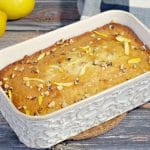
📋 Old Fashioned Lemon Bread Recipe (No Glaze)
This Old Fashioned Lemon Bread recipe is an easy recipe, made with simple ingredients like fresh lemon and walnuts, without glaze. And it's the perfect balance of sweet and tangy!
Servings 8
Calories 339kcal
Ingredients
- ½ cup unsalted butter
- 1 cup white granulated sugar
- 2 whole eggs, beaten
- 1 ½ cup all-purpose flour
- ¼ teaspoon salt
- 1 ¼ teaspoon baking powder
- ½ cup milk
- ½ cup chopped walnuts
- 1 whole lemon rind (peel), grated
Garnish
- lemon zest
- chopped walnuts
Instructions
- Preheat oven to 350 degrees F or 175 degrees C and spray a 9X5 loaf pan with non-stick cooking spray.
- In a large bowl, cream butter with 1 cup sugar, using an electric hand mixer on medium speed, then add beaten eggs.½ cup unsalted butter, 1 cup white granulated sugar, 2 whole eggs, beaten
- In a medium bowl, sift dry ingredients (flour, salt and baking powder) together. Then add this flour mixture to butter mixture, alternately with milk, a little bit at a time, mixing well between additions.1 ½ cup all-purpose flour, ¼ teaspoon salt, 1 ¼ teaspoon baking powder, ½ cup milk
- Finely grate 1 whole lemon into a small bowl, then add the grated rind to the batter.1 whole lemon rind (peel), grated
- Stir in walnuts.½ cup chopped walnuts
- Baking time: Pour into prepared pan and bake for 45-55 minutes or until cake tester or toothpick comes out clean.
- Cool hot bread for 5 minutes in pan, then run knife (or spatula) around edge of bread pan and remove to wire rack to cool for an additional 10 minutes.
Garnish
- Sprinkle additional walnuts and lemon zest on top of the bread, if desired.lemon zest, chopped walnuts
Notes
Expert Recipe Tips:
- Room Temperature Ingredients: For the best "creamy" texture, ensure your butter and eggs are at room temperature. This allows the fat and liquid to emulsify properly, resulting in a lighter, more uniform crumb.
- The "Alternating Addition" Rule: You’ll notice the recipe calls for adding the flour and milk alternately. This is a classic baking technique that prevents the batter from "breaking" or curdling. It also ensures the flour is fully incorporated without overworking the gluten.
- Don't Overmix: Once you add the dry ingredients to the wet, mix only until just combined. If you overbeat the batter at this stage, you’ll end up with a tough, rubbery loaf instead of a tender, dense bread.
- Zest for Success: Since this bread relies on the lemon rind for its flavor, use a Microplane or a very fine zester. Make sure to only grate the yellow part of the skin; the white "pith" underneath is bitter and can ruin the delicate sweetness of the loaf.
- The "Pan Tap": Before popping the loaf in the oven, give the pan a firm tap on the counter. This helps any large air bubbles rise to the surface so you don't have holes in your finished slices.
- Proper Cooling: Resist the urge to slice the bread while it's hot! Quick breads continue to set as they cool. Letting it rest in the pan for 5 minutes and then on a wire rack for 10-15 minutes ensures it won't crumble when you cut it.
Nutrition
Serving: 1slice | Calories: 339kcal | Carbohydrates: 45g | Protein: 4g | Fat: 17g | Saturated Fat: 8g | Cholesterol: 32mg | Sodium: 83mg | Potassium: 143mg | Fiber: 1g | Sugar: 26g | Vitamin A: 383IU | Vitamin C: 1mg | Calcium: 60mg | Iron: 1mg
