


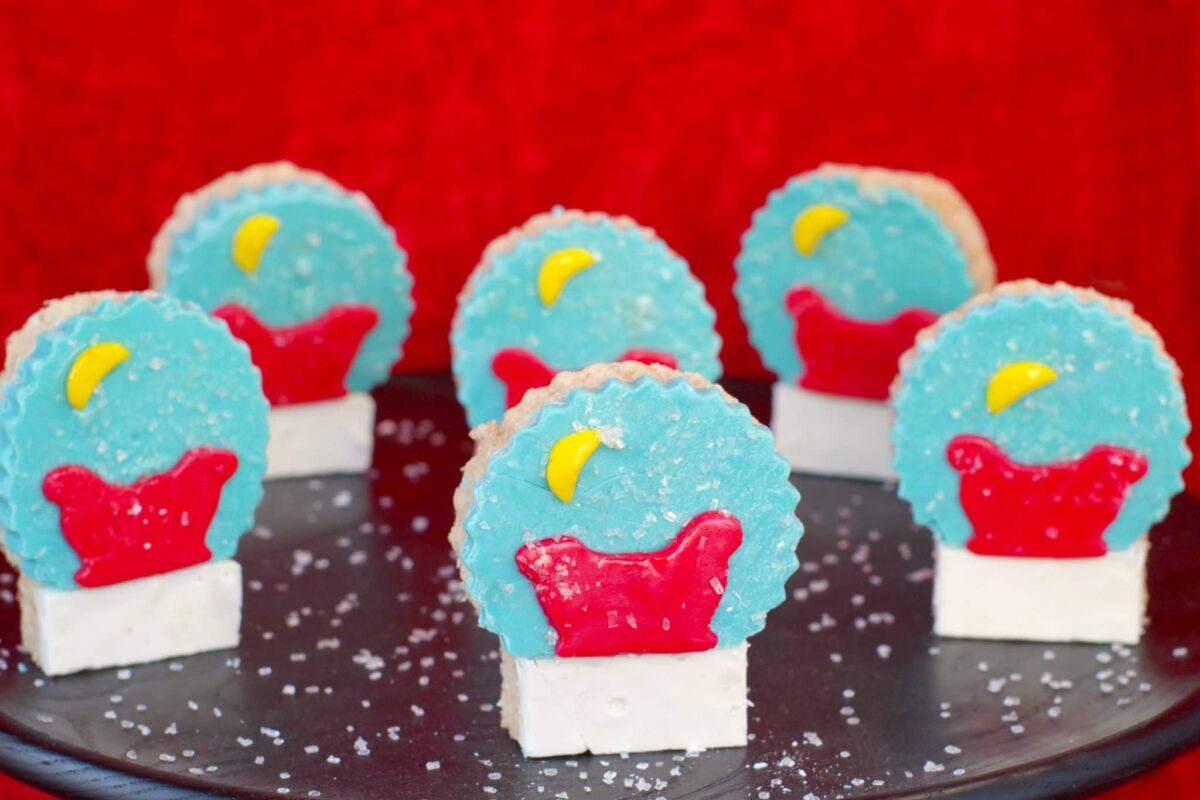
If you are looking for a holiday treat that is a little different than your typical Christmas cookie, you are going to love these Snow Globe Rice Krispie Christmas Treats. They take the gooey, crunchy nostalgia of a childhood favorite and dress it up into a stunning, edible winter scene. The best part about this recipe is that it looks impressive but uses a clever shortcut. By using blue and white candy melts poured directly over the cereal treats, you avoid the hassle of cutting and rolling individual fondant backgrounds. It is a much easier way to get that perfect snowy sky! These edible snow globes are perfect for gifting, parties, or just enjoying a little winter magic with your family.
Rice Krispie treats are classic treats that are popular during the holiday season. And these Christmas Rice Krispies treats are a little different than your typical Christmas cookie or treat. Kids can even help to make them. This holiday treat is a fun and easy edible snow globe that's ideal for a Christmas cookie exchange or holiday party.
Jump to:
I could stare at it for hours... I imagined myself there, that beautiful place inside that little ball. And although it was snowing, I still wanted to go wherever that was. It was a little snippet of something so idyllic, set inside a perfect globe. Ever since I was a little kid, snow globes have made me happy. And since Rice Krispie treats also make me happy, what better than a Christmas Rice Krispie Treat Snow Globe?!~There are a lot of snow globe cookies out there, but you won't find snow globe Rice Krispies treats like this. I used candy melts instead of fondant, so they didn't have to be individually rolled out for each Rice Krispies treat.
The candy melts are poured over the entire pan of Rice Krispies treats, and then cut into shapes. It's a lot easier than making snow globe cookies! The Christmas Rice Krispie Treats are also great for sending along to a kids' Christmas party, but they are ideal for kids of all ages!
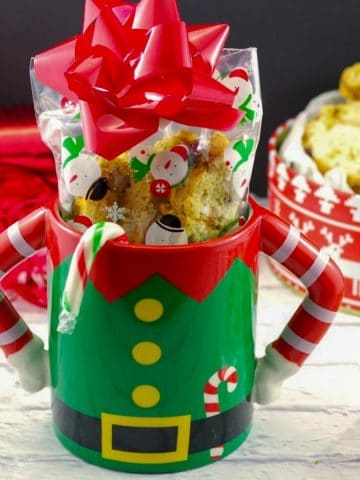
If you love unique edible Christmas gifts, check out my Gingerbread Chocolate Christmas Bark and my Gingerbread Yule Log Cookies.
🥘 Ingredient Notes
- Light blue candy melts and white candy melts. You don't have to worry about using food coloring because these holiday treats use colored candy melts, which are very easy to use!
- Red and yellow fondant. I use these colors for the sled design, but could use other colors for a different design
- Cake Sparkles. Cake sparkles are a type of edible glitter made from food-safe ingredients.
- Sparkling white sugar. Sparkling white sugar, also known as coarse sanding sugar, is a type of sugar with large, coarse crystals used for baking and decorating.
- Confectioners' glaze. Confectioners' glaze is a food-grade sealant used to give a shiny, smooth, and protective finish to confections like candies.
- Corn syrup. Make sure to use the clear corn syrup. Clear corn syrup, also known as light corn syrup, is a transparent syrup made from cornstarch. It provides sweetness and moisture, and prevents sugar crystallization.
*Please see recipe card for full list of ingredients and quantities
📖Variations & Substitutions
- Confectioners' Glaze - If you can't find confectioners' glaze, you can use an edible glaze spray or edible cake gloss. Edible glaze spray for cakes provides a shiny, professional finish and protects from moisture. You can find this at your local cake decorating or craft store or online.
🔪How to Make Christmas Rice Krispie Treats
MAKE THE RICE KRISPIE TREATS:
- Spray a 9 X 13 pan and an 8X8 pan with non-stick cooking spray.
- Grease a large microwave-safe bowl and a large spoon (plastic preferably) with a little vegetable shortening (this will prevent the Rice Krispies from sticking)*Alternatively, you can make this on a stovetop with a large saucepan, melting marshmallows and butter on low heat.
Add margarine and marshmallows to the bowl and microwave for 1 minute and 30 seconds at 50% power (½ power). Remove and stir. If not fully melted, put back into the microwave in 15-20 second increments and remove and stir each time until melted. * They will melt as you stir. Do NOT overcook marshmallows! - Once melted, remove from the microwave and immediately stir the marshmallow mixture into the Rice Krispies.
- Press ⅔ of the cereal mixture into a 9X13 pan, then the remaining ⅓ into a square 8X8 pan. You can dampen your hands with water or lightly grease them to press into the pan or use a greased spatula.
- Refrigerate for 15- 20 minutes.
- Melt blue and white candy melts in separate bowls for 3 minutes, approximately on 50 % power. Add 3 tablespoons of shortening to the blue candy melts and 1 tablespoon to the white candy melts. You may need to melt a little again after adding shortening (be sure it's still on 50% power, or it will seize! Pour the white candy melts over the Rice Krispie treats in the 8x8 pan, then bang on the counter to smooth out.
ASSEMBLY:
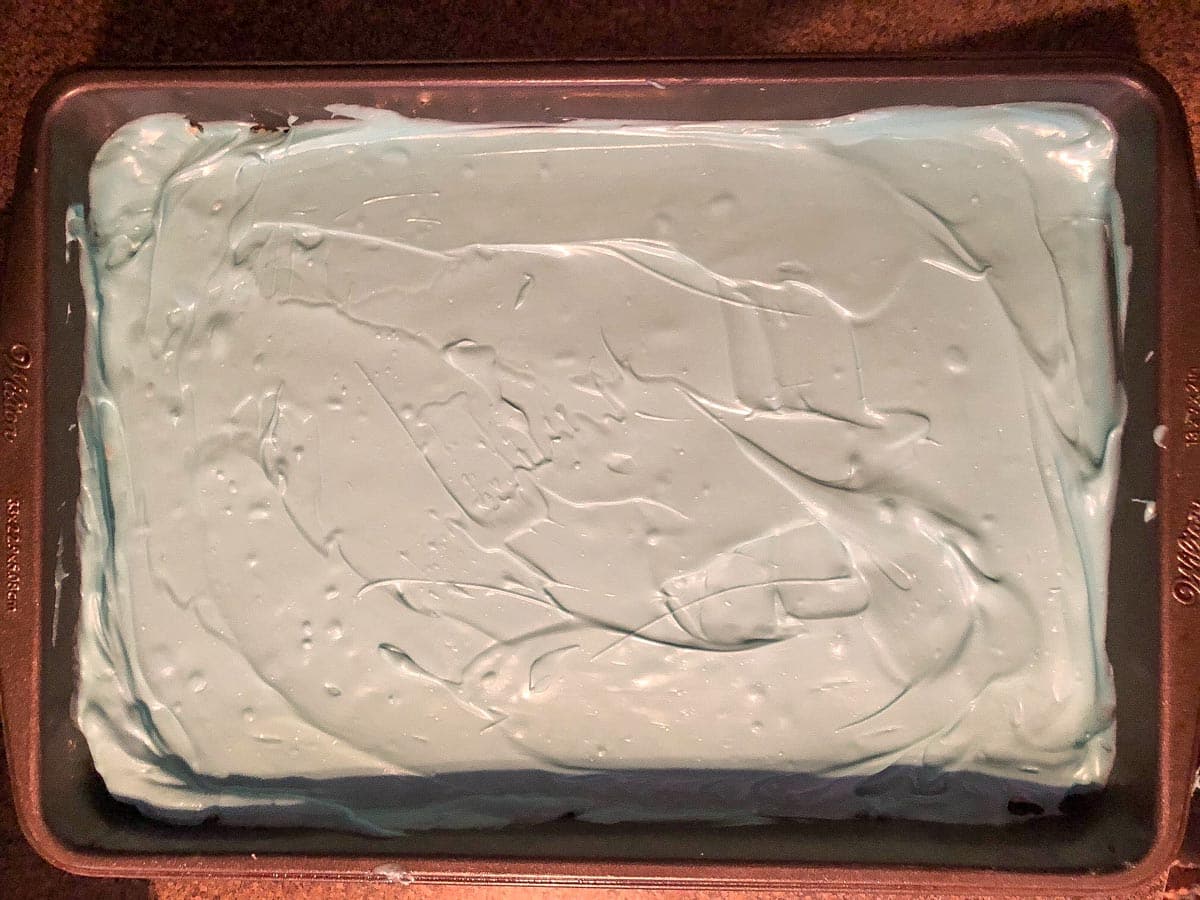
- Step 1: Pour the blue candy melts over the 9X13 pan of Rice krispie treats and spread evenly with a spatula.
- Step 2: Then bang the pan on the counter to smooth out. If there are air bubbles, poke them with a toothpick, then gently bang again. (* If there are a few air bubbles left, don't worry, as it doesn't matter.)Do the same thing with the white candy melts and the 8X8 pan of Rice krispie squares. Refrigerate another 15- 20 minutes. When the candy melts have set (hard to the touch), remove from fridge, loosen edges of pan with a butter knife, and gently ease entire rice kripies out of the pans and onto a large cutting board, candy melt side facing up.
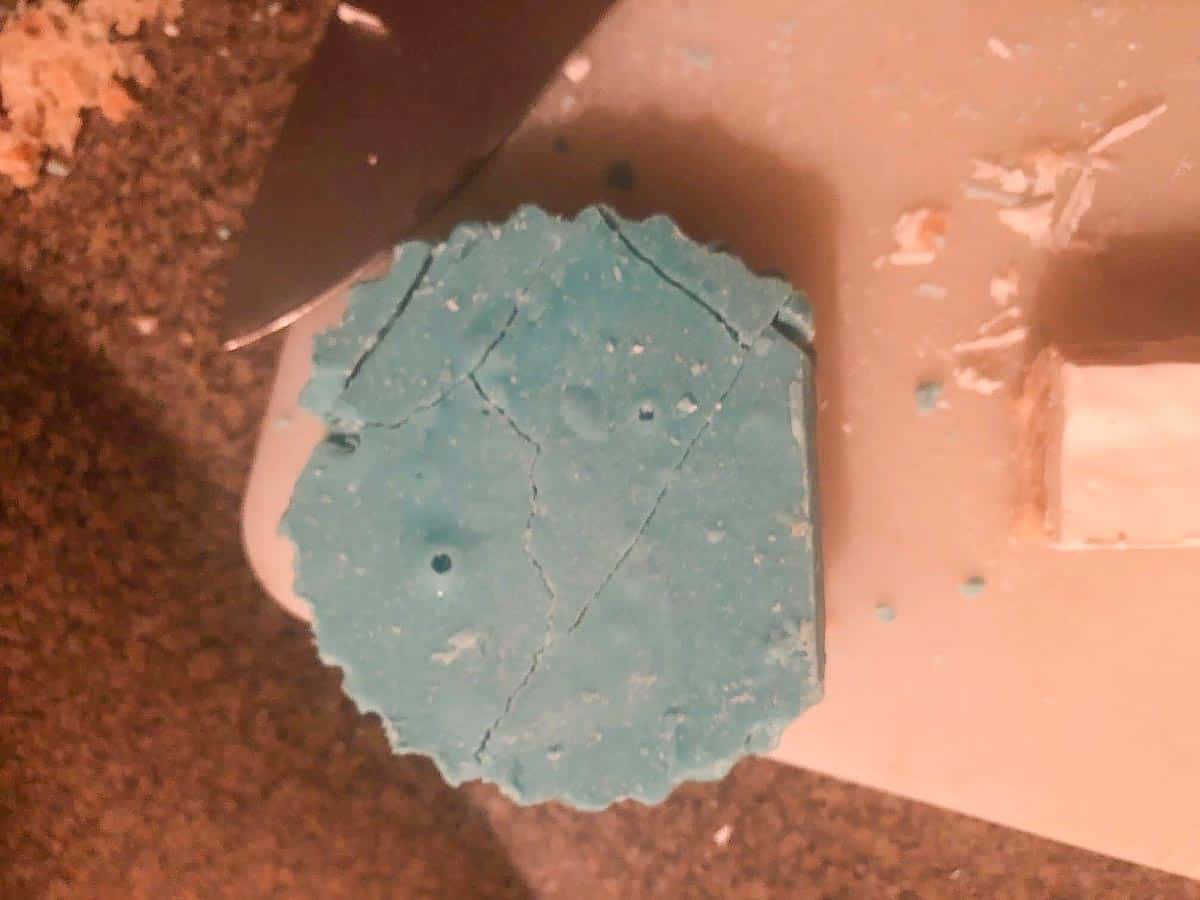
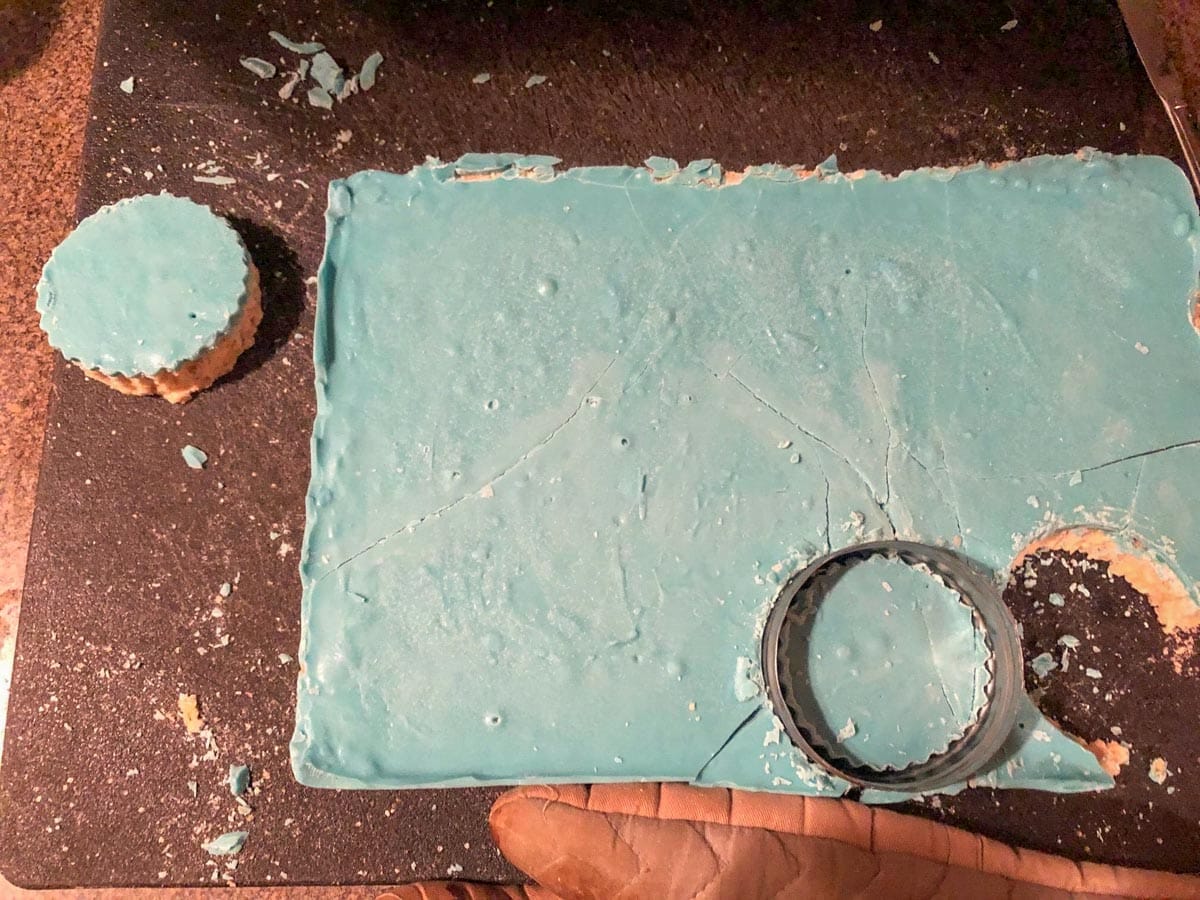
- Step 3: Cut the blue rice krispie with 3- 4 inch round cutter (preferably with a fluted edge as shown) ** They WILL crack somewhat at this stage, but don't worry because you simply gently push it back together and gently run your fingers over the cracks a few times- the heat from your hands will melt the candy melts enough to repair the cracks. And the glaze you put on later will also help to seal the cracks (then they are covered up with sparkling sugar)
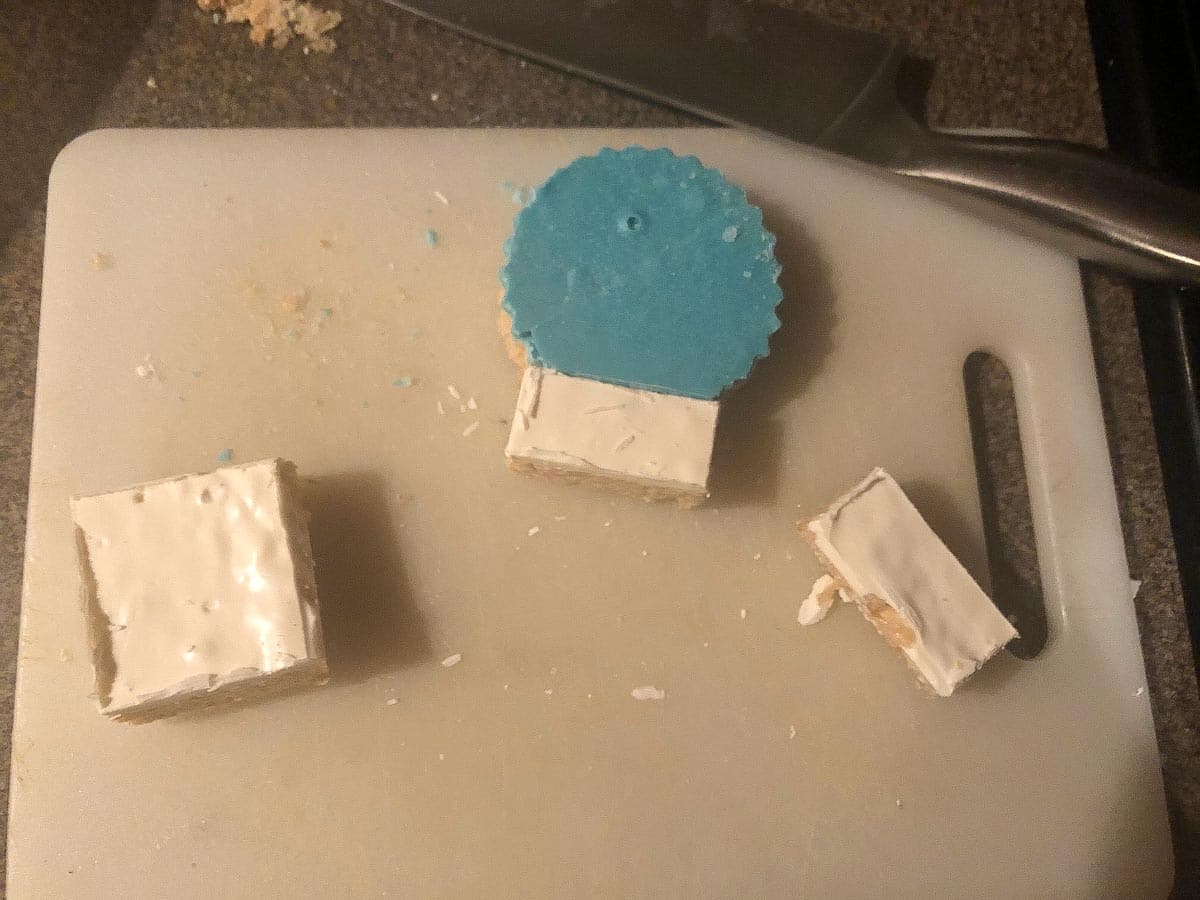
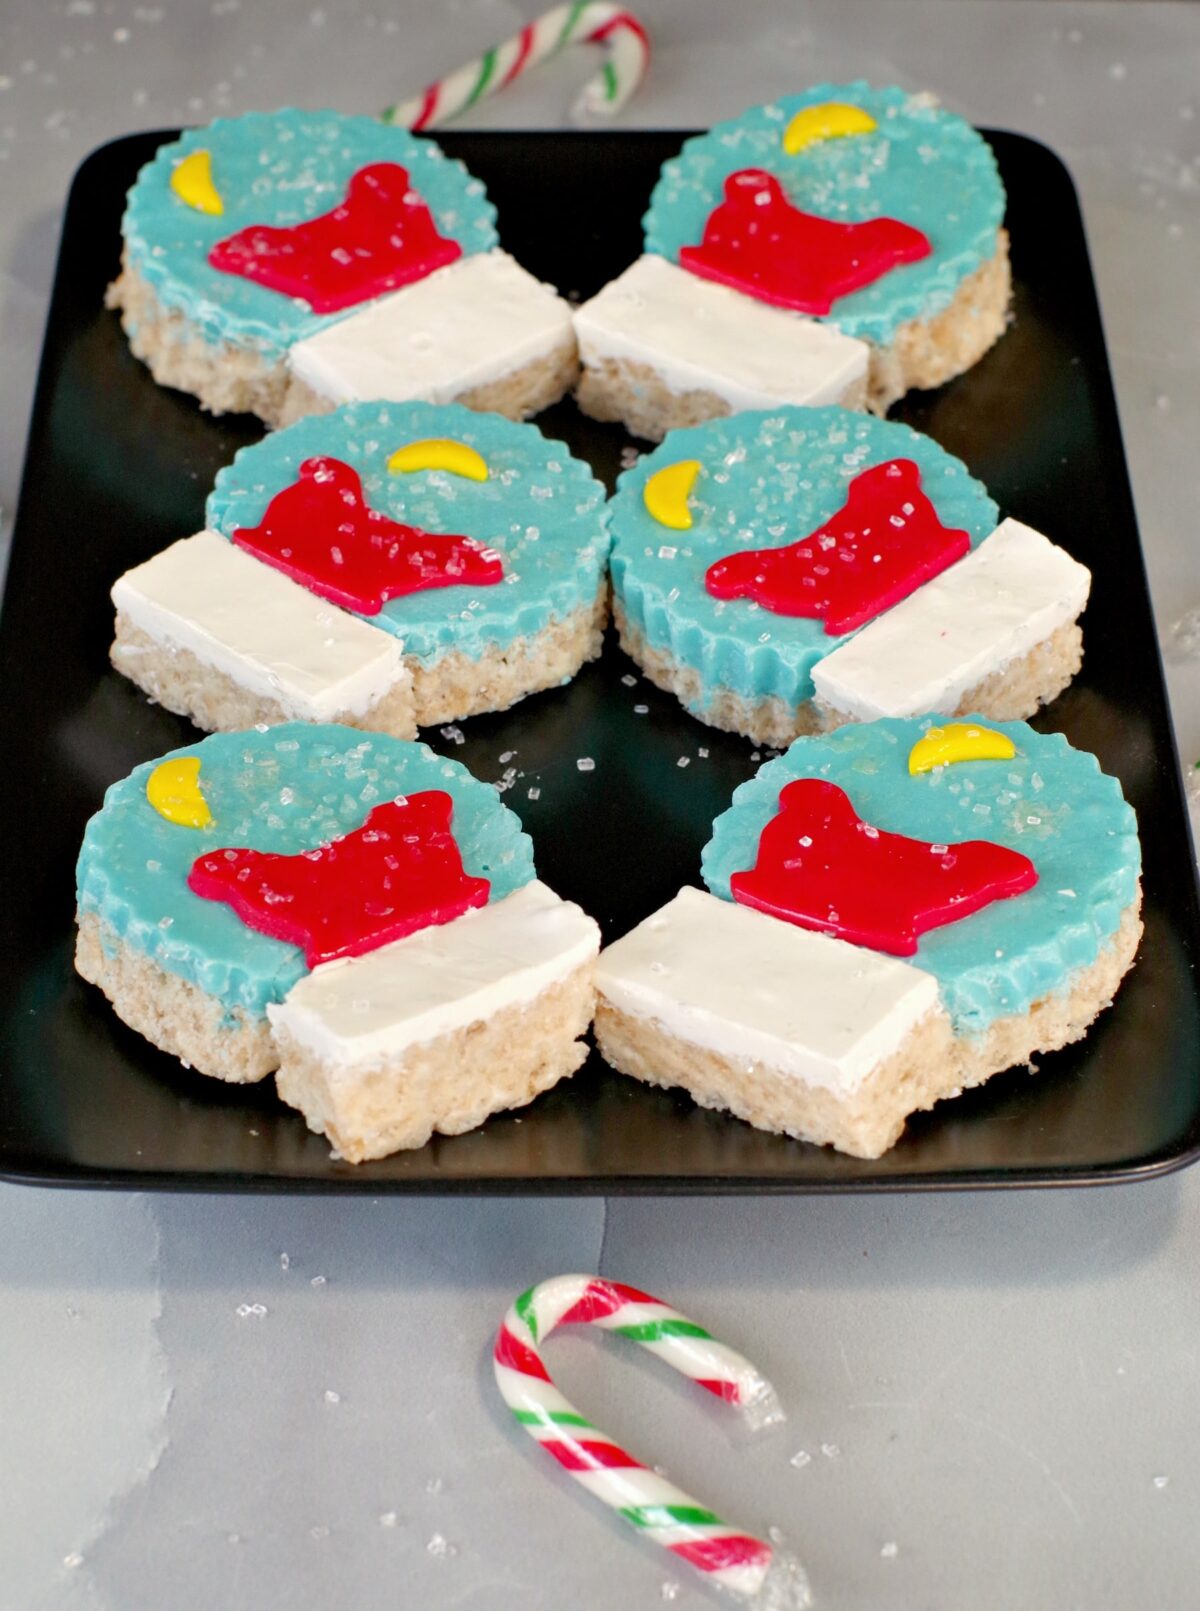
- Step 4: Cut a little off one end to make it a straight line (square) - this is where you'll add the base. Then cut the white Rice Krispies into squares, then in half again. This will be your base. Add the base to the bottom of the circle (where you squared it off). I just pushed it together, and it stuck well enough, but you could add a little syrup or fondant to make it stick.

- Step 5:Roll out fondant cut out your decorations with mini cookie cutters. I used the large end of an icing tip to cut the circles for the moon, then cut them in half and shaped them a little into a moon shape.
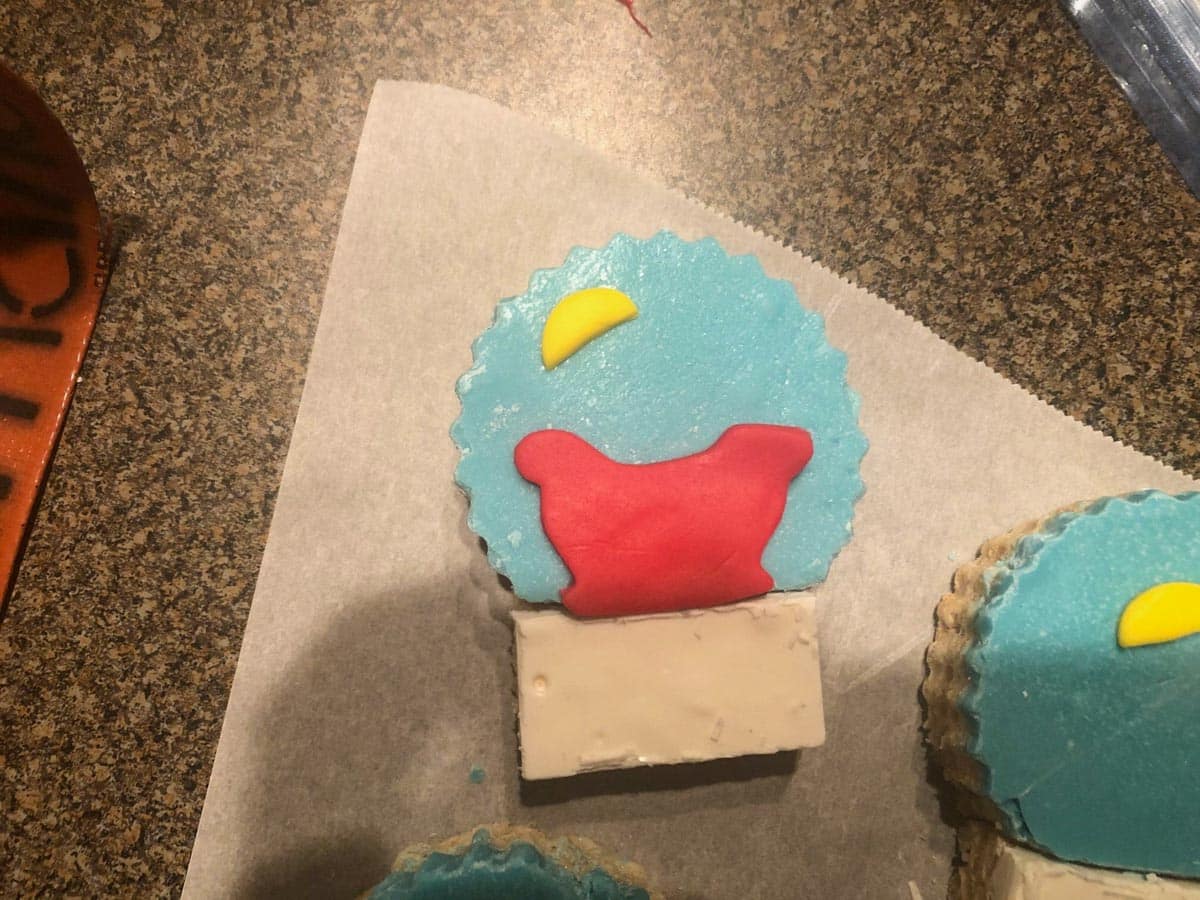
- Step 6: Place the rice krispie treats on parchment paper (or wax paper) and attach the fondant decorations to the rice krispie treats by adding a little corn syrup on the back. * You could use another scene (ie, a Christmas tree with green fondant)
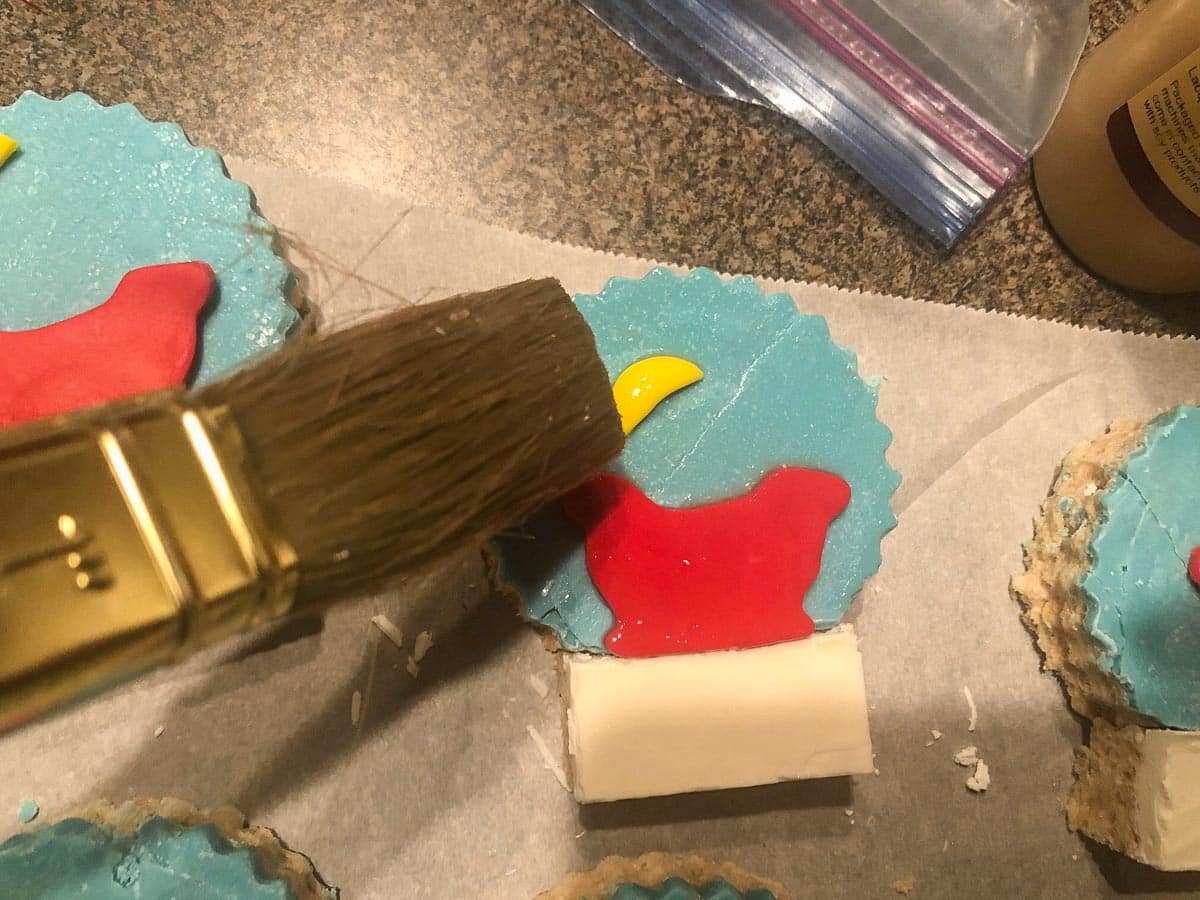
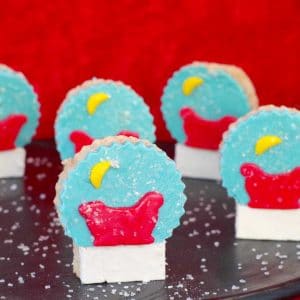
- Step 7: Paint with confectioners' glaze OR spray with an edible glaze to give a glassy look. Sprinkle on white sparkling sugar and cake sparkles (make sure to do this while they are still wet so they will stick). Let dry for 30 minutes or until they are no longer wet (they will still be a little sticky to the touch).
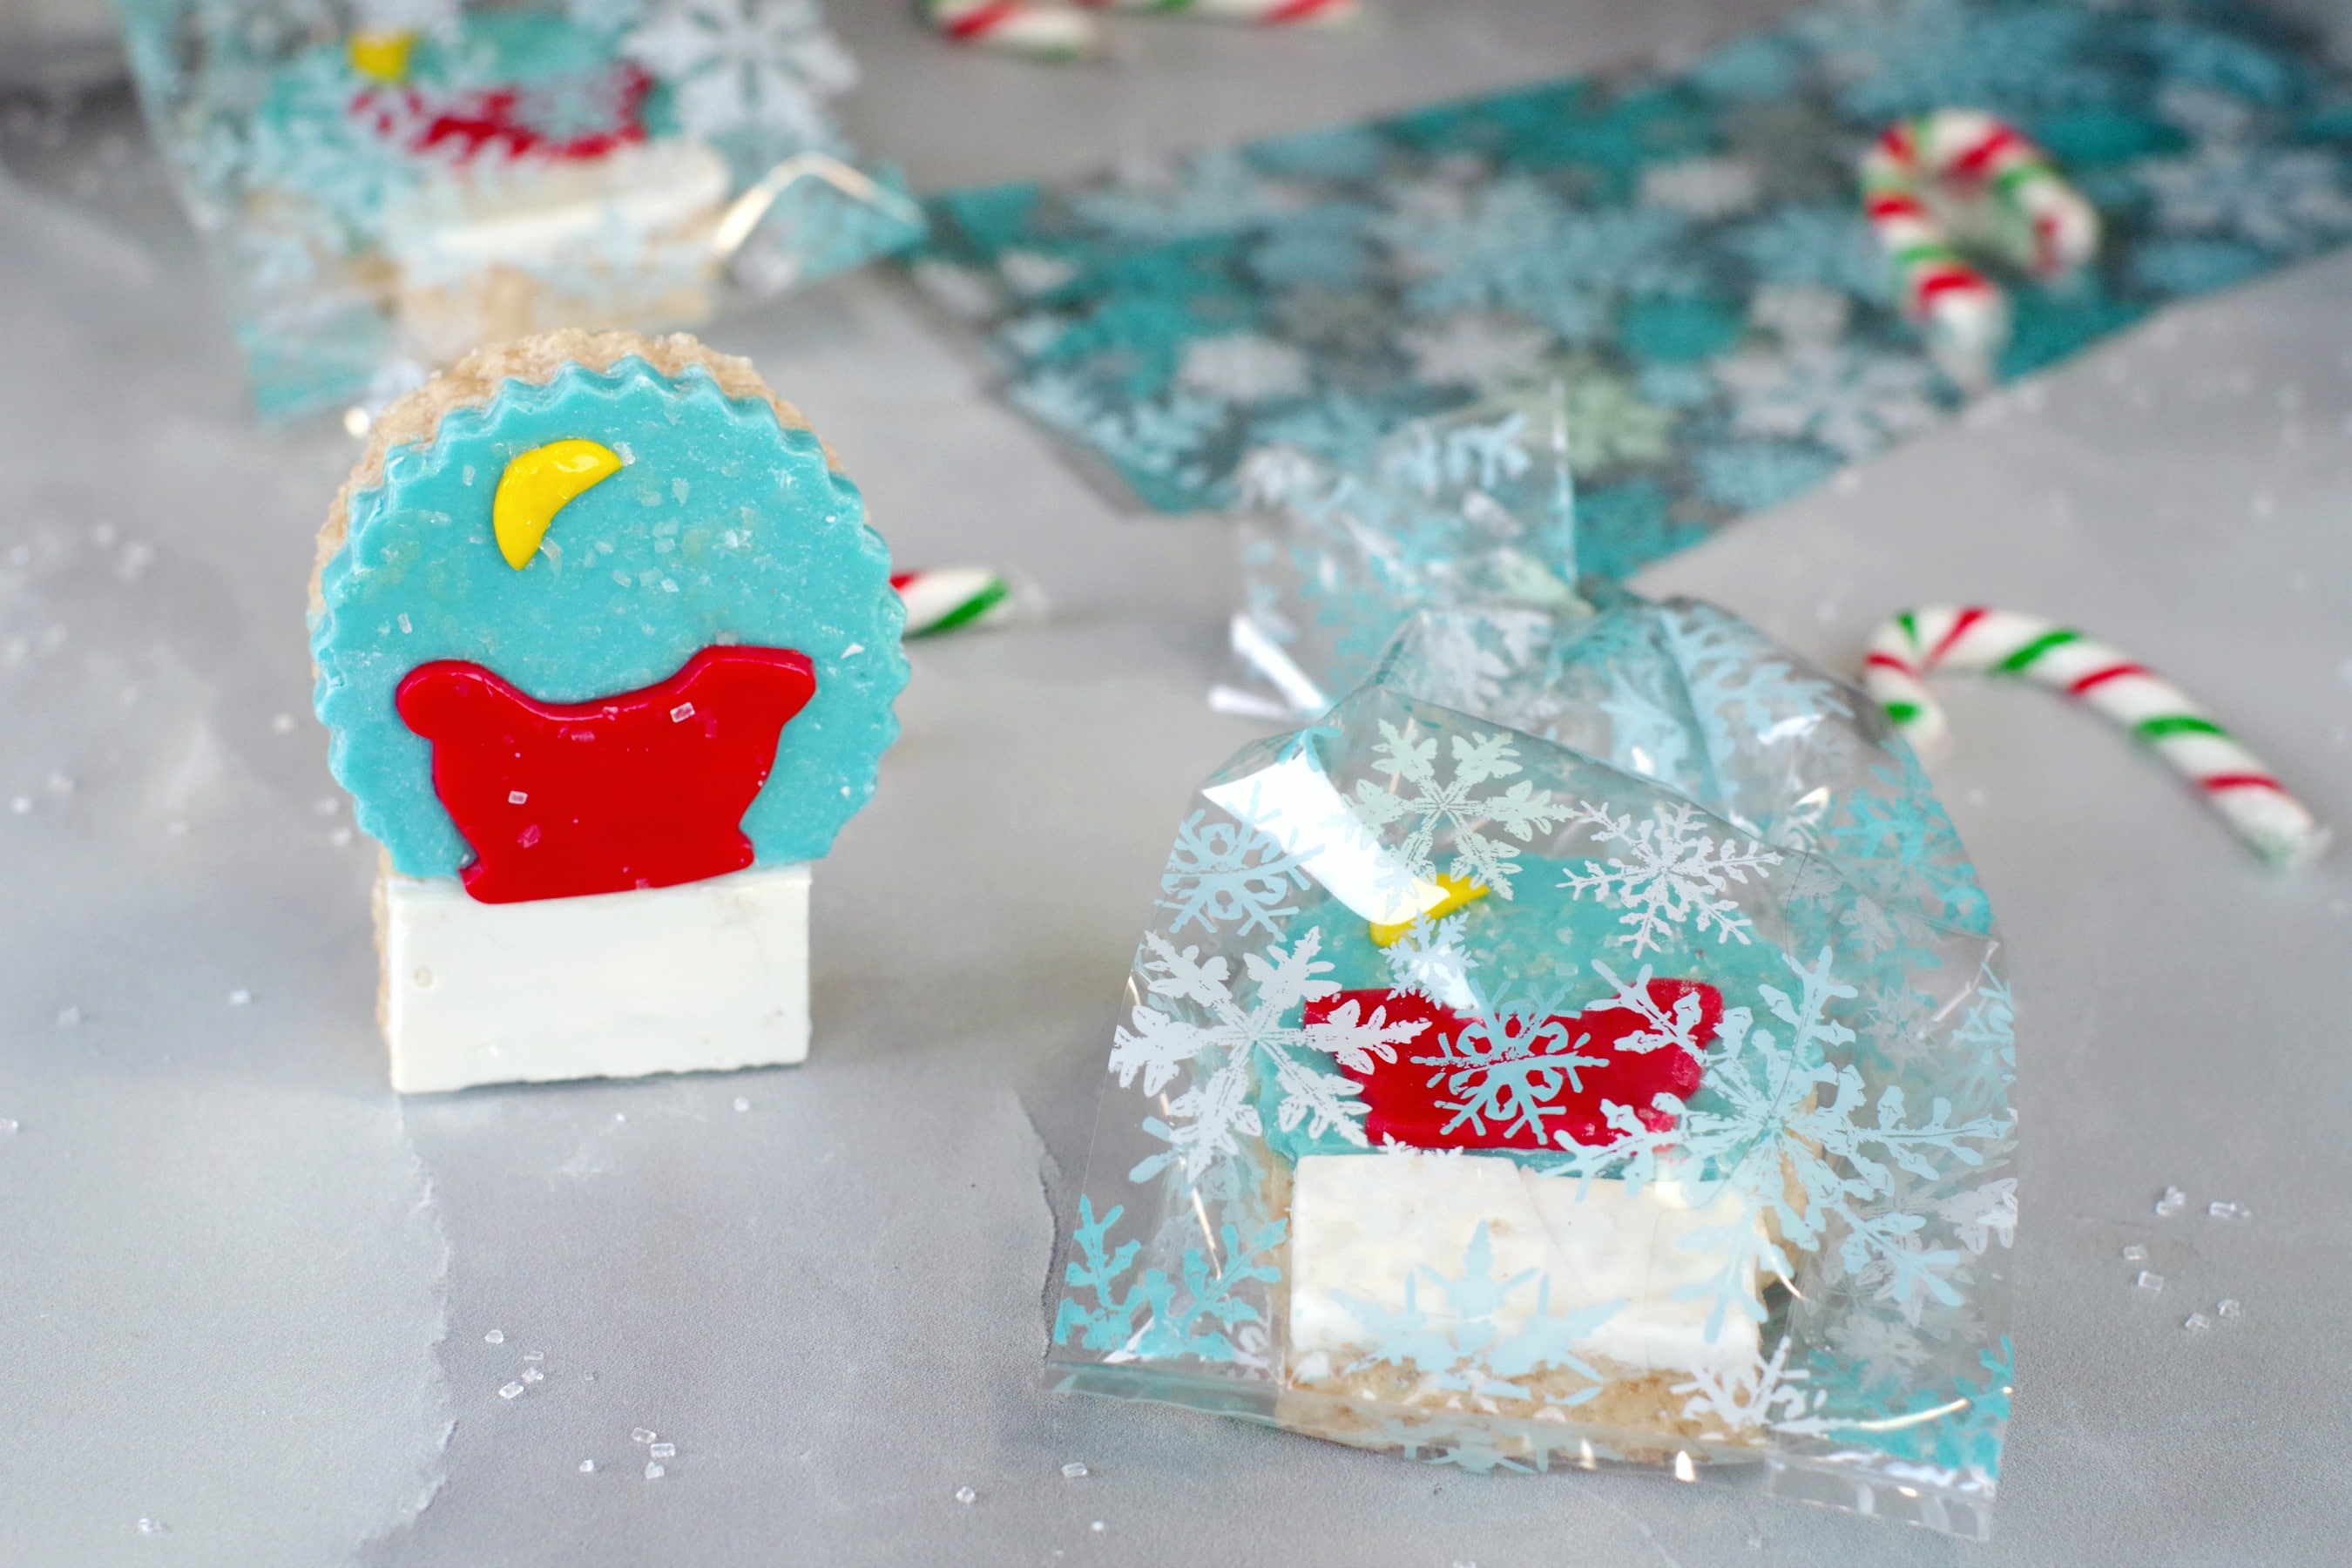
- Step 8: Serve! Or package to give as an edible gift!
Expert Recipe Tips
- Use shortening to prevent sticking. Grease your bowl and spoon with a thin layer of vegetable shortening before mixing; it keeps the marshmallows from sticking and makes stirring much easier.
- Don't overheat the marshmallows. Microwaving marshmallows for too long will make your Rice Krispie treats hard. Melt on 50% power and stop as soon as they're mostly melted-they'll finish melting as you stir.
- Press lightly for softer treats. When pressing the cereal mixture into the pans, don't compact it too firmly. A gentle press keeps the treats soft and chewy, making them easier to cut later.
- Add shortening to your candy melts for smoother coverage. A little vegetable shortening keeps the candy melts thinner, easier to spread, and less likely to seize-especially important when covering a whole pan.
- Cut while the candy melt coating is fully set. Chill the coated treats until the candy melts are firm to the touch. If you cut too soon, the coating will smear and won't crack cleanly.
- Expect some cracking-and fix it easily. Cracks are normal with Rice Krispie surfaces. Gently push broken areas together and warm them with your fingers; the heat will soften the candy melts and seal the cracks. The glaze and sparkling sugar will hide any imperfections.
- Use a fluted cutter for the best "snow globe" effect. Fluted edges make the globes look more decorative and reduce visible cracking compared to a straight-edged cutter.
- Warm your cookie cutter for cleaner cuts. Dip the cutter in hot water, wipe dry, and then cut. The slightly warm metal helps glide through the candy melts without excessive cracking.
- Chill briefly before attaching decorations. After cutting, chill the globes for 5-10 minutes so the surface is firm. Decorations will stick better and won't slide around.
- Use clear corn syrup as edible glue. It's the best way to attach fondant pieces and holds them securely without making the surface too wet.
- Decorate on parchment for easy cleanup. Place your globes on parchment or wax paper before glazing or sprinkling-this keeps the sparkling sugar contained and prevents sticking.
- Apply glaze right before sprinkling. Sprinkle sparkling sugar and cake sparkles while the glaze is still wet, so they adhere perfectly and give the "snowy" look.
- Freeze undecorated if prepping ahead. If freezing, leave off the glaze until fully thawed and the fondant decorations are dry. Freeze flat in a single layer to prevent sticking.
- Create multiple scenes for variety. Mix it up by making some globes with sleds, some with Christmas trees, and others with moons or stars-this makes a great assortment for gifting.
👪 Serving size
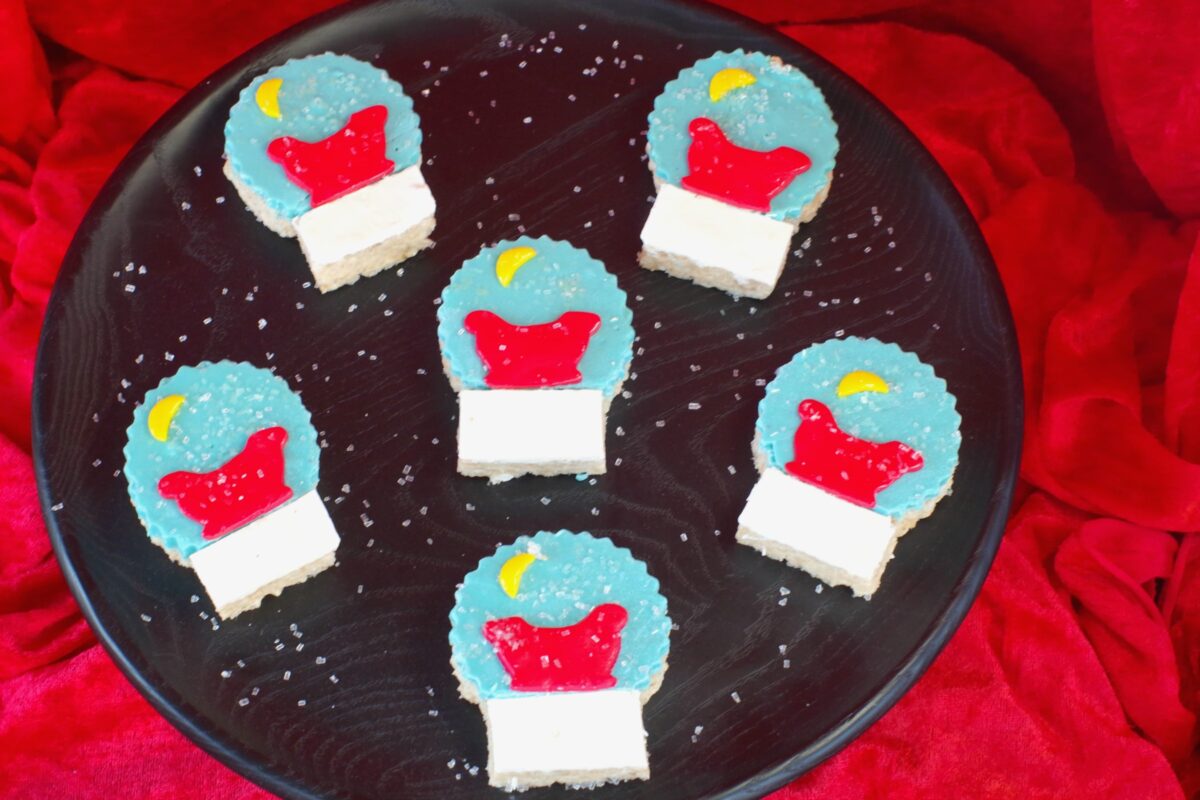
You will get 10 snow globes from this Rice Krispie Christmas treats recipe. You can double or triple the recipe by clicking on the blue serving size and selecting the number of servings you'd like. The ingredient amounts will then adjust accordingly.
This easy holiday treat makes a great edible gift because it are not your typical Christmas cookie or even a typical red and white Christmas cereal treat. And you can customize them by using a different scene in the snow globe if you so desire.

🌡️Storing
You'll want to store these cereal treats in an airtight container at room temperature for up to 3 days. If you plan to freeze them, do NOT glaze them first. Let them fully defrost (lid off container) until the fondant is completely dry before applying any glaze. They will freeze for up to 3 months, but be sure to freeze them flat (not stacked), or they will stick together.
❔ Recipe FAQs
I use two pans because it is easier to pour different colors and cut from a separate pan, and this also ensures clean, even pieces for both components.
Candy melts seize when they are overheated or melted at full power. Always melt them at 50% power and in short intervals. Adding the shortening after the first melt also helps keep them smooth and spreadable. If they start to thicken, return them to the microwave at 50% power for another 10-15 seconds.
No! Cracking is completely normal with Rice Krispie treats because the surface is bumpy. Simply press the pieces gently back together and warm the cracks slightly with your fingers. The edible glaze and sparkling sugar will hide any remaining imperfections.
Didn't find the answer you're looking for?
Ask AI to answer based on this specific recipe
Although it's fun to indulge over the holidays, when the holidays are over, you can still enjoy rice krispie treats with these healthier Apricot Sunflower Seed Rice Krispie Treats
In the meantime, if you are looking for fun and different Christmas Rice Krispies for a party or an edible gift, then give these homemade Rice Krispie treats a try! Although these are a little more involved than the usual Rice Krispie squares, they are worth the little extra time investment!
Merry Christmas!
🎁More Edible Gifts for Christmas


Did your family❤️this recipe? Did you know that commenting and⭐rating recipes is one of the best ways to support your favorite recipe creators? If you LOVED this recipe, please comment and rate it in the recipe card or share photos on social media using the hashtag #foodmeanderings or tagging @foodmeanderings !

📋 Snow Globe Christmas Rice Krispie Treats Recipe
Ingredients
- 9 cups rice krispies
- 7.5 cups mini marshmallows
- ⅓ cup margarine or butter
Decorations
- 1.5 -14 oz- bags of light blue candy melts 397 g bags
- ¾ - of a 14 oz bag of white candy melts
- 4 tablespoon vegetable shortening
- red fondant
- yellow fondant
- sparkling white sugar
- cake sparkles
- confectioners glaze or edible shine spray
- corn syrup
Instructions
- Spray a 9 X 13 pan and an 8X8 pan with non-stick cooking spray.
- Grease a large microwave safe bowl and a large spoon (plastic preferably) with a little vegetable shortening (this will prevent the rice krispies from sticking)*Alternatively, you can make this on a stovetop with a large saucepan, melting marshmallows and butter on low heat.
- Add margarine and marshmallows to bowl and microwave for 1 minute and 30 seconds at 50% power (½ power). Remove and stir. If not fully melted, put back into microwave in 15-20 second increments and remove and stir each time until melted. * They will melt as you stir. Do NOT overcook marshmallows!
- Once melted, remove from microwave and immediately stir marshmallow mixture into the rice krispies.
- Press ⅔ of the cereal mixture into a 9X13 pan, then the remaining ⅓ into a square 8X8 pan. You can dampen your hands with water or lightly grease them to press into pan or use a greased spatula.
- Refrigerate for 15- 20 minutes.
- Melt blue and white candy melts in separate bowls for 3 minutes approx on 50 % power, add in 3 tablespoon of shortening to blue candy melts and 1 tablespoon to white candy melts. You may need to melt a little again after adding shortening (be sure it's still on 50% power or it will seize!)
- Pour the white candy melts over the rice krispie treats in the 8x8 pan, then bang on the counter to smooth out.
- Pour the blue candy melts over the 9X13 pan of rice krispie treats and spread evenly with spatula,
- Then bang pan on counter to smooth out. If there are air bubbles, poke them with toothpick, then gently bang again. (* If there are a few air bubbles left, don't worry, as it doesn't matter)
- Do the same thing with the white candy melts and the 8X8 pan of rice krispie squares
- Refrigerate another 15- 20 minutes
- When the candy melts have set (hard to the touch), remove from fridge, loosen edges of pan with a butter knife and gently ease entire rice kripies out of the pans and onto a large cutting board, candy melt side facing up.
- Cut the blue rice krispie with 3- 4 inch round cutter (preferably with a fluted edge as shown) ** They WILL crack somewhat at this stage, but don't worry because you simply gently push it back together and gently run your fingers over the cracks a few times- the heat from your hands will melt the candy melts enough to repair the cracks. And the glaze you put on later will also help to seal the cracks (then they are covered up with sparkling sugar)
- Cut a little off one end to make it a straight line (square) - this is where you'll add the base.
- Then cut the white rice krispie squares into squares, then in half again. This will be your base.
- Add the base to the bottom of the circle (where you squared it off). I just pushed it together and it stuck well enough, but you could add a little syrup or fondant to make it stick.
- Roll out fondant cut out your decorations with mini cookie cutters. I used the large end of an icing tip to cut the circles for the moon, then cut them in half and shaped them a little into a moon shape.
- Attach them to the rice krispie treats by adding a little corn syrup on the back. * You could use another scene (ie: a Christmas tree with green fondant)
- Paint with confectioners glaze OR spray with an edible glaze to give glassy look.
- Sprinkle on white sparkling sugar and cake sparkles.
- Let dry for 30 minutes or until they are no longer wet (they will still be a little sticky to the touch) Serve!
Notes
- Use shortening to prevent sticking. Grease your bowl and spoon with a thin layer of vegetable shortening before mixing; it keeps the marshmallows from sticking and makes stirring much easier.
- Don't overheat the marshmallows. Microwaving marshmallows too long will make your Rice Krispie treats hard. Melt on 50% power and stop as soon as they're mostly melted-they'll finish melting as you stir.
- Press lightly for softer treats. When pressing the cereal mixture into the pans, don't compact it too firmly. A gentle press keeps the treats soft and chewy, making them easier to cut later.
- Add shortening to your candy melts for smoother coverage. A little vegetable shortening keeps the candy melts thinner, easier to spread, and less likely to seize-especially important when covering a whole pan.
- Cut while the candy melt coating is fully set. Chill the coated treats until the candy melts are firm to the touch. If you cut too soon, the coating will smear and won't crack cleanly.
- Expect some cracking-and fix it easily. Cracks are normal with Rice Krispie surfaces. Gently push broken areas together and warm them with your fingers; the heat will soften the candy melts and seal the cracks. The glaze and sparkling sugar will hide any imperfections.
- Use a fluted cutter for the best "snow globe" effect. Fluted edges make the globes look more decorative and reduce visible cracking compared to a straight-edged cutter.
- Warm your cookie cutter for cleaner cuts. Dip the cutter in hot water, wipe dry, and then cut. The slightly warm metal helps glide through the candy melts without excessive cracking.
- Chill briefly before attaching decorations. After cutting, chill the globes for 5-10 minutes so the surface is firm. Decorations will stick better and won't slide around.
- Use clear corn syrup as edible glue. It's the best way to attach fondant pieces and holds them securely without making the surface too wet.
- Decorate on parchment for easy cleanup. Place your globes on parchment or wax paper before glazing or sprinkling-this keeps the sparkling sugar contained and prevents sticking.
- Apply glaze right before sprinkling. Sprinkle sparkling sugar and cake sparkles while the glaze is still wet, so they adhere perfectly and give the "snowy" look.
- Freeze undecorated if prepping ahead. If freezing, leave off the glaze until fully thawed and the fondant decorations are dry. Freeze flat in a single layer to prevent sticking.
- Create multiple scenes for variety. Mix it up by making some globes with sleds, some with Christmas trees, and others with moons or stars-this makes a great assortment for gifting.


Marieke says
These are beautiful! What a great alternative to the traditional sugar cookie decorating.
Terri Gilson says
Thanks so much Marieke! I hope you enjoy them !
Denise@urbnspice says
These Christmas Rice Krispie Treats are so cute, Terri! They are a great option for gluten-free treats too. My grandchildren would love these. Thanks for sharing.
Terri Gilson says
Thanks, so much, Denise! Yes, you're right - they are a great gluten-free option.
Trish says
Those are the cutest! Snow globes have always been a favourite of mine too!
Terri Gilson says
Thanks, Trish!
Bernice Hill says
How adorable are these?! As a kid I was obsessed with snow globes! Also, those apricot and sunflower treats are right up my alley.
Terri Gilson says
Thank you, Bernice! I hear you - I'm still obsessed with snow globes!!
Colleen says
You always make the cutest treats, Terri, and these are no exception. I know that all the kids in the family will love these.
Terri Gilson says
Awww thanks, Colleen! I guess the cake decorator in me has to come out somehow haha!
Joss says
My daughter would absolutely love these, great idea!
Terri Gilson says
Thanks, Joss!
Leanne says
These are the most creative rice crispy treats I've ever seen! My nephews would just love these! Great recipe Terri! Pinning!
Terri Gilson says
Thanks, Leanne! Yes, they are fun to make with kids!