


I love biscotti because it's the ultimate breakfast dessert! And it's pretty much the only breakfast dessert I don't feel guilty about eating. This Chocolate Marble Biscotti has both chocolate and vanilla flavors mixed together (marbled) in one delicious cookie. It's also Weight Watchers friendly!
For a while, I was only making my Cranberry Pistachio Biscotti Christmas Biscotti once a year (during the holidays). But then I started to really miss it the rest of the year. Turns out the rest of my family was missing it just as much because that enormous batch didn't last very long. Since I need to make it regularly now, I decided I should mix it up a bit and create a new biscotti recipe. And what flavor makes the best dessert, especially breakfast dessert?! Well, chocolate, of course! That is how this Chocolate Biscotti recipe was born. And this recipe was also the inspiration for my Chocolate Zucchini Biscotti.
🍒Pinterest Review
"I like it a lot! Easy to follow... a great recipe, thank you!!" ⭐⭐⭐⭐⭐
Milly
Jump to:
Before I started making my own homemade biscotti, I didn't get the hype. If you've ever had a stale, break-tooth piece of biscotti from a coffee shop, you'll know what I'm talking about - pure disappointment! But making it yourself is an entirely different thing altogether. Homemade biscotti is crispy, yet soft and definitely not stale!

🥘 Ingredient Notes
This biscotti is made with very simple pantry ingredients that you likely have on hand:
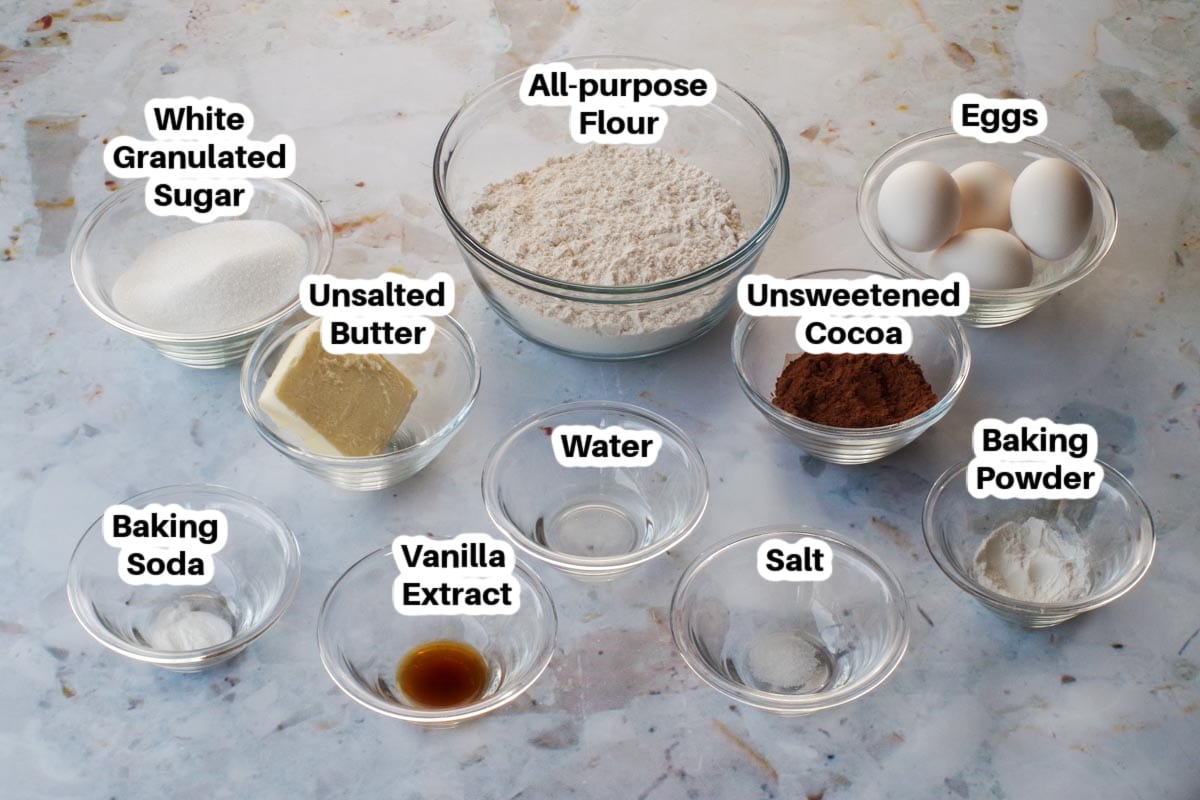
- Unsalted butter. I prefer to use unsalted butter in my recipes so I can control the salt. The salt content in salted butter varies by brand.
- Vanilla extract. Vanilla extract enhances this biscotti with vanilla flavor that melds perfectly with the chocolate!
- Cocoa. Cocoa gives this marble biscotti its chocolate flavor without adding more calories.
📖 Variations & Substitutions
- Dried Fruit: You can add dried fruit (cranberries, dried cherries or dried apricots) to this biscotti. However, you may want to adjust the sugar, as the fruit makes it sweeter.
- Nuts: You can also add nuts- sliced almonds or chopped pistachios tend to work the best. If you're counting WW points, you'll need to adjust those as well.
- Butter: You can use salted butter, but skip the salt in the recipe.
Biscotti is a Cookie
If you didn't already know this, biscotti is simply an Italian cookie, but the difference is that it's baked twice. But there is something magical in the double baking that gives biscotti this delicate texture, unlike any other cookie. In essence, these are chocolate marble cookies, but only better!
🔪 How to Make Marble Biscotti
It all starts with one simple biscotti vanilla dough that's then divided so that half of it can be made into a chocolate biscotti dough. From there, it's just blended to get the marbled effect.
Heads up: There is a 2 hour chilling time before baking.
Make the dough:
- In a large mixing bowl, beat butter with an electric mixer on medium to high speed for 30 seconds, then add sugar, baking powder, baking soda, and salt; beat until combined.
- Beat in the 3 eggs and vanilla extract until combined. Beat in 2 ¼ cups of flour, beating in as much of the flour as you can with the mixer. Stir in any remaining flour with a large spoon.
- Divide into 2 portions.
- Add the remaining ¼ cup flour into one portion and mix with your hands until combined.
- Add the cocoa into the other portion and knead with your hands until well combined. You may need to add a little flour (1 tablespoon at a time until it isn't too sticky to work with)
- **Cover and refrigerate for 2 hours or until the dough is easy to handle.
- Preheat oven to 350 degrees F/ 175 degrees C.
Assembly & Baking:
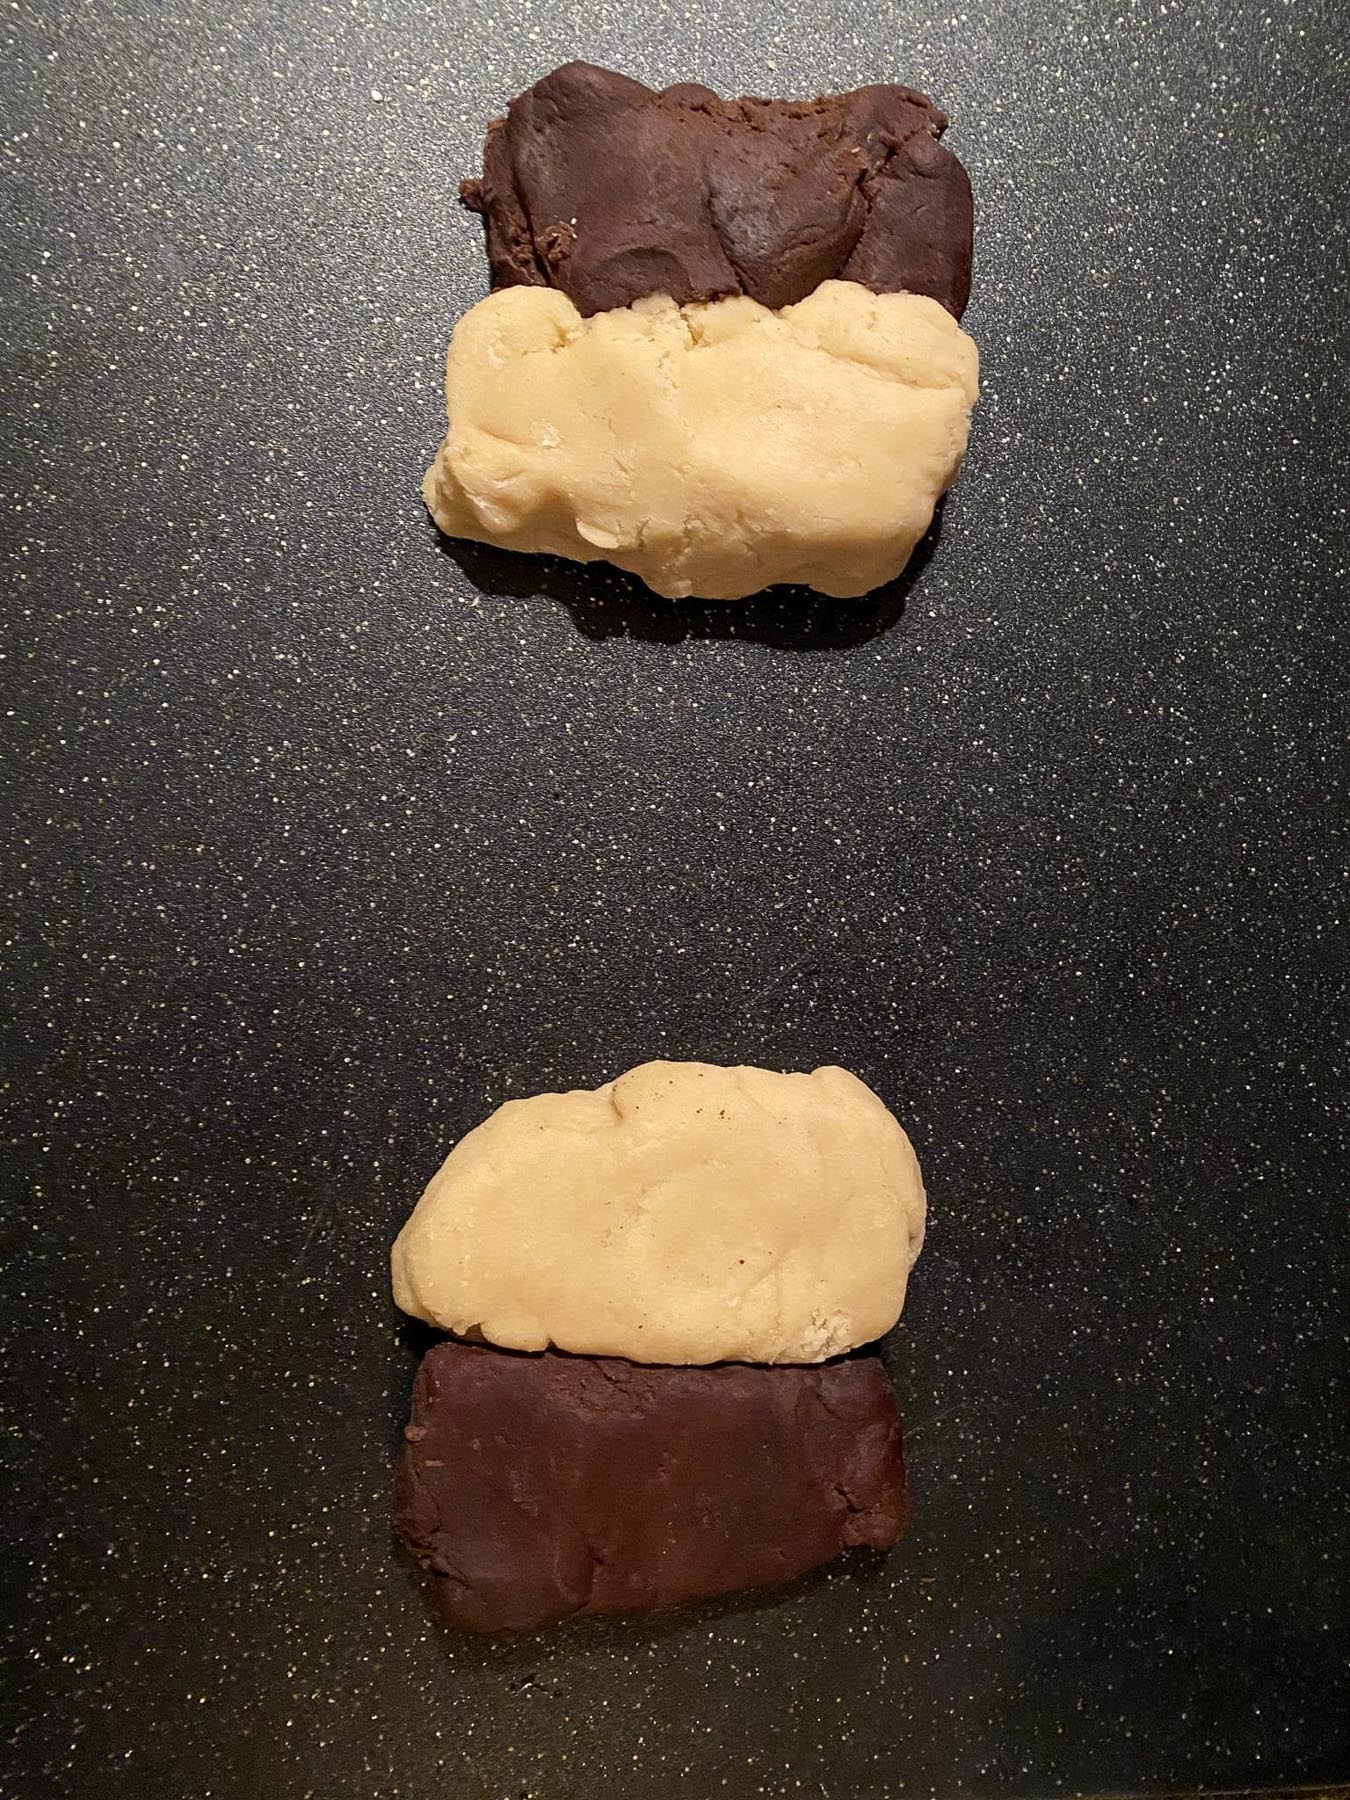
- Step 1: Divide each dough in half, then put the halves together in separate sections.
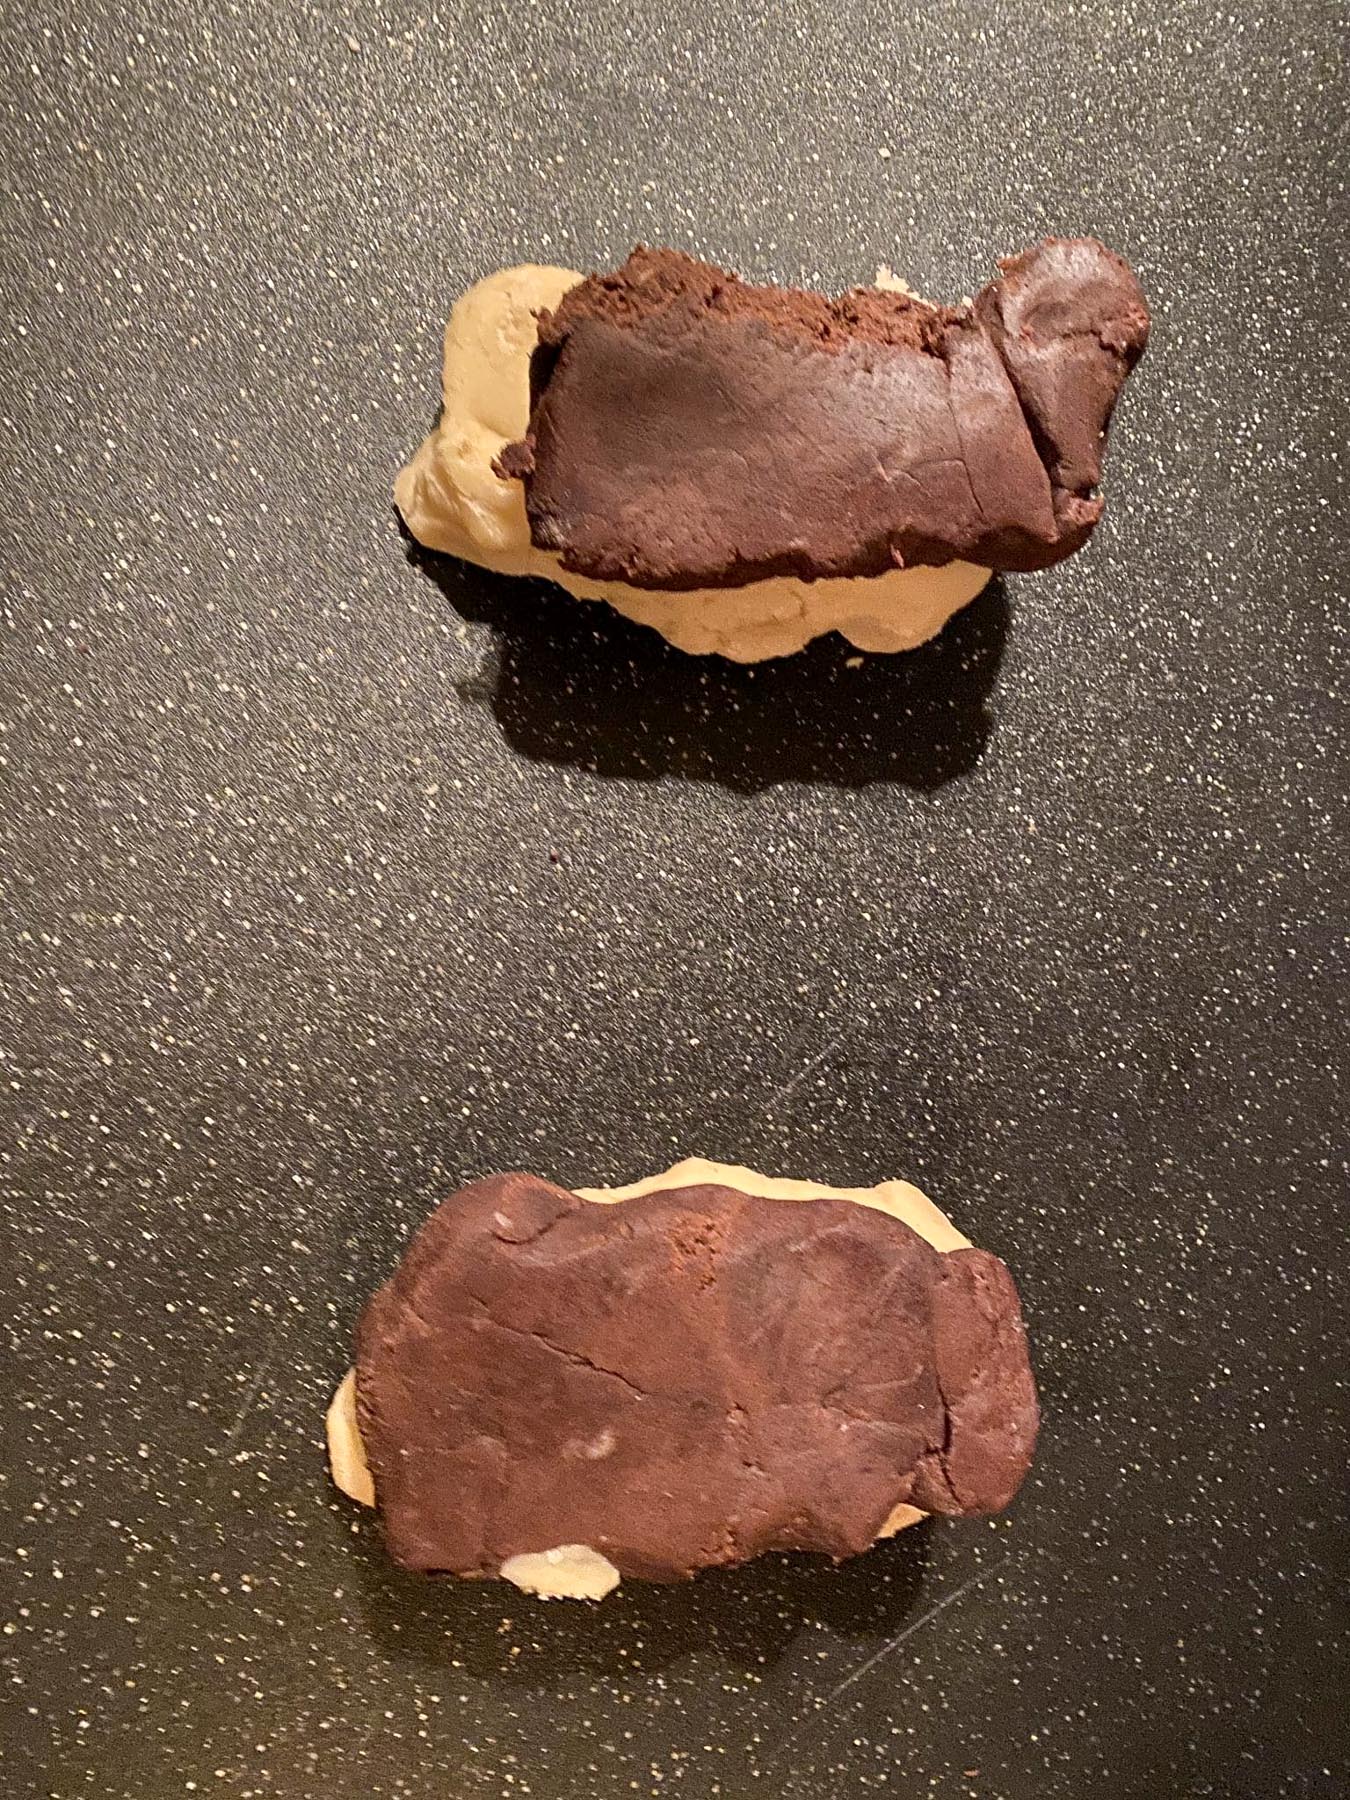
- Step 2: Then, flip each section of chocolate and vanilla dough on top of each other, keeping the 2 sections separated.
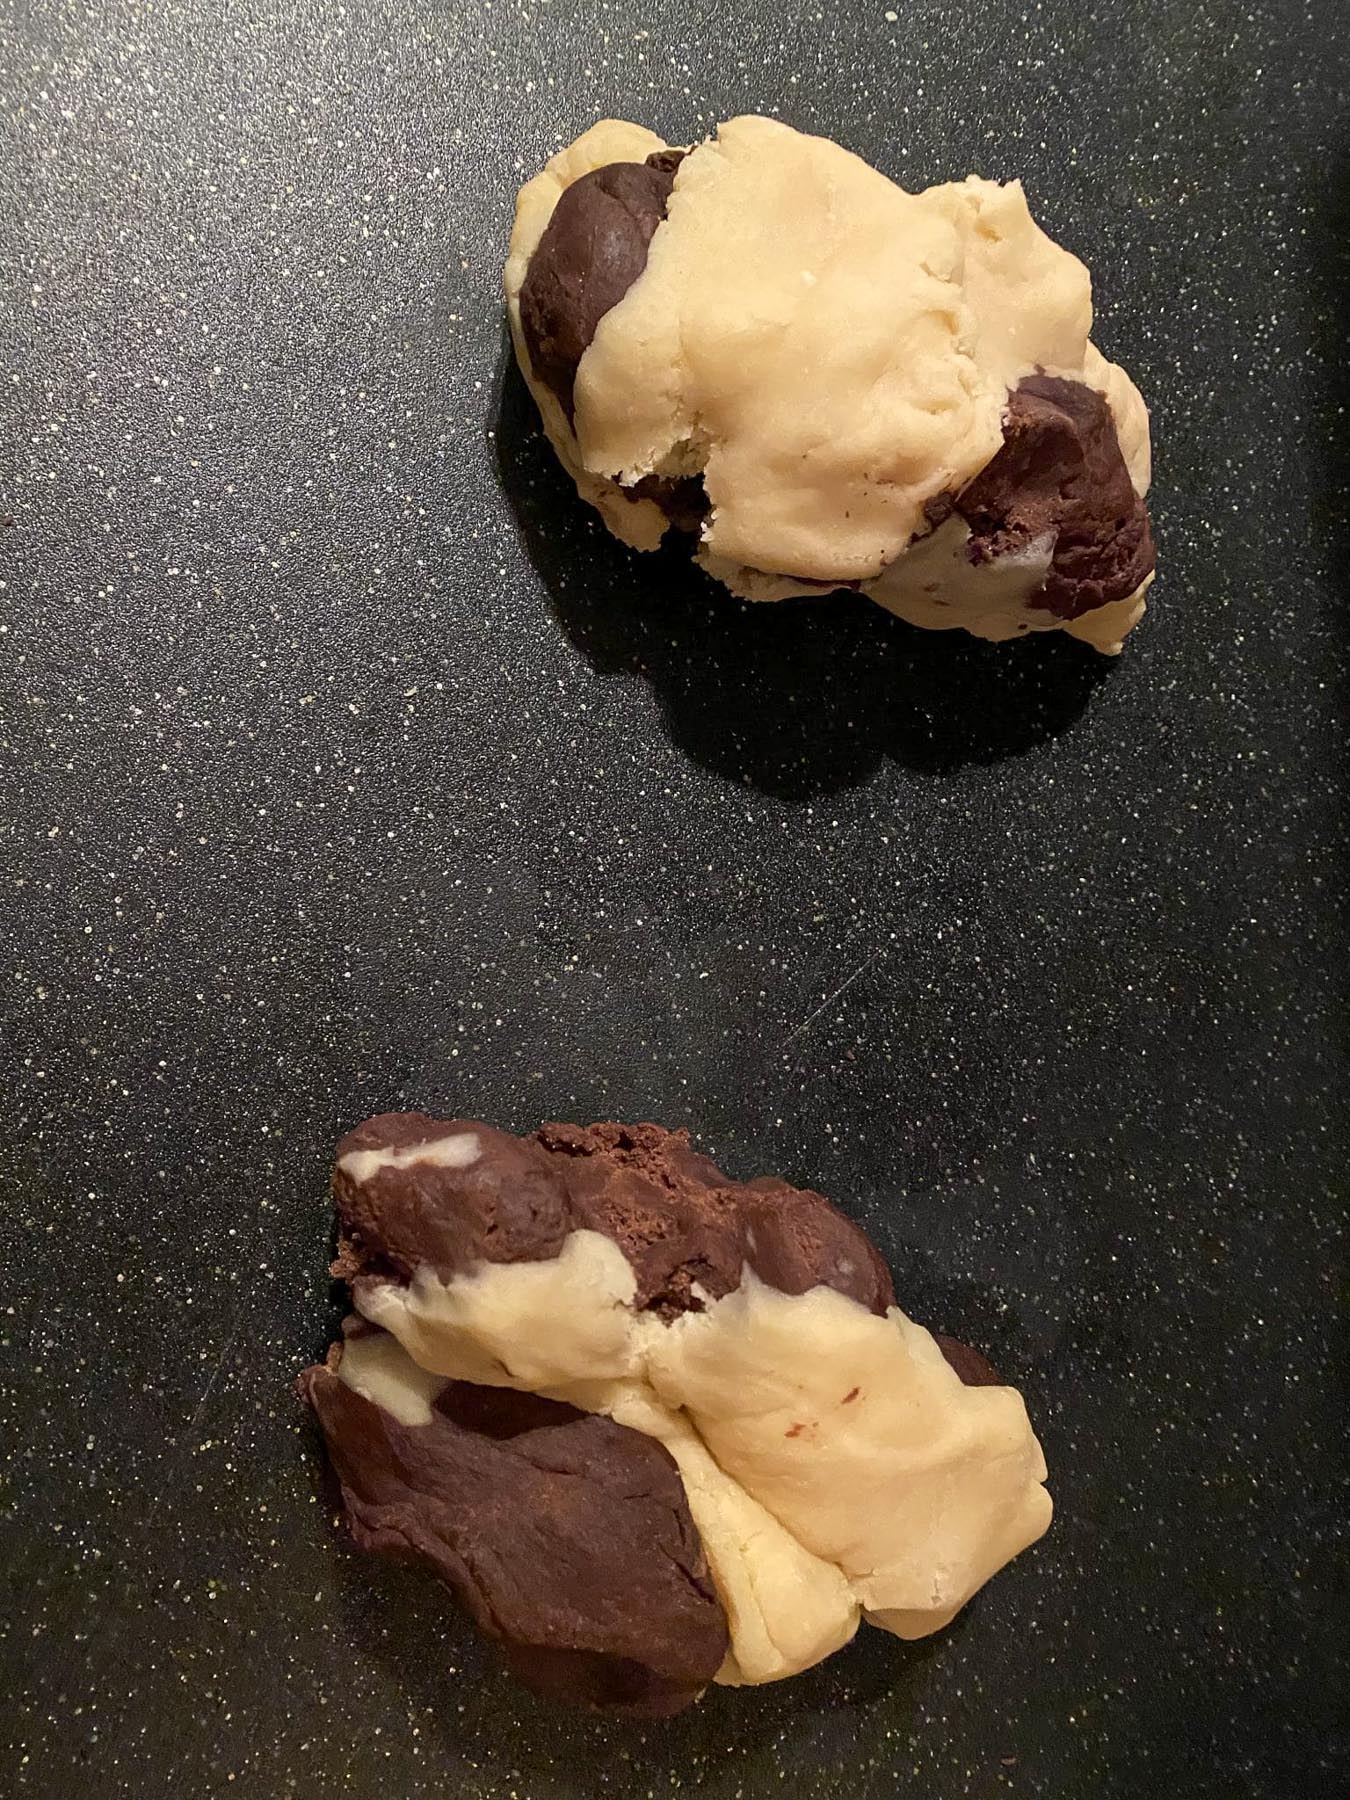
- Step 3: Start folding, twisting, and mixing.
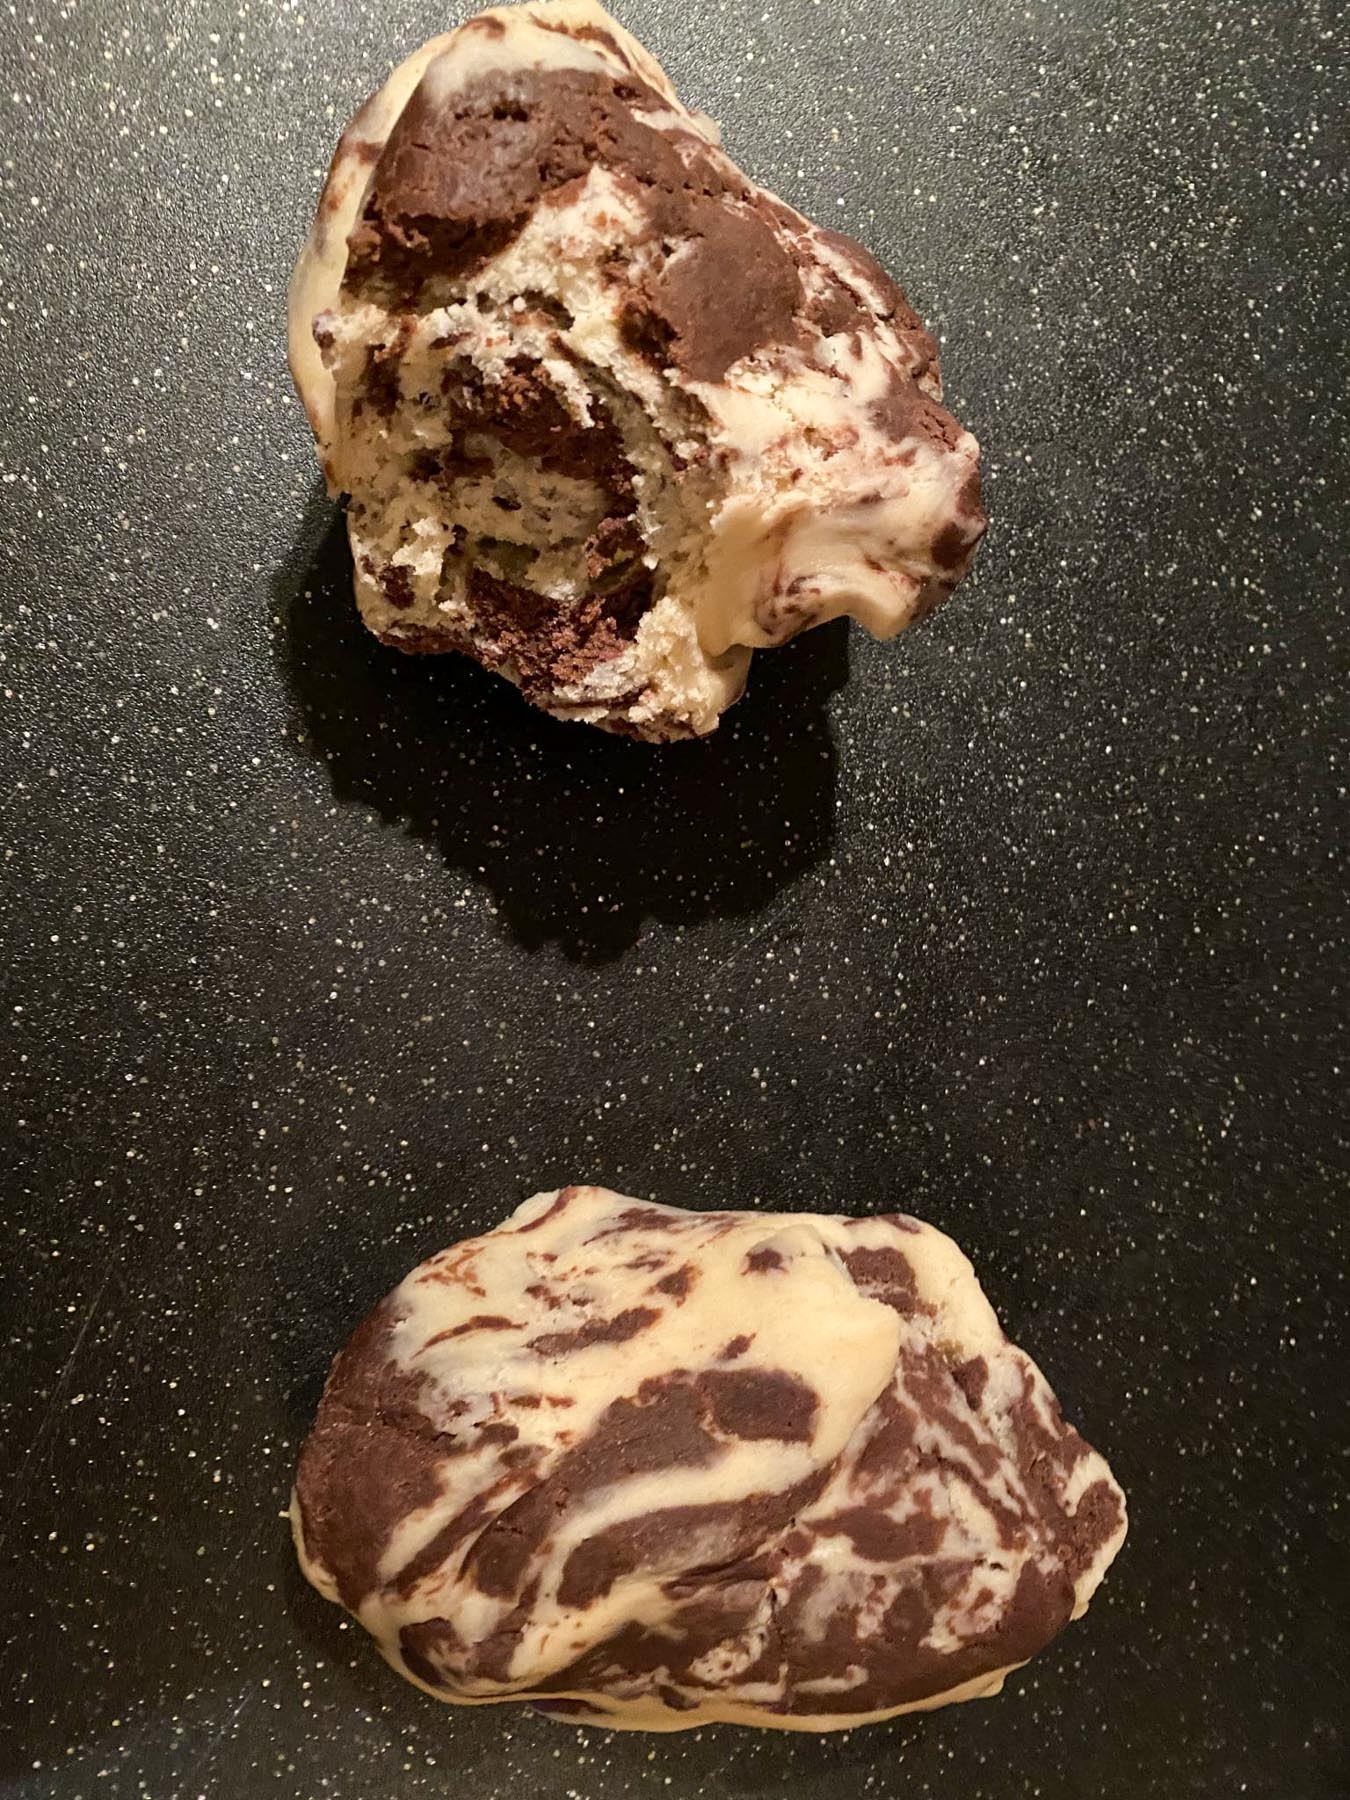
- Step 4: Continue twisting and folding until you get the desired marble effect. *The cook in the video demonstrates a very similar technique to mine: How to marble dough ( Skip to 6:15)
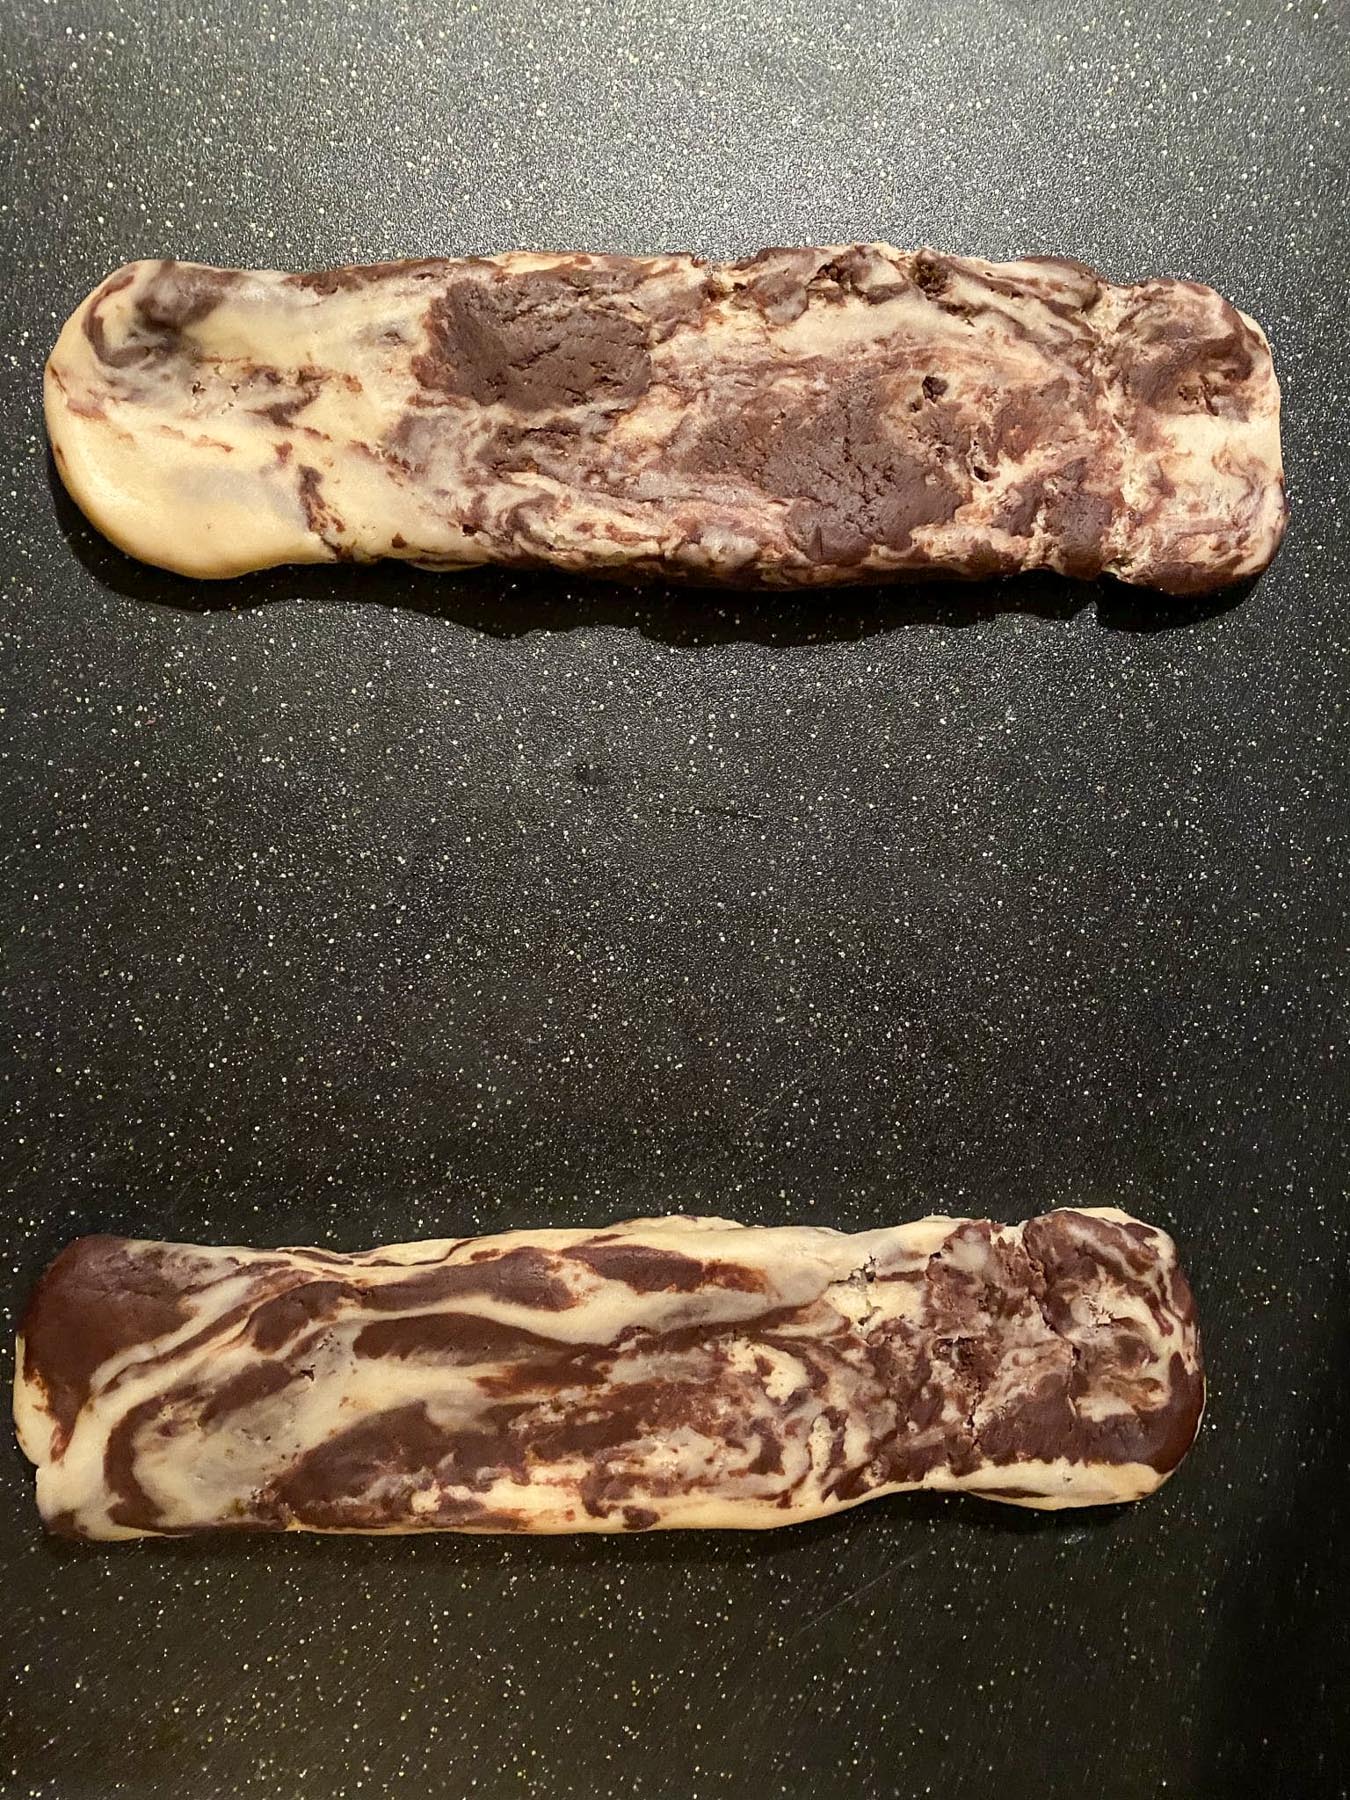
- Step 5: Shape each half into a 12-inch log about 1 ½ inches thick.
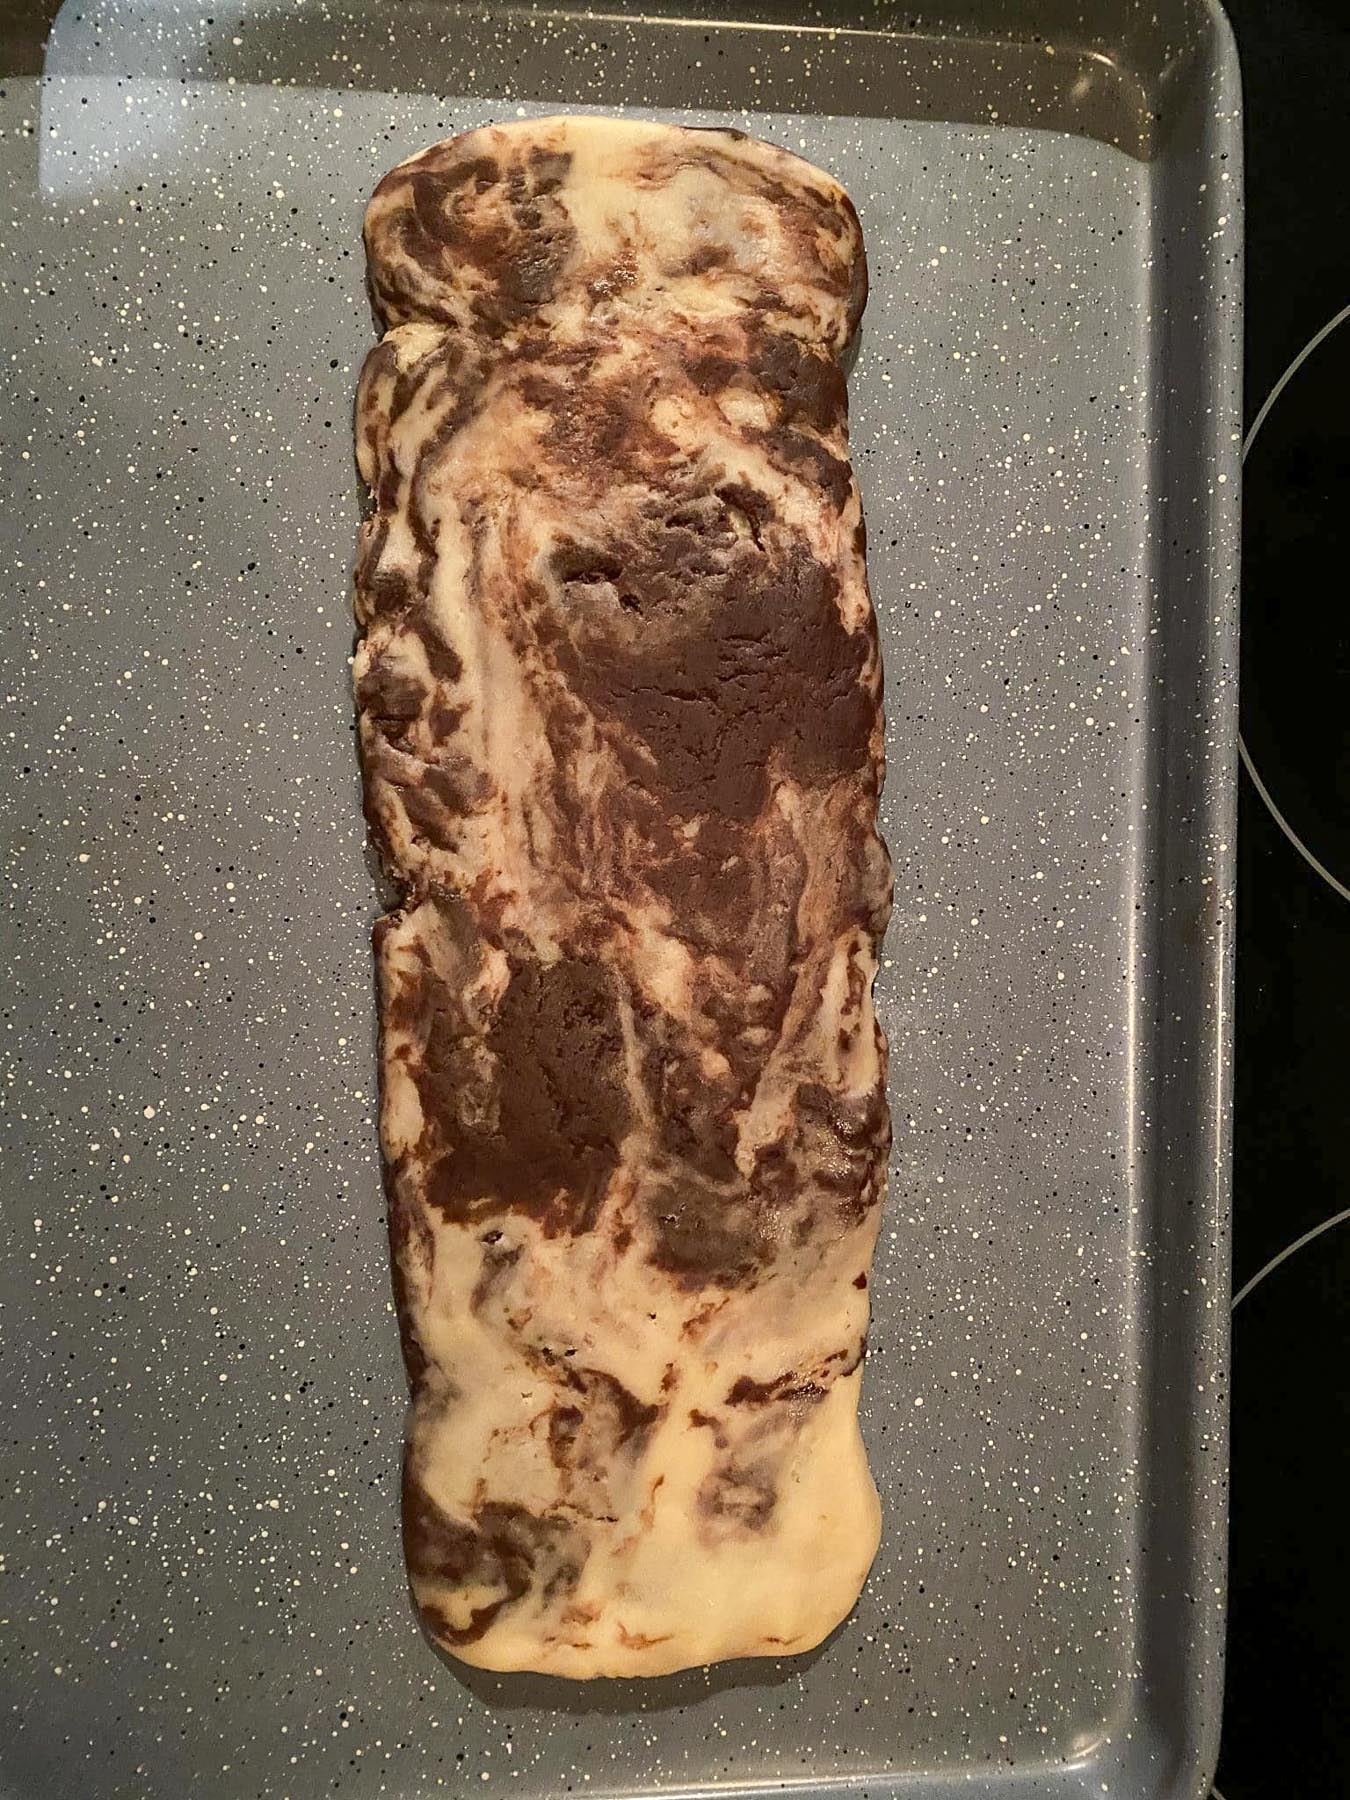
- Step 6: Place logs on separate, lightly greased cookie sheets (*I use nonstick cooking spray). Flatten each log to a ¾ -1 inch thick loaf. (They will bake up quite a bit, so don't worry if they are very flat).
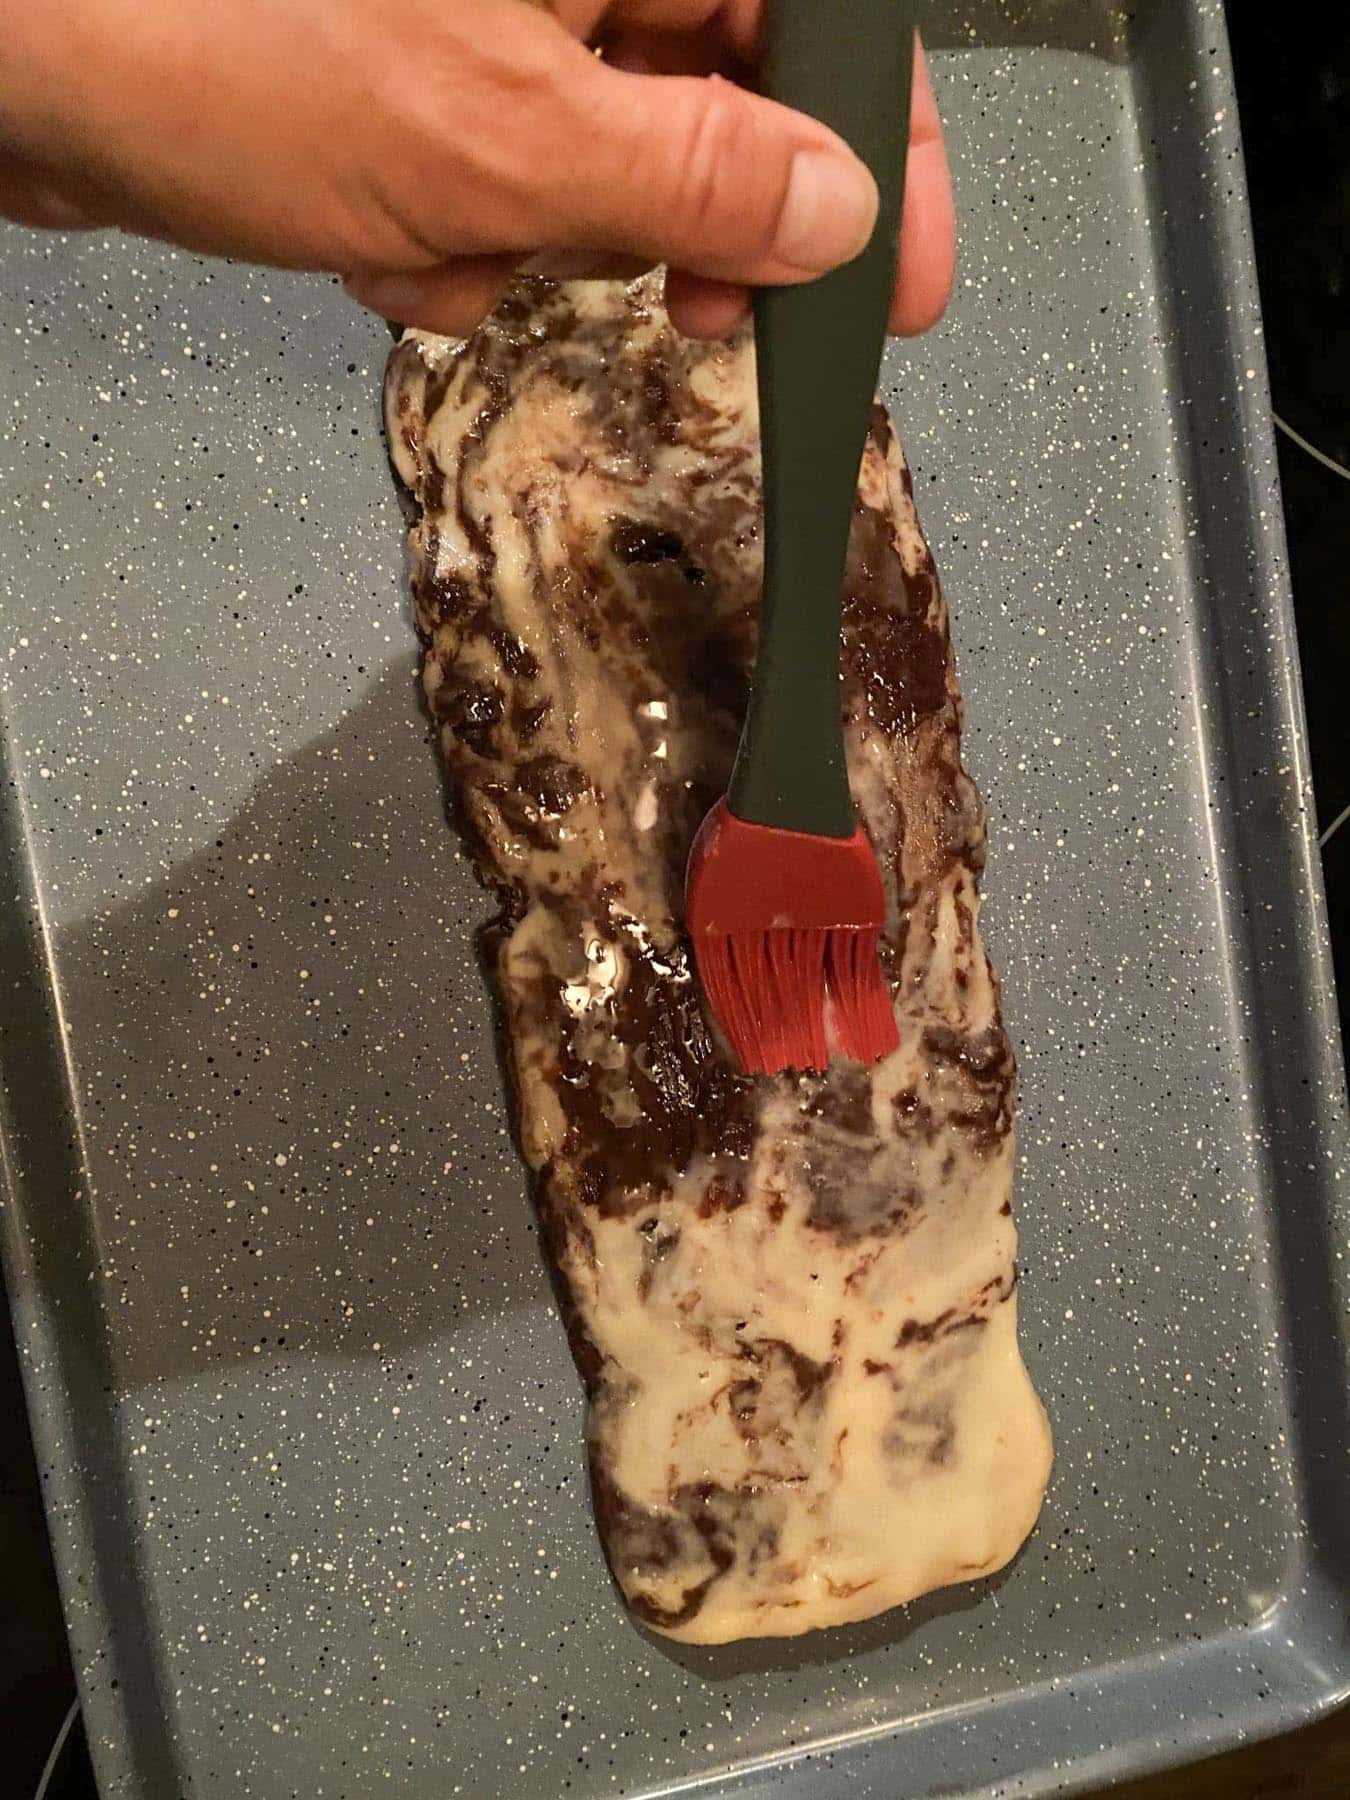
- Step 7: Egg Wash: Combine the 1 egg and 1 tablespoon of water to make an egg wash. Brush egg mixture over loaves. You won't use all of it (maybe ½ - ⅓).
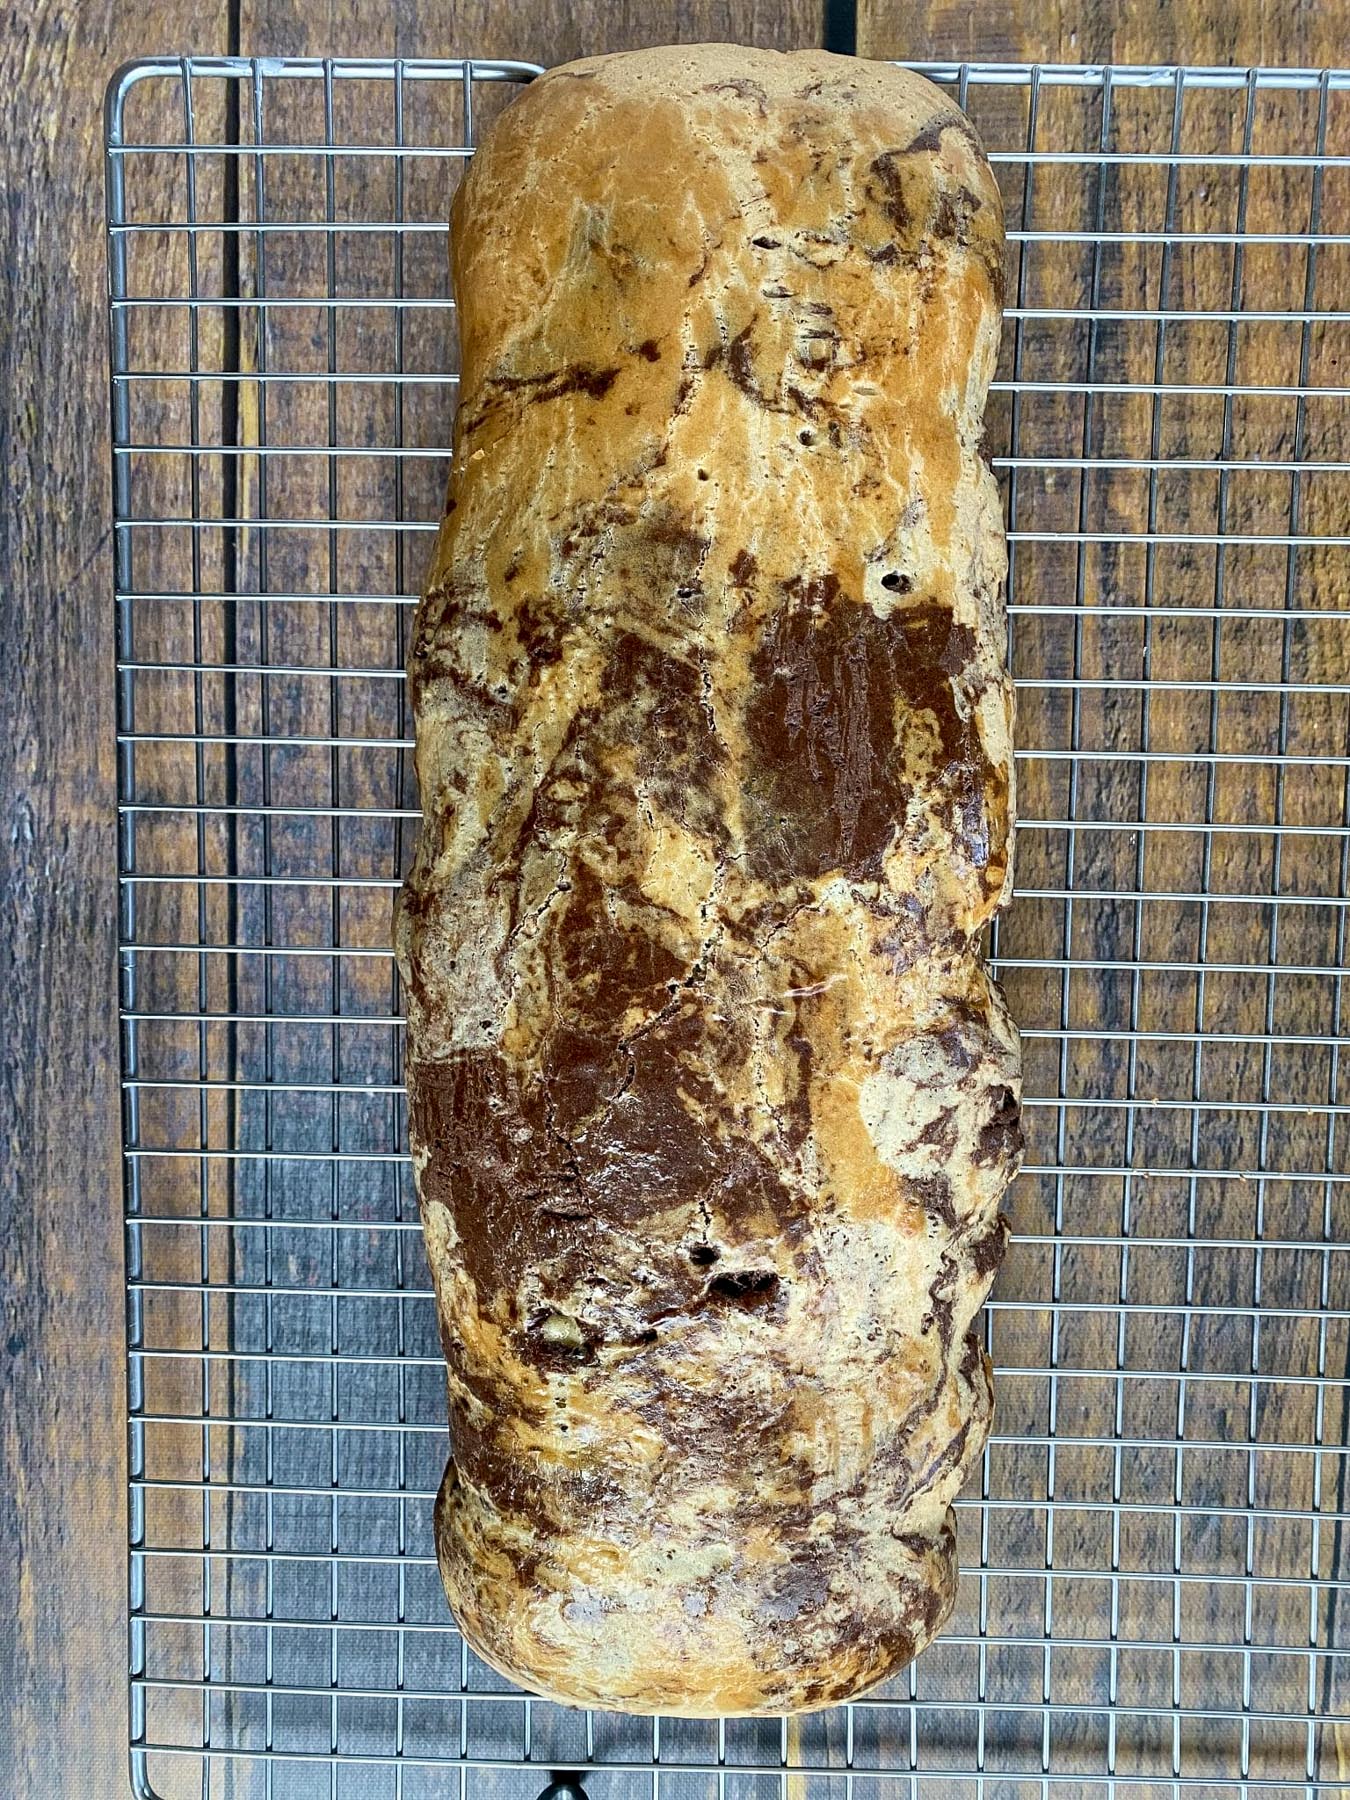
- Step 8: Bake in preheated oven for 25- 30 minutes or until very lightly browned. Cool loaves on cookie sheet for 10 -15 minutes, then carefully move to cooling rack. Cool another 45-50 minutes or until completely cooled 2nd Bake: At this point, I like to rewash and spray my baking pans. When the loaves are cool, preheat oven to 325 degrees F/160 C.
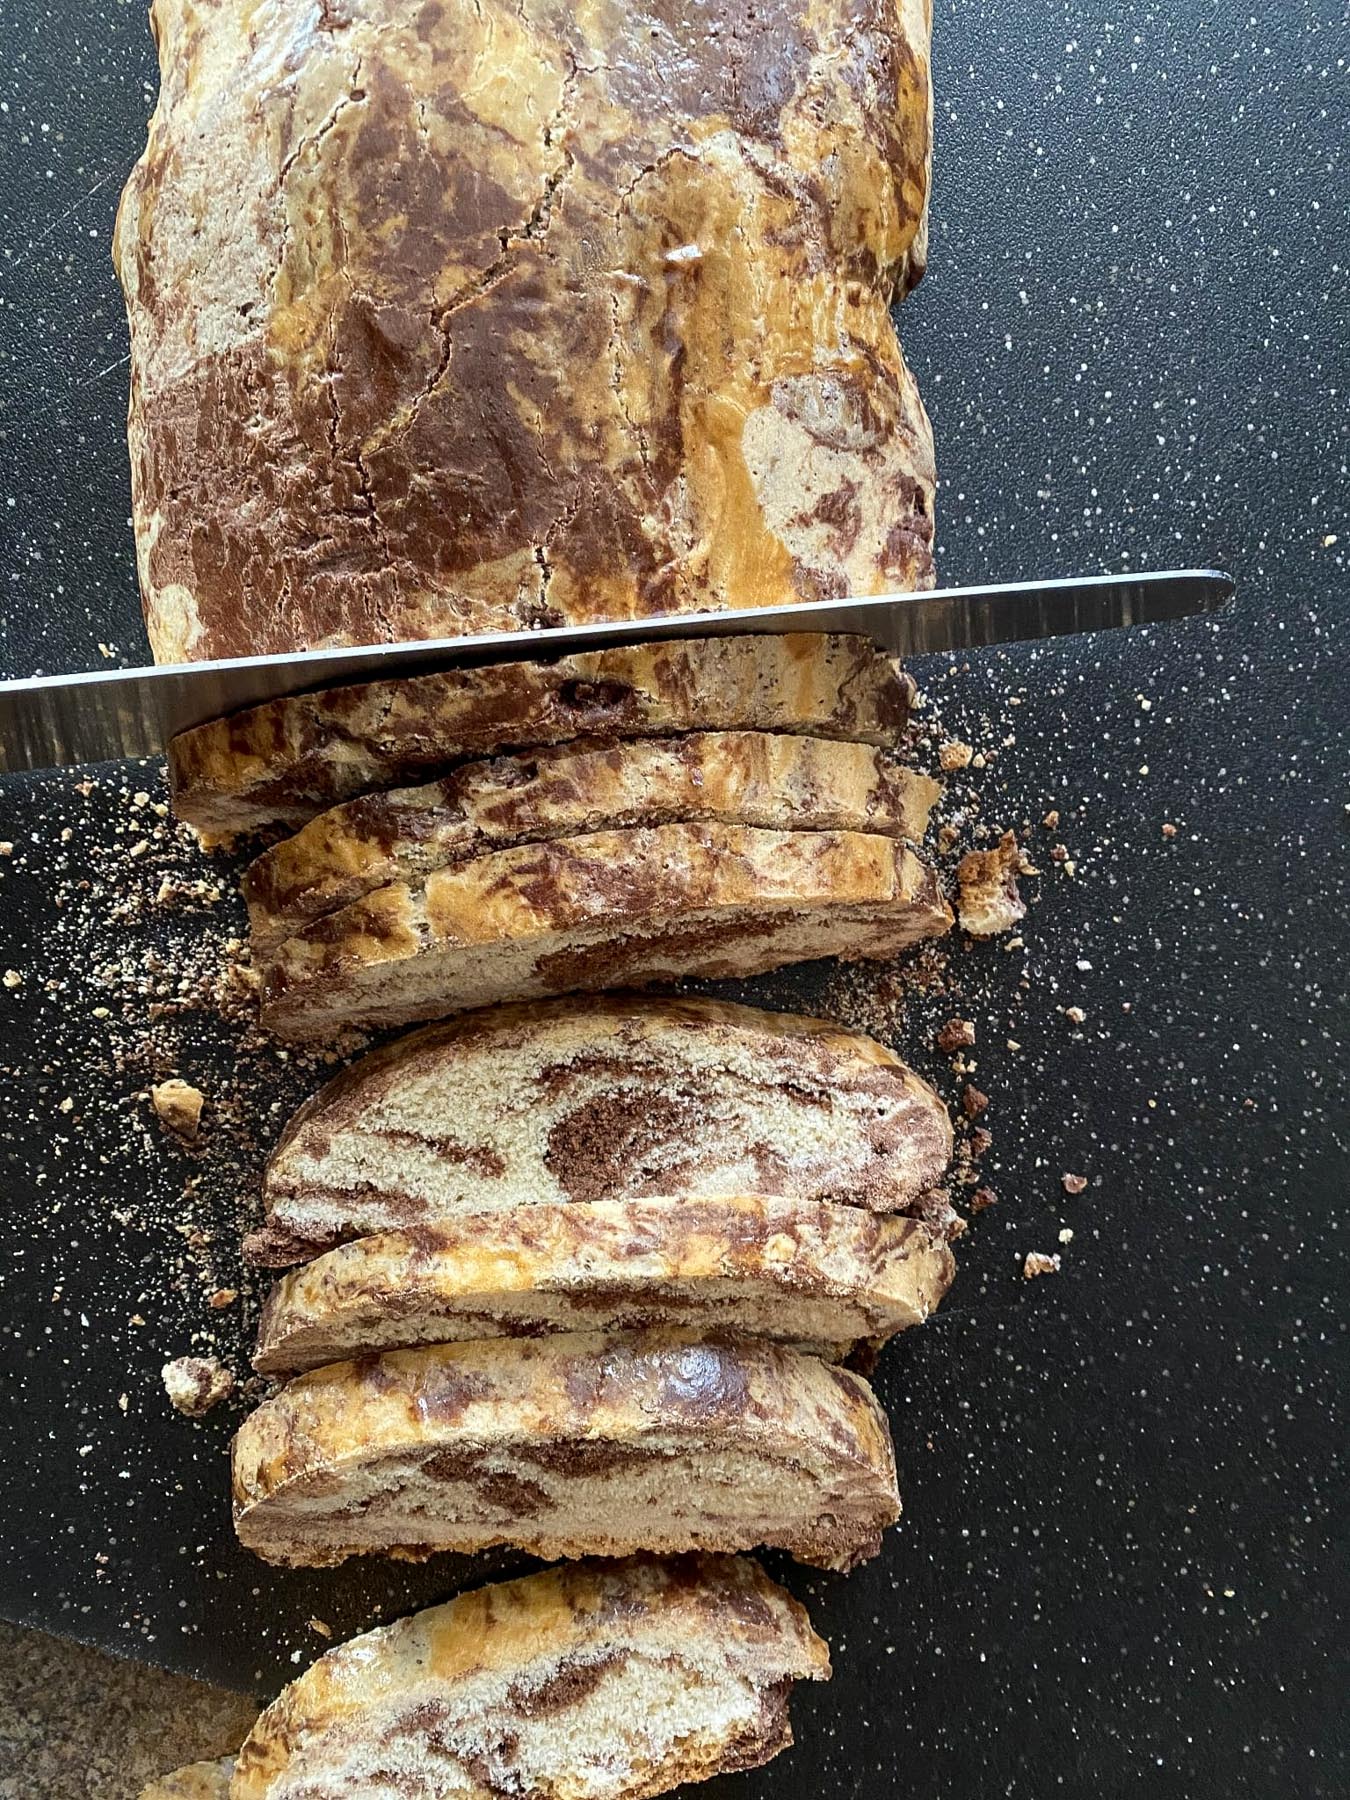
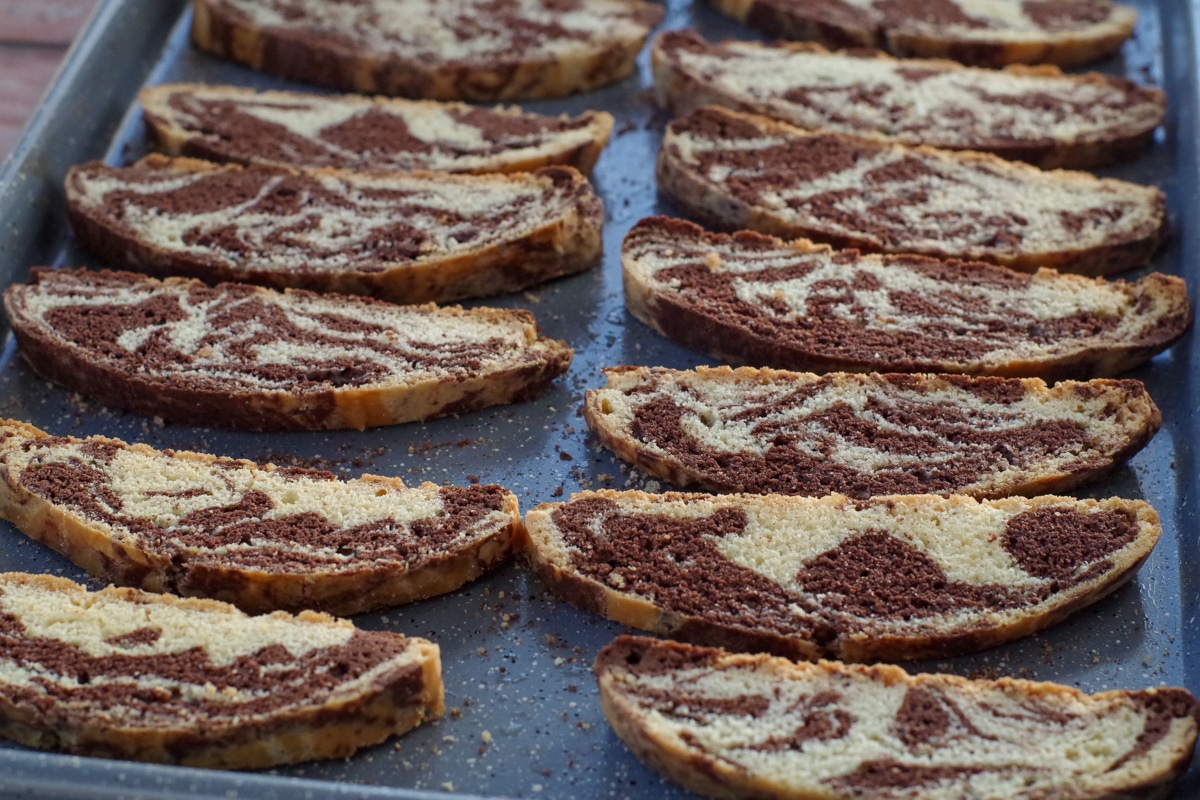
- Step 9: Transfer loaves to a cutting board. Cut each loaf diagonally in ½ inch thick slices with a serrated knife. Lay slices, cut sides down on cookie sheet. Bake in the preheated oven for 5-10 minutes until lightly browned on bottom. Turn slices over and bake 5 -10 minutes more or until biscotti are dry and crisp. Transfer to a wire rack. Cool.
⏲️ Baking time
If you've never made biscotti before then you need to realize that it's a bit of a time commitment because it requires 2 hours of chilling, 2 bakes (one is 25- 30 minutes and the other is 15-20 minutes ), and cooling time (up to an hour) in between the 2 bakes. So, in total time the biscotti takes about 4 hours. But is it ever worth the time!!
Expert Tips
- Use Room Temperature Ingredients. Ensure your butter and eggs are at room temperature before starting. This helps the ingredients blend more easily and creates a smoother dough with better texture.
- Chill for Easy Handling. Don't skip the chilling step. The dough is much easier to handle and shape after it's been chilled. If it still feels sticky, lightly flour your hands or chill for an additional 30 minutes.
- Don't Overmix the Marble. When twisting and folding the two doughs together, stop once you see a defined marble pattern. Overmixing will cause the colors to blend too much, losing the marbled effect.
- Shape Evenly for Consistent Baking. When forming the logs, try to keep them uniform in thickness. This ensures that they bake evenly and avoids having thinner ends that dry out faster.
- Let Logs Cool Completely Before Slicing. Cooling the biscotti logs fully before slicing (as directed) is key to keeping them from crumbling. Use a gentle sawing motion with a serrated knife to avoid breakage.
- Rotate the Pan for Even Browning. For both bakes, especially the second one, rotate your baking sheet halfway through to ensure even crisping and browning.
- Add-ins? Toast Them First! If you're using nuts or dried fruit, consider toasting the nuts or rehydrating the fruit slightly to enhance flavor and improve texture in the final cookie.
- Keep an Eye on the Second Bake. The second bake can go from golden to overdone quickly. Check at the 5-minute mark on each side to avoid overly dry biscotti.
- Use a serrated knife and cut on an angle. You'll want to cut this marbled biscotti on an angle, with a serrated knife. I use a serrated bread knife. I've just found it to be the best way to cut biscotti, and the King Arthur Baking Company agrees -they list the technique as one of their 'secrets' of great biscotti.
- 9. Customize Texture with Bake Time. Prefer crunchier biscotti? Bake longer on the second round. Want a softer center? Shave off a few minutes from the second bake time.
- Biscotti Too Hard? If your biscotti ends up too crunchy for your liking, let it sit uncovered at room temperature for a few hours. Exposure to a bit of air can slightly soften the crispness.
👪 Serving Size
This chocolate biscotti recipe seems like it makes a lot (48), but trust me, it goes fast! However, you can easily cut the recipe in half or double it, as I did. *Do this by clicking on the serving size in my recipe and selecting the number of servings you'd like. The ingredient quantities will automatically adjust. And it freezes well.
🔢WW Points
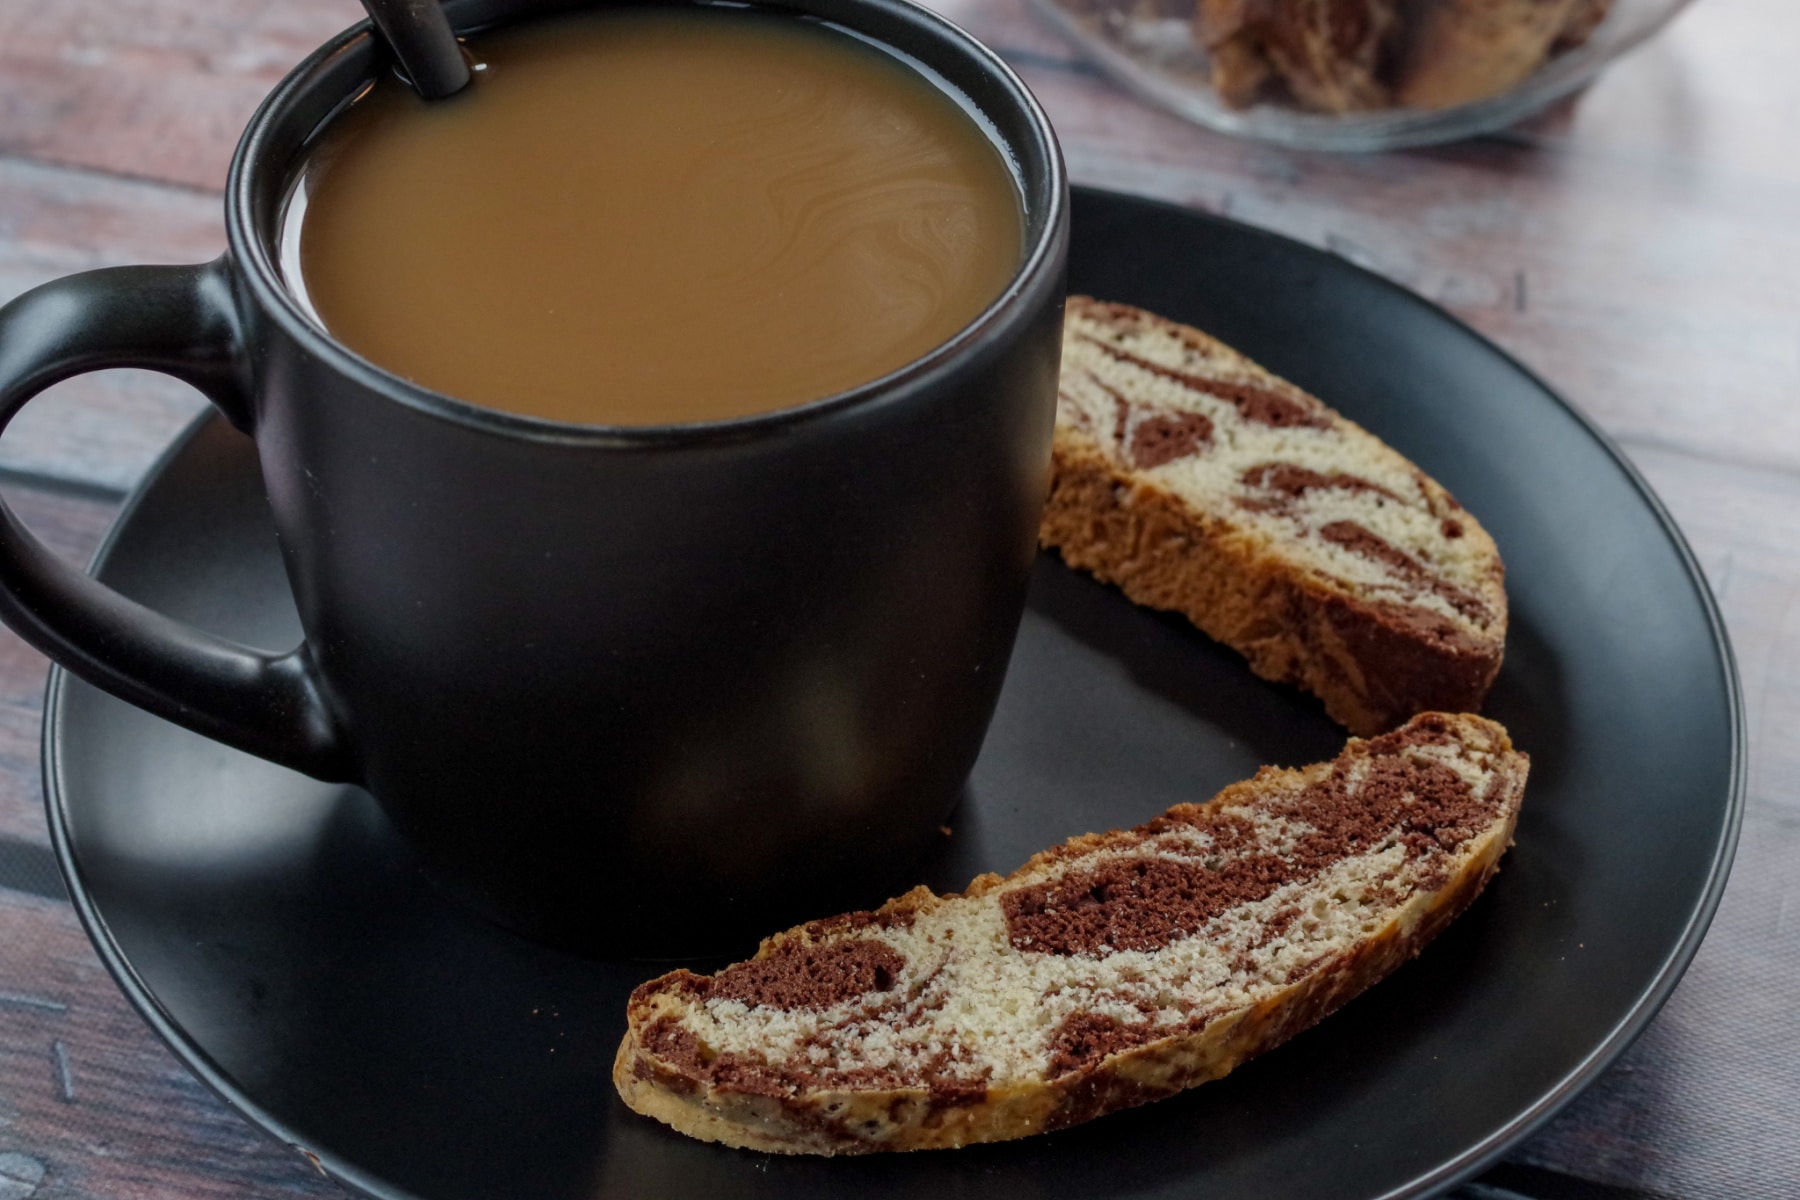
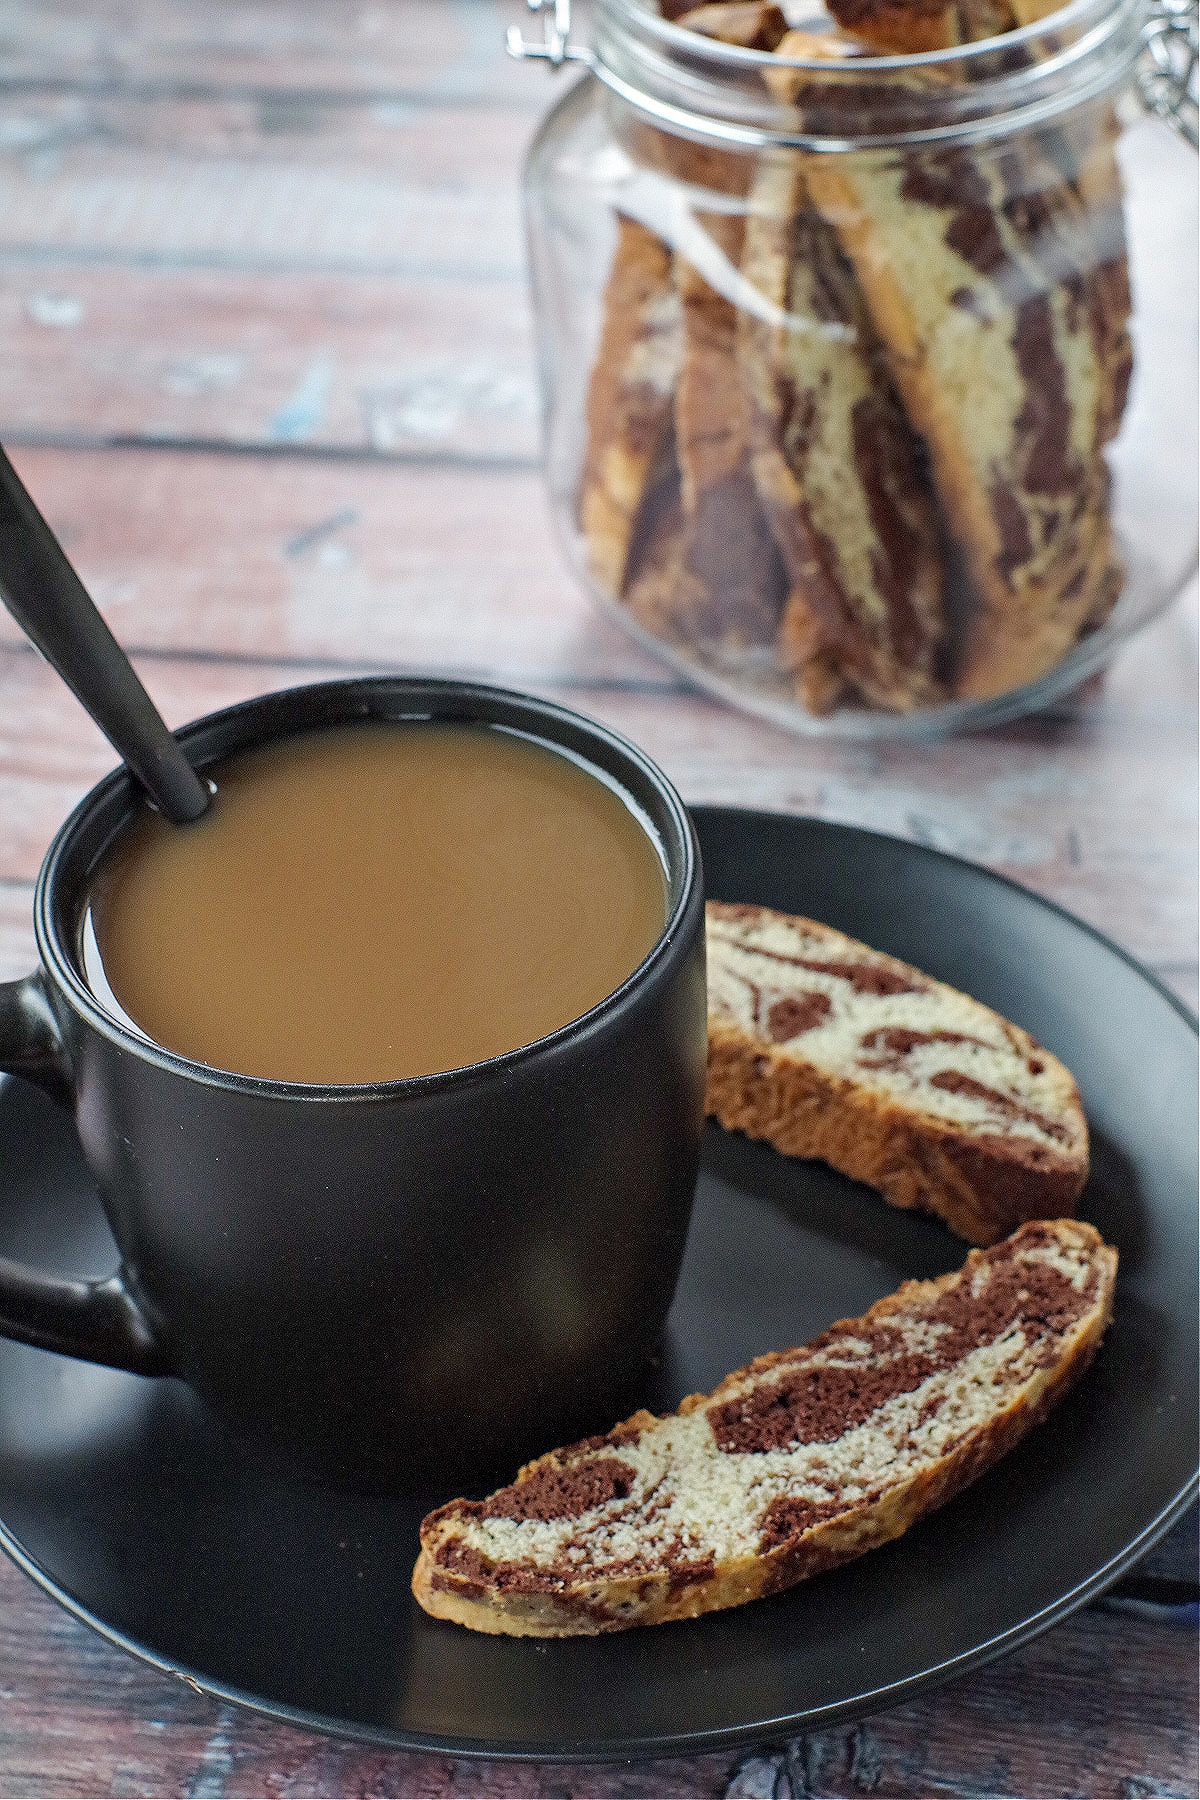
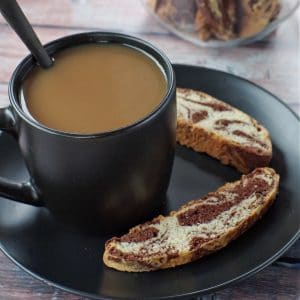
I always crave something sweet after breakfast, and muffins and loaves are too heavy (especially after eating breakfast). But biscotti is the perfect size, it's not too fattening, and totally satisfies that sweet tooth. This homemade biscotti is also ideal for dunking in coffee. This chocolate marbled biscotti recipe is Weight Watchers friendly @ 2 WW points.
🌡️Storage
You can keep it in an airtight container (you can use a sealed jar, as in photo) for up to a week or freeze them in a Ziplock freezer bag for up to 3 months. I pull them out of the freezer as I need them.
❔Recipe FAQs
No, chilling is essential. It makes the dough easier to handle and shape, helps the marbling hold its structure, and ensures the biscotti doesn't spread too much while baking.
The biscotti should be dry and crisp to the touch on both sides. If it still feels soft in the center, give it a few more minutes, flipping halfway through. Remember, it will continue to firm up slightly as it cools.
Be sure the loaves are completely cooled before slicing. Use a sharp serrated knife and gently cut in a smooth sawing motion on the diagonal to avoid breakage.
Absolutely! Once fully cooled, drizzle or dip the biscotti in melted chocolate, then let it harden at room temperature or in the fridge. This adds a sweet, indulgent touch.
If you're looking for biscotti flavor ideas or biscotti with chocolate, this Vanilla and Chocolate Marble Biscotti recipe is for you!
🍳More WW Breakfast and Brunch Recipes!
So, if you're looking for the best chocolate biscotti, you're going to love this marbled biscotti recipe! Because this is a ww biscotti recipe, now you can enjoy biscotti (almost) daily as I do! It pairs well with my Homemade Masala Chai Tea, and it's also ideal for a hostess gift or taking along to a breakfast or brunch potluck. And if you're looking for more potluck recipes, check out these breakfast potluck ideas!

Did your family❤️this recipe? Did you know that commenting and⭐rating recipes is one of the best ways to support your favorite recipe creators? If you LOVED this recipe, please comment and rate it in the recipe card or share photos on social media using the hashtag #foodmeanderings or tagging @foodmeanderings !

📋 Chocolate Marble Biscotti Recipe
Ingredients
- ¼ cup unsalted butter softened
- 1 cup white granulated sugar
- 1 teaspoon baking powder
- ½ teaspoon baking soda
- ¼ teaspoon salt
- 3 eggs
- ½ teaspoon vanilla extract
- 2 ½ cups all-purpose flour
- ¼ cup cocoa
Egg Wash
- 1 egg
- 1 tablespoon water
Instructions
- Heads up: There is a 2 hour chilling time before baking.
- In a large mixing bowl, beat butter with an electric mixer on medium to high speed for 30 seconds, then add sugar, baking powder, baking soda, and salt; beat until combined. .¼ cup unsalted butter softened, 1 cup white granulated sugar, 1 tsp baking powder, ½ tsp baking soda, ¼ tsp salt
- Beat in the 3 eggs and vanilla extract until combined. Beat in 2 ¼ cups of flour, beating in as much of the flour as you can with the mixer. Stir in any remaining flour (from the 2 ¼ cups) with a large spoon.*Set aside ¼ cup flour to use when dough is divided,3 eggs, ½ tsp vanilla extract, 2 ½ cups all-purpose flour
- Divide into 2 portions.
- Add the remaining ¼ cup flour into one portion and mix with hands until combined.
- Add the cocoa into the other portion and knead with hands until well combined. You may need to add a little flour (1 tablespoon at a time until it isn't too sticky to work with)¼ cup cocoa
- **Cover and refrigerate for 2 hours or until dough is easy to handle.
- Preheat oven to 350 degrees F/ 175 degrees C. Divide each dough in half, then put the halves together.
- Then flip them on top of each other.
- Start folding and twisting and mixing,
- Keep doing this until the you get the desired marble effect (see video in NOTES)
- Shape each half into a 12 inch log about 1 ½ inches thick.
- Place logs on separate, lightly greased cookie sheets (*I use nonstick cooking spray). Flatten each log to a ¾ -1 inch thick loaf. (they will bake up quite a bit, so don't worry if they are very flat)
- Egg Wash: Combine the 1 egg and 1 tablespoon of water to make an egg wash. Brush egg mixture over loaves. You won't use all of it (maybe ½ - ⅓)1 egg, 1 tbsp water
- Bake in preheated oven for 25- 30 minutes or until very lightly browned. Cool loaves on cookie sheet for 10 -15minutes, then carefully move to cooling rack.
- Cool another 45-50 minutes or until completely cooled
- 2nd Bake:
- At this point, I like to rewash and spray my baking pans.
- When the loaves are cool, preheat oven to 325 degrees F/160 C. Transfer loaves to a cutting board. Cut each loaf diagonally in ½ inch thick slices with a serrated knife. Lay slices, cut sides down on cookie sheet. Bake in the preheated oven for 5-10 minutes until lightly browned on bottom.
- Turn slices over and bake 5 -10 minutes more or until biscotti are dry and crisp. Transfer to wire rack. Cool.
Notes
- Use Room Temperature Ingredients. Ensure your butter and eggs are at room temperature before starting. This helps the ingredients blend more easily and creates a smoother dough with better texture.
- Chill for Easy Handling. Don't skip the chilling step. The dough is much easier to handle and shape after it's been chilled. If it still feels sticky, lightly flour your hands or chill for an additional 30 minutes.
- Don't Overmix the Marble. When twisting and folding the two doughs together, stop once you see a defined marble pattern. Overmixing will cause the colors to blend too much, losing the marbled effect.
- Shape Evenly for Consistent Baking. When forming the logs, try to keep them uniform in thickness. This ensures that they bake evenly and avoids having thinner ends that dry out faster.
- Let Logs Cool Completely Before Slicing. Cooling the biscotti logs fully before slicing (as directed) is key to keeping them from crumbling. Use a gentle sawing motion with a serrated knife to avoid breakage.
- Rotate the Pan for Even Browning. For both bakes, especially the second one, rotate your baking sheet halfway through to ensure even crisping and browning.
- Add-ins? Toast Them First! If you're using nuts or dried fruit, consider toasting the nuts or rehydrating the fruit slightly to enhance flavor and improve texture in the final cookie.
- Keep an Eye on the Second Bake. The second bake can go from golden to overdone quickly. Check at the 5-minute mark on each side to avoid overly dry biscotti.
- Use a serrated knife and cut on an angle. You'll want to cut this marbled biscotti on an angle, with a serrated knife. I use a serrated bread knife. I've just found it to be the best way to cut biscotti, and the King Arthur Baking company agrees -they list the technique as one of their 'secrets' of great biscotti.
- 9. Customize Texture with Bake Time. Prefer crunchier biscotti? Bake longer on the second round. Want a softer center? Shave off a few minutes from the second bake time.
- Biscotti Too Hard? If your biscotti ends up too crunchy for your liking, let it sit uncovered at room temperature for a few hours. Exposure to a bit of air can slightly soften the crispness.


Ana says
Just curious why so long of a wait time for the second bake?
Terri Gilson says
Hi Ana,
It's 5- 10 minutes on each side, so 10-20 minutes in total for 2nd bake.
Terri