


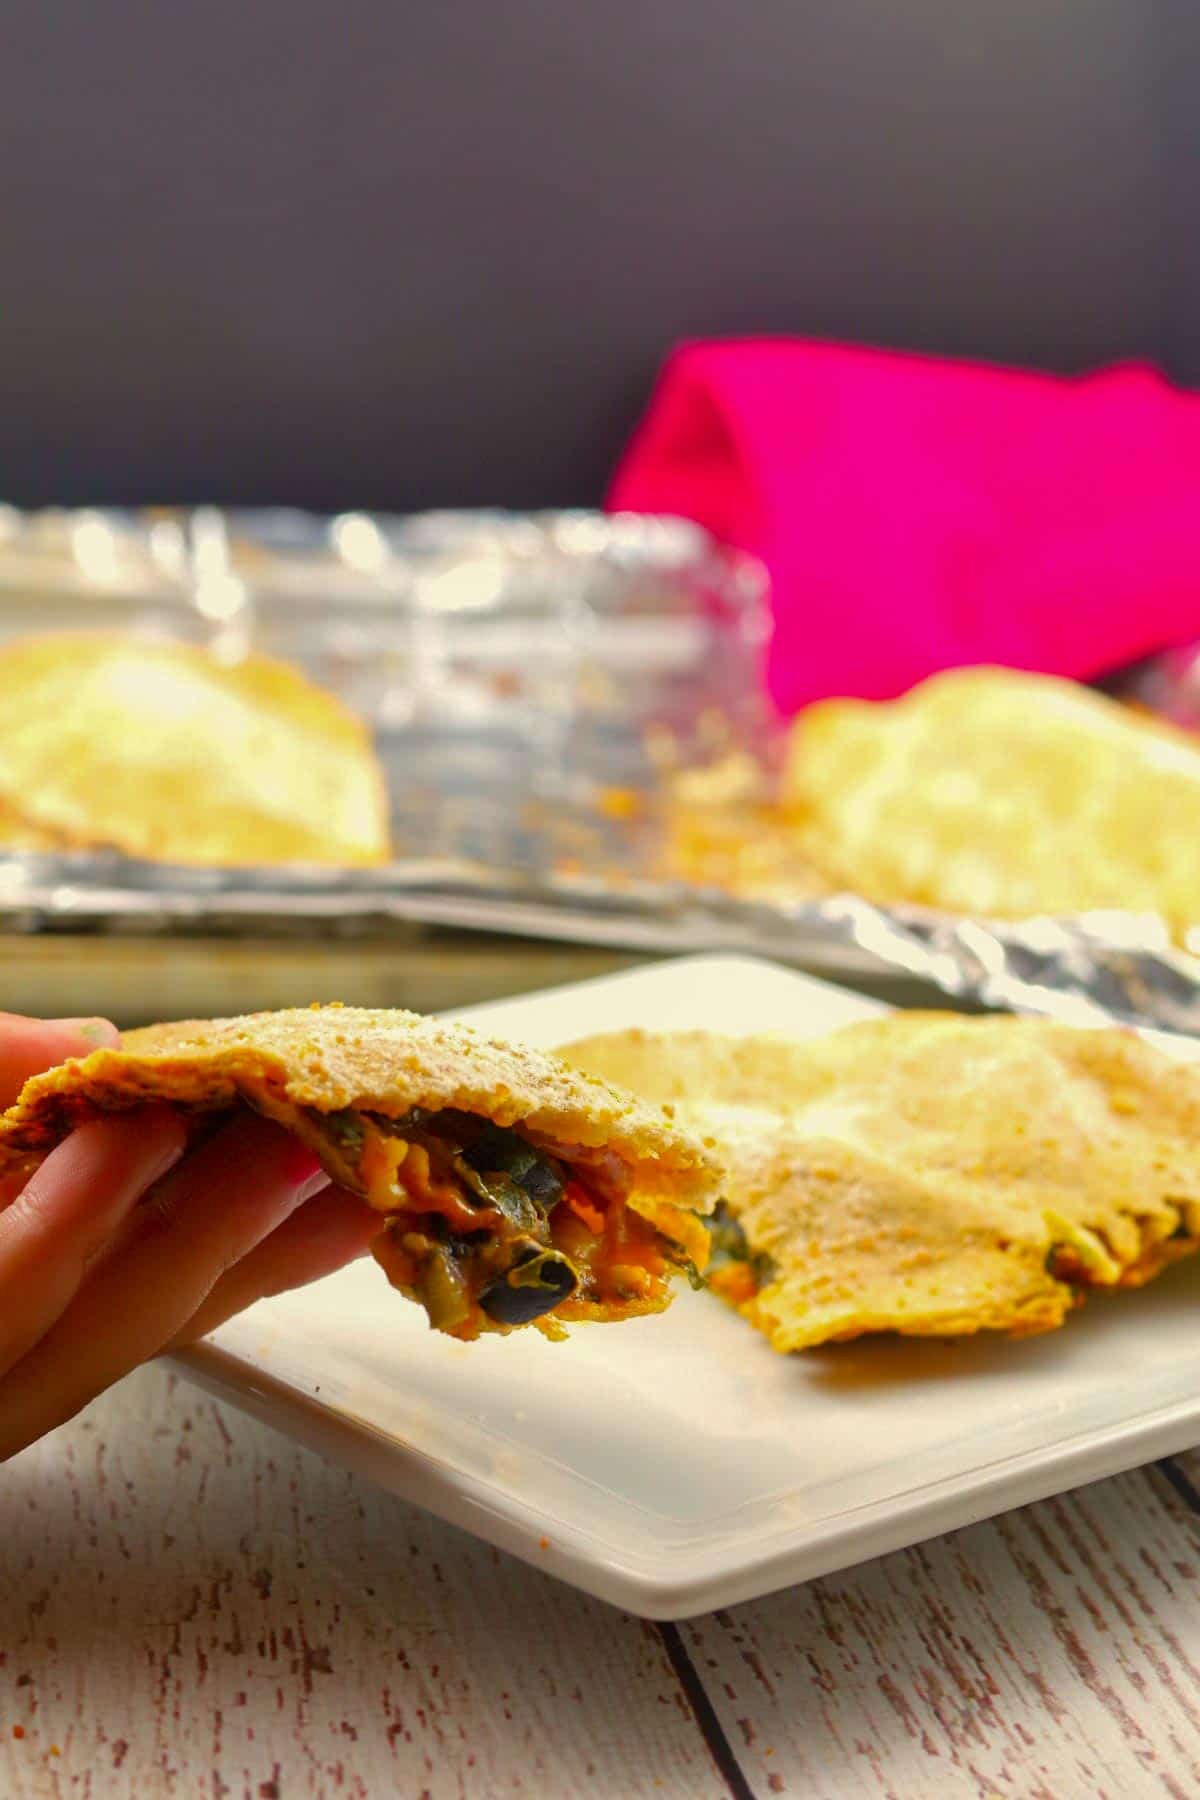
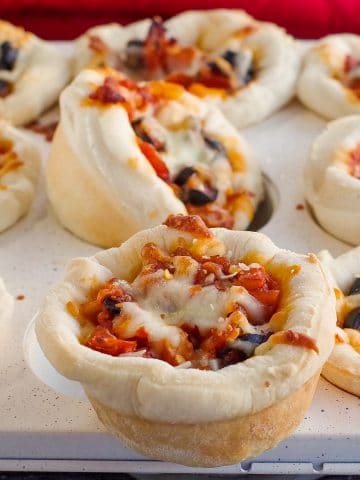
These Healthy homemade Pita Pizza Pockets are stuffed with Mediterranean flavors like black olive, feta cheese, and spinach. They are also a healthy lunch (hot or cold) for the lunch box!
Pizza pops, also known as pizza pockets or hot pockets, are still one of my favorite comfort foods from childhood. And because they are quite fattening, I was motivated to create this healthier and low-calorie Pita Pizza Pop. Made with pita bread instead of pizza dough, this healthy version of Pizza Pocket (aka Healthy Hot Pockets) is also Weight Watchers friendly-this recipe inspired my other healthy pizza recipe - this Healthy Pita Pizza.
Jump to:
My kids loved these because they practically live for pizza pops. That was the other motivator - to make a healthy version for their school lunches. But the true testament was when my daughter's friend, one of the pickiest eaters I know, was over when I was testing the recipe, and she loved it!
When I was a kid, I was really lucky if my parents stopped to get me a pizza pop from Syl's Drive-in in Carmen, MB, on the way to my grandparents' farm.
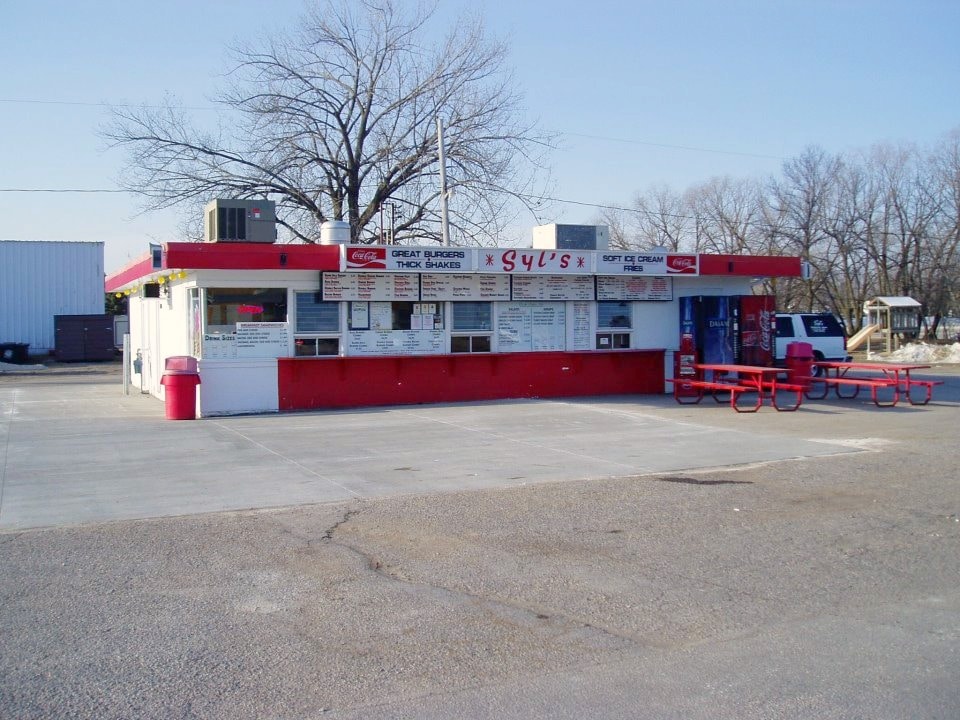
Photo courtesy of Syl's Drive-Inn Facebook Page
Driving out to the farm was pretty much the only time I ever got pizza pops when I was a kid; it really was a rare treat. And I practically lived for them, too! And all these years later, they still give me comfort.
🥘 Ingredient Notes
For these healthy pita pockets, you'll need:
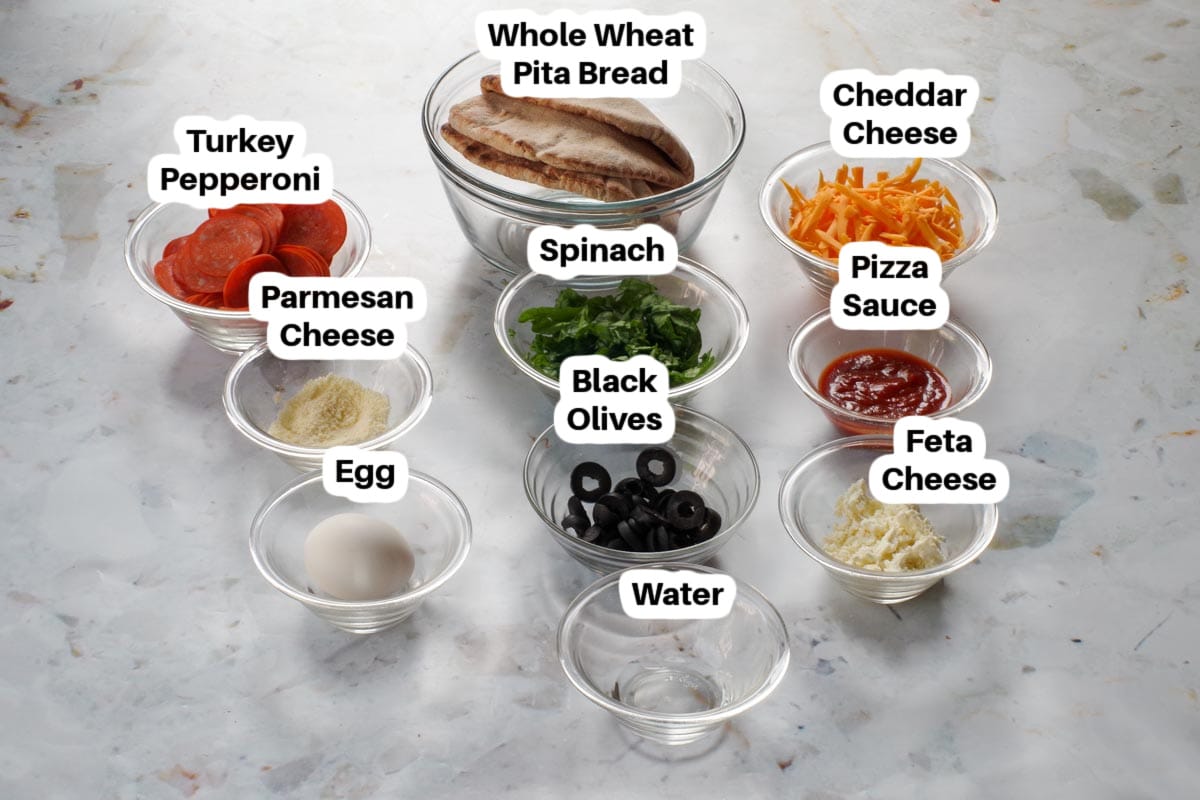
- Whole wheat pita bread. You could use white instead, if you prefer.
- Spinach. Baby spinach is ideal because it is smaller and more tender, but you can use regular spinach and chop it up.
- Pizza sauce. You can use your favorite brand. I use Primo Pizza Squeeze Traditional Pizza Sauce- it's only 1 ww pt for ¼ cup!
- Turkey Pepperoni. Butterball makes a turkey pepperoni- I buy it at Walmart.
- Feta, Cheddar, and Parmesan cheese. I use the light/low-fat versions of all the cheeses.
- Black olives. I use the canned, pitted and pre-sliced olives to save time.
📖 Variations & Substitutions
Fillings: use any type of pizza filling you like for these homemade hot pockets! You can still keep it light and healthy using turkey sausage or turkey bacon instead of turkey pepperoni. You could also use mozzarella cheese instead of cheddar.
🔪How to Make Healthy Hot Pockets
PREP: Preheat oven to 400 degrees F/205 degrees C and spray an aluminum-lined cookie sheet with non-stick cooking spray.
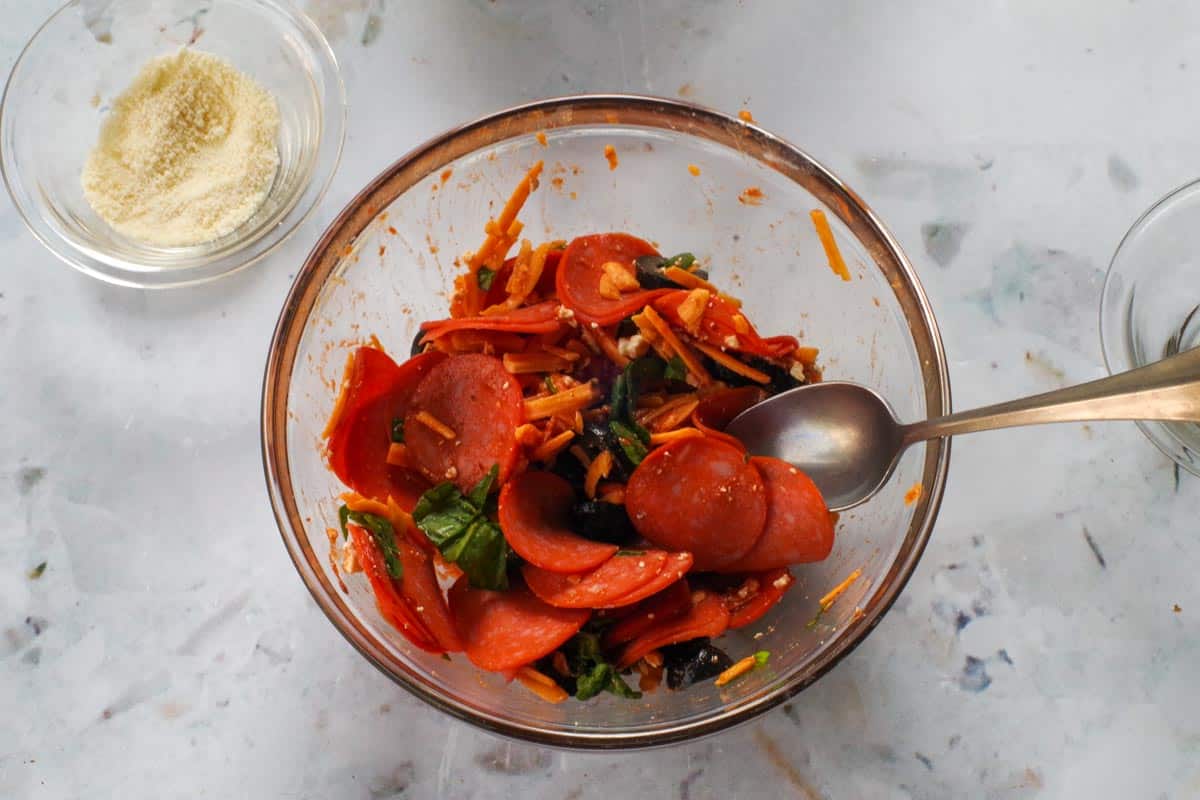
- Step 1: Mix spinach, pepperoni, pizza sauce, black olives, and feta and cheddar cheese together in a bowl.
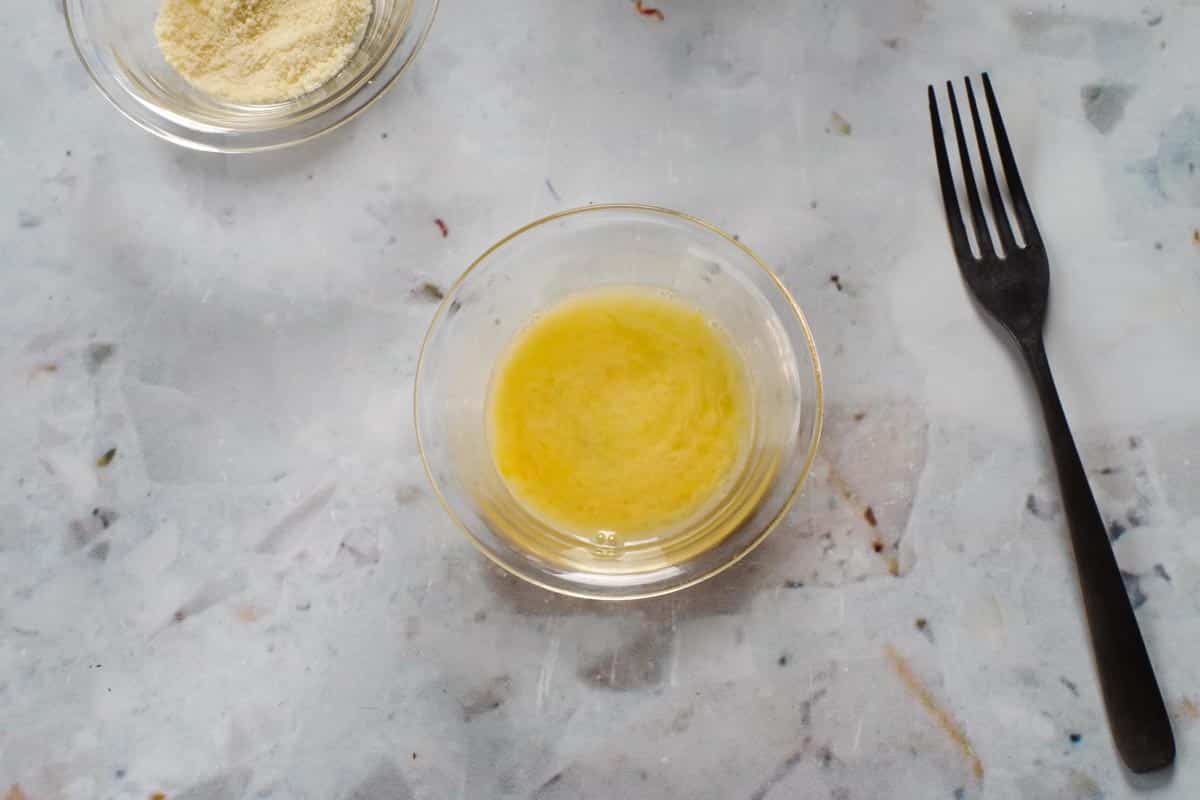
- Step 2: Make egg wash: Add water to the egg and beat together for a few seconds.
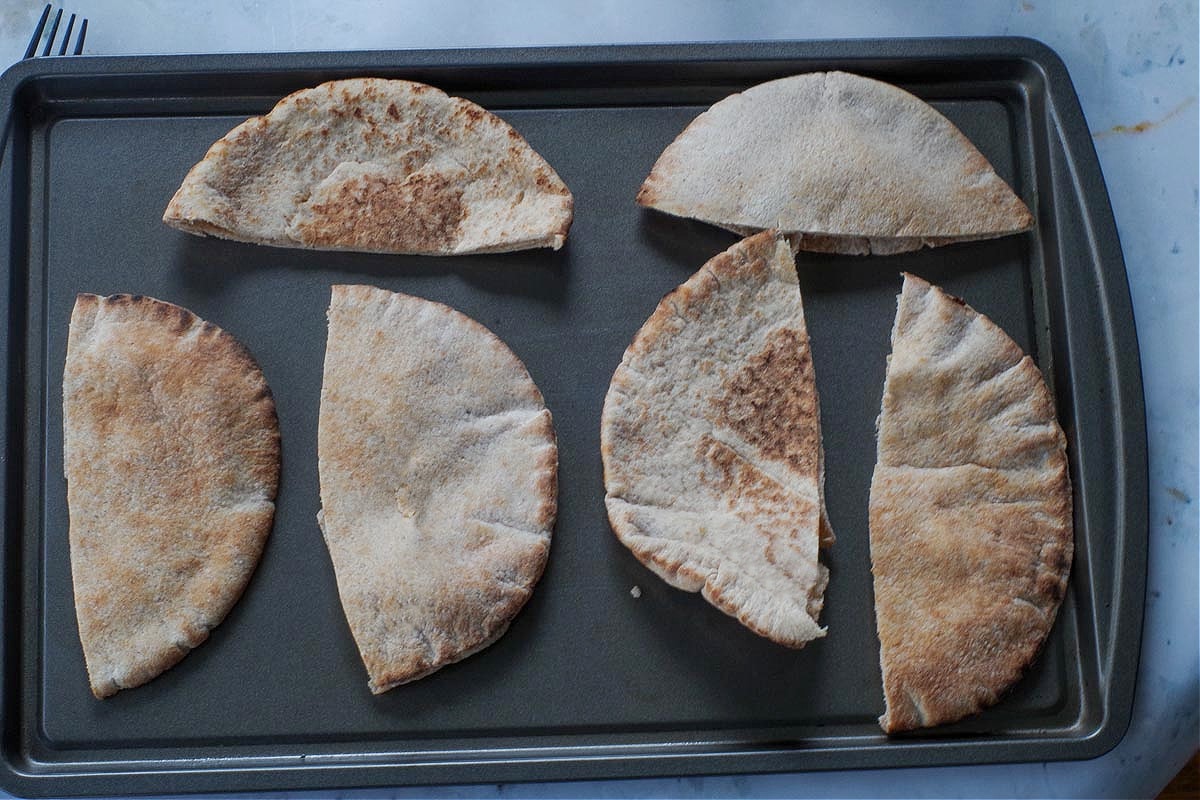
- Step 3: Cut pitas in half, then open (use a knife to gently slice open if necessary).
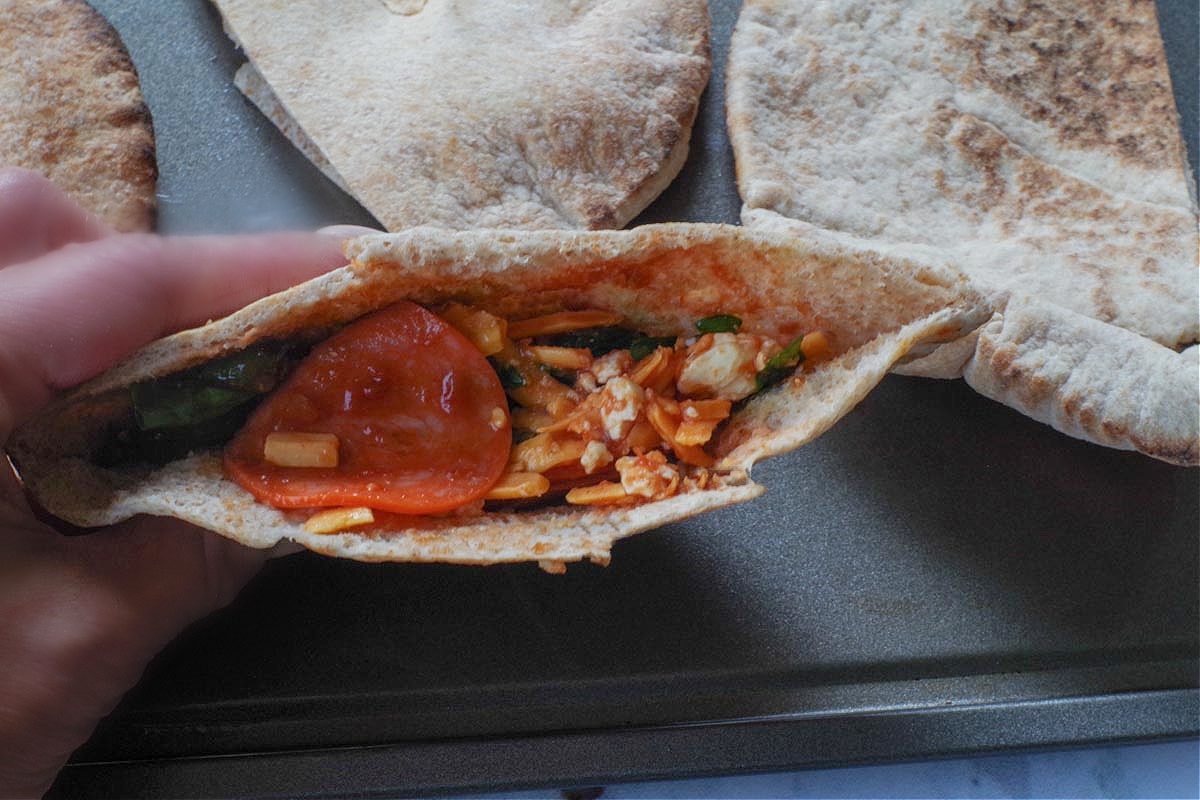
- Step 4: Fill each pita half with about 3 tbsps of the filling.* Do not overfill, or it will be too difficult to seal and will rip.
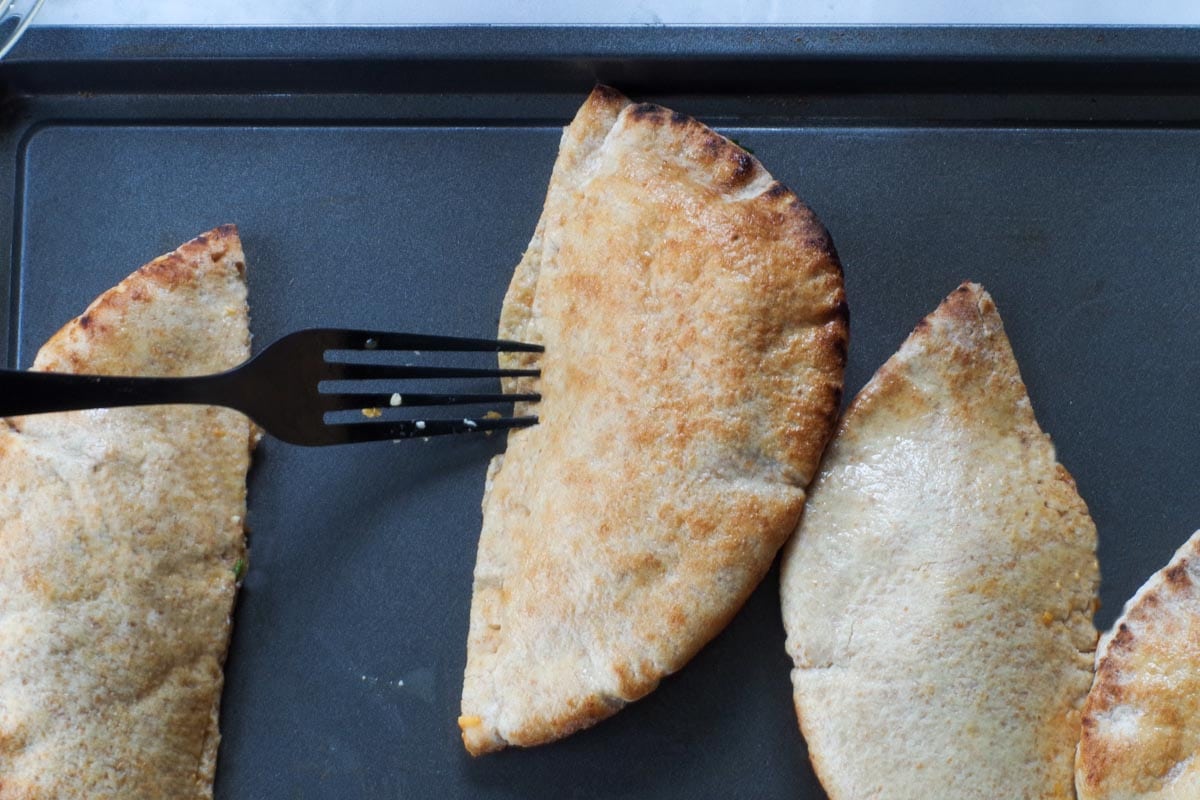
- Step 5: Seal the pita with the egg wash by running the egg wash inside the rim of the pita on each side with a pastry brush. Be careful not to use too much and 'soak it' or it will get soggy and fall apart. Then lay the pita on its side and brush egg wash over the pita until it's covered, but not soaked. Take a fork and press down along the cut of the pita (on the straight side), as you would a pie crust, sealing it in.
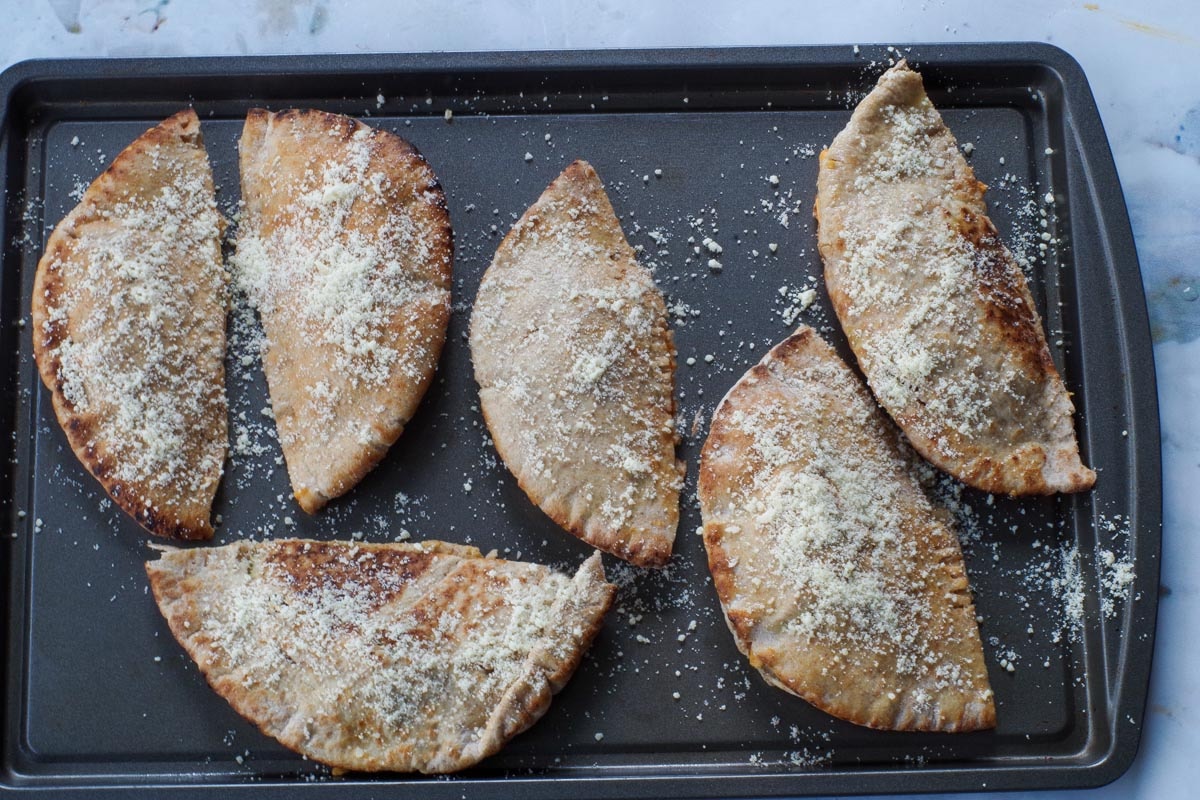
- Step 6: Sprinkle Parmesan Cheese over all of the pizza pockets.
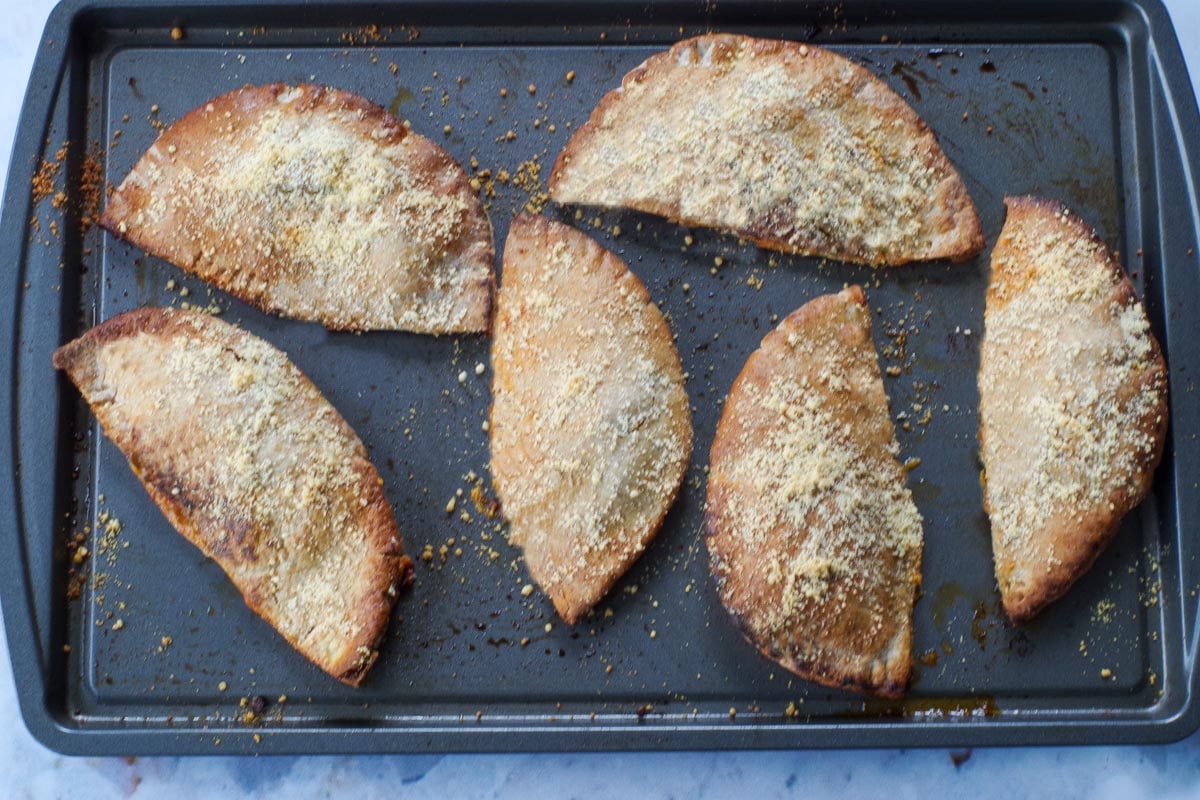
- Step 7: Bake in a preheated oven for 15 minutes.
Expert Recipe Tips
- Don't overfill the pita - 3 tablespoons per half pita is the sweet spot. Too much filling will cause the bread to tear or leak while baking.
- Warm the pita slightly before filling - a few seconds in the microwave makes the pita more pliable and easier to open without ripping.
- Use an egg wash sparingly - brush just enough to seal and lightly coat the outside. Too much liquid will make the pita soggy and harder to crisp.
- Press firmly with a fork - when sealing the cut side of the pita, really press down to "crimp" the edges, like a pie crust, to help lock in the filling.
- Sprinkle Parmesan before baking - this not only adds flavor but also creates a golden, crisp exterior.
- Line your baking sheet with foil or parchment - this prevents sticking and makes cleanup easier if any filling does escape.
- Cool before packing in a lunchbox - if they go in too warm, condensation can make the pita soggy. Let them rest for at least 5 minutes first.
- Make a big batch and freeze - they freeze beautifully, so double the recipe and store extras for quick grab-and-go meals.
Pizza Pops are Canadian
When I was a teenager and had a little more food freedom, my own money and pizza pops were commercially available, I practically lived on them! Little did I know that Pizza Pops were created in Winnipeg, Manitoba!, which also happens to be my hometown.
Although Pillsbury bought out the creators in the early '80's and they are now made by General Mills, pizza pops are truly a Canadian thing. Not only does that make me really proud, but it makes them even more of a comfort food.
And that's why, when I was googling pizza pops, all I could find, aside from Pillsbury pizza pops, was pizza pockets. Because that's what they are called in the United States. That, or hot pockets or stuffed pizza pockets.
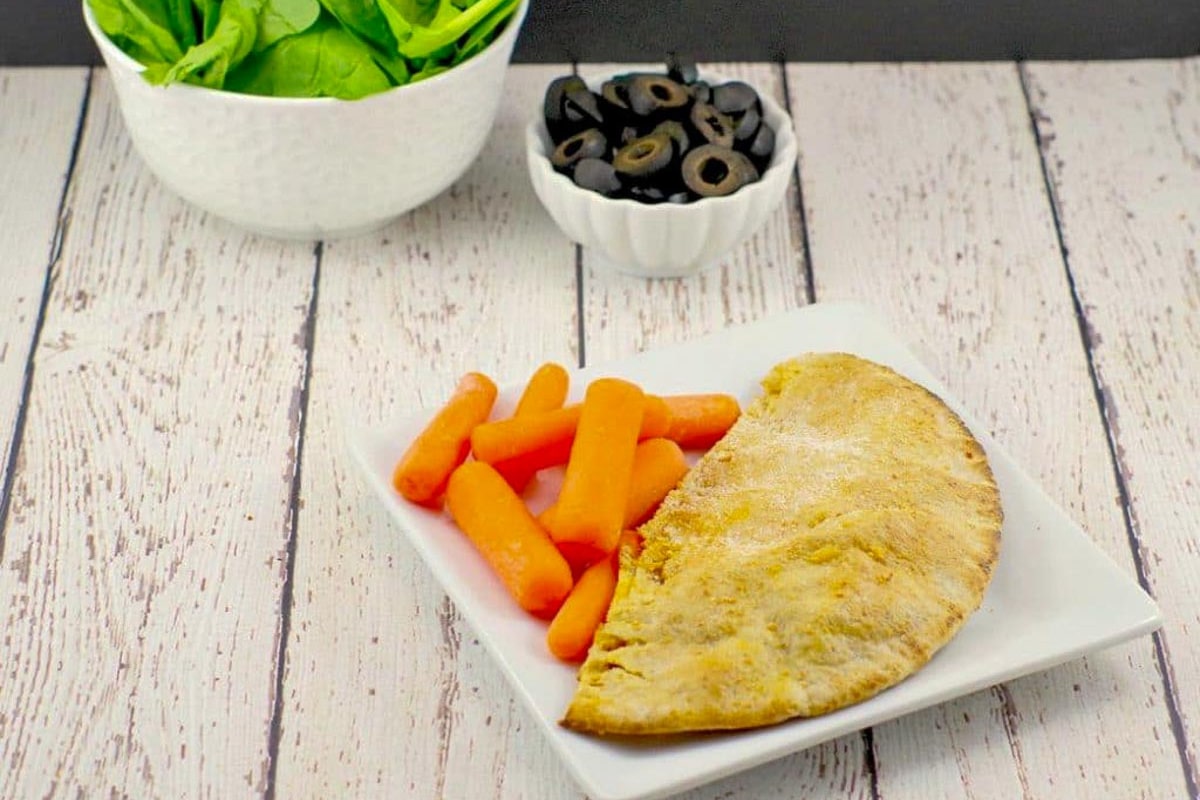
🥗 What to Serve with Healthy Pizza Pockets
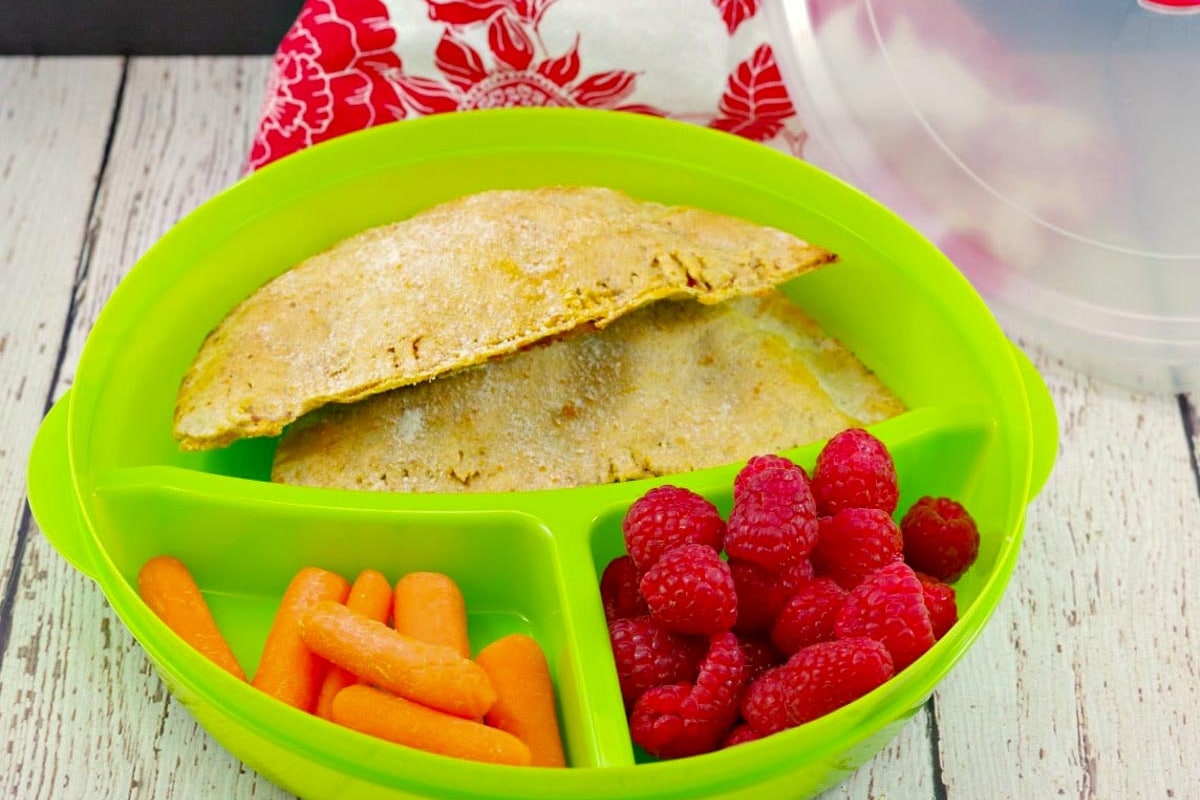
If you're sending these pizza pops along in a lunch box, then I recommend serving vegetables like baby carrots or this Quick Cucumber Kimchi, fresh fruit, or salad like my Easy Quinoa Salad. Homemade Chocolate Yogurt is a great dessert to serve alongside these pizza pops, especially in a packed lunch!
🔢WW Points
These Pizza pockets are 6 ww points per serving. But you could reduce the points further by using fat-free parmesan, cheddar, and feta. I use Primo Pizza Squeeze Traditional Pizza Sauce- it's only 1 ww pt for ¼ cup!
🌡️Storing
- Fridge: you can keep these in the fridge for up to 3 days in a sealed container
- Freezer: you can freeze these pizza pops for up to 3 months in a sealed container or ziplock bag
- Reheating: you can reheat from frozen in the microwave for 1-2 minutes, depending on your microwave.
- To keep warm: Wrap in aluminum foil before adding to an insulated lunch bag. *Do not reheat with aluminum foil on
❔ Recipe FAQs
Yes, they're delicious both hot and cold, which makes them perfect for lunch boxes or on-the-go meals.
Yes! Place the sealed pita pockets in a preheated air fryer at 375°F (190°C) and cook for 6-8 minutes, checking halfway through, until golden and crisp.
Avoid overstuffing the pita, and be sure to seal it well with the egg wash and fork crimping. Brushing the outside lightly with egg wash also helps hold everything together.
Yes! You can prepare and bake them in advance, then store them in the fridge for up to 3 days or freeze them for up to 3 months. They reheat well in the microwave, making them a great meal-prep option.
Didn't find the answer you're looking for?
Ask AI to answer based on this specific recipe
This recipe is perfect for picky eaters. My daughter's friend was over when I was testing these (she's an extremely picky eater) and LOVED this! So, if you're looking for healthy hot pockets, you'll love this one!
🍱More Lunch Box Recipes!


Did your family❤️this recipe? Did you know that commenting and⭐rating recipes is one of the best ways to support your favorite recipe creators? If you LOVED this recipe, please comment and rate it in the recipe card or share photos on social media using the hashtag #foodmeanderings or tagging @foodmeanderings !


📋 Healthy Pita Pizza Pocket Recipe
Ingredients
- 3 whole wheat pitas, cut in half
- 1 whole egg
- 2 teaspoon water
- ⅔ cup finely chopped spinach
- 4 tablespoon pizza sauce * your favorite brand
- ¾ cup low-fat cheddar
- 1 -175 g package of turkey pepperoni
- 2 tablespoon light feta cheese, crumbled
- 2 tablespoon sliced black olives
- 2 tablespoon light parmesan cheese
Instructions
- Preheat oven to 400 degrees F/205 degrees C and spray an aluminum lined cookie sheet with non-stick cooking spray.
- Mix spinach, pepperoni, pizza sauce, black olives and cheese together in a bowl.
- Make egg wash: Add water to egg and beat together for a few seconds.
- Cut pitas in half, then open (use a knife to gently slice open if necessary) each pita and stuff it with about 3 tbsps of the filling * Do not overfill or it will be too difficult to seal and will rip.
- Seal the pita with the egg wash by running the egg wash inside the rim of the pita on each side with a pastry brush. Be careful not to use too much and 'soak it' or it will get soggy and fall apart. Then brush egg wash over the pita until it's covered, but not soaked.
- Take a fork and press down along the cut of the pita (on the straight side), as you would a pie crust, sealing it in.
- Sprinkle each pita with parmesan cheese, distributing equally between the pitas. Bake in preheated oven for 15 minutes.
- Serve hot as a meal or snack with raw veggies (like carrots and celery) and berries or pack for a lunch (they can be reheated or eaten cold). You can also freeze them.
Notes
- Fridge: you can keep these in the fridge for up to 3 days in a sealed container
- Freezer: you can freeze these pizza pops for up to 3 months in a sealed container or ziplock bag
- Reheating: you can reheat from frozen in the microwave for 1-2 minutes, depending on your microwave.
- To keep warm: Wrap in aluminum foil before adding to an insulated lunch bag. *Do not reheat with aluminum foil
- Don't overfill the pita - 3 tablespoons per half pita is the sweet spot. Too much filling will cause the bread to tear or leak while baking.
- Warm the pita slightly before filling - a few seconds in the microwave makes the pita more pliable and easier to open without ripping.
- Use an egg wash sparingly - brush just enough to seal and lightly coat the outside. Too much liquid will make the pita soggy and harder to crisp.
- Press firmly with a fork - when sealing the cut side of the pita, really press down to "crimp" the edges, like a pie crust, to help lock in the filling.
- Sprinkle Parmesan before baking - this not only adds flavor but also creates a golden, crisp exterior.
- Line your baking sheet with foil or parchment - this prevents sticking and makes cleanup easier if any filling does escape.
- Cool before packing in a lunchbox - if they go in too warm, condensation can make the pita soggy. Let them rest for at least 5 minutes first.
- Make a big batch and freeze - they freeze beautifully, so double the recipe and store extras for quick grab-and-go meals.


Chef Markus Mueller says
Really liking your take on using pitas as the crust for these pizza pockets! I have always made 'hand pie' style pizza pockets where you make the dough your self and then wrap it around the filling kind of like a calzone..its super messy though, and really takes a lot of practice to get good at|! This is so much easier!
Terri Gilson says
Thanks, Markus! Yes, this is really easy and although I love pizza dough, I agree, it takes time, practice and it's a lot more calories! 🙂