


An easy no bake adorable Easter treat for kids and adults alike! These 3 ingredient Easter Bunny Dirt Cups are the perfect Easter Bunny Dessert. Made with prepared snack pudding, marshmallows, chocolate baking crumbs (or Oreo cookie crumbs), mini marshmallows, and a marshmallow bunny butt, they taste like s'more, look like burrowing bunnies, and are a snap to throw together!

These Easter Dirt Cups are popular during the Easter season, but great for Earth Day or a spring birthday party. They also make great Easter crafts for kids! Whether you bring them to an Easter potluck or whip them up for a treat at home, these marshmallow bunny burrows are quick, easy, and delicious!
Jump to:
If you love easy Easter treats, be sure to give my Microwave Easter Egg Fudge a try too. Looking for more dirt cups? Check out my Earth Day Jello Worms and Dirt Cups!
🥘 Ingredient Notes
All you need is 3 ingredients (large and mini marshmallows, chocolate baking crumbs, and chocolate pudding) and an edible marker to make easy Easter bunny marshmallow treats and it will take you no time at all (15 minutes)!
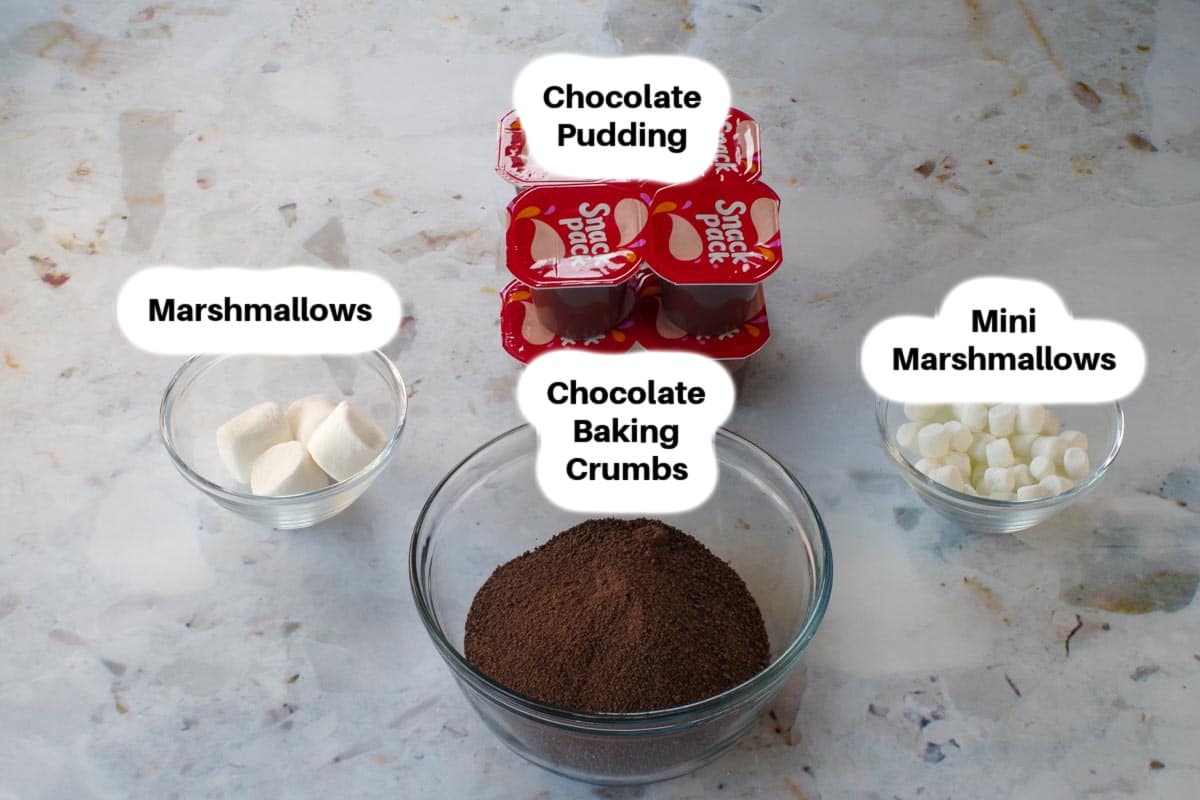
- Chocolate Baking Crumbs. You can use any kind of chocolate baking crumbs, including Oreo. But if you can't find them, just break up Oreo cookies or chocolate wafer cookies and use those instead. I used to use crushed-up chocolate graham crackers but they have been discontinued.
- Chocolate Pudding. I find it easiest to use prepared chocolate pudding cups, especially when you're working with kids. They are perfectly portioned and there's no messing with electric mixers. However, you can use instant chocolate pudding (or even homemade chocolate pudding) instead!
*Please see recipe card for full list of ingredients and quantities
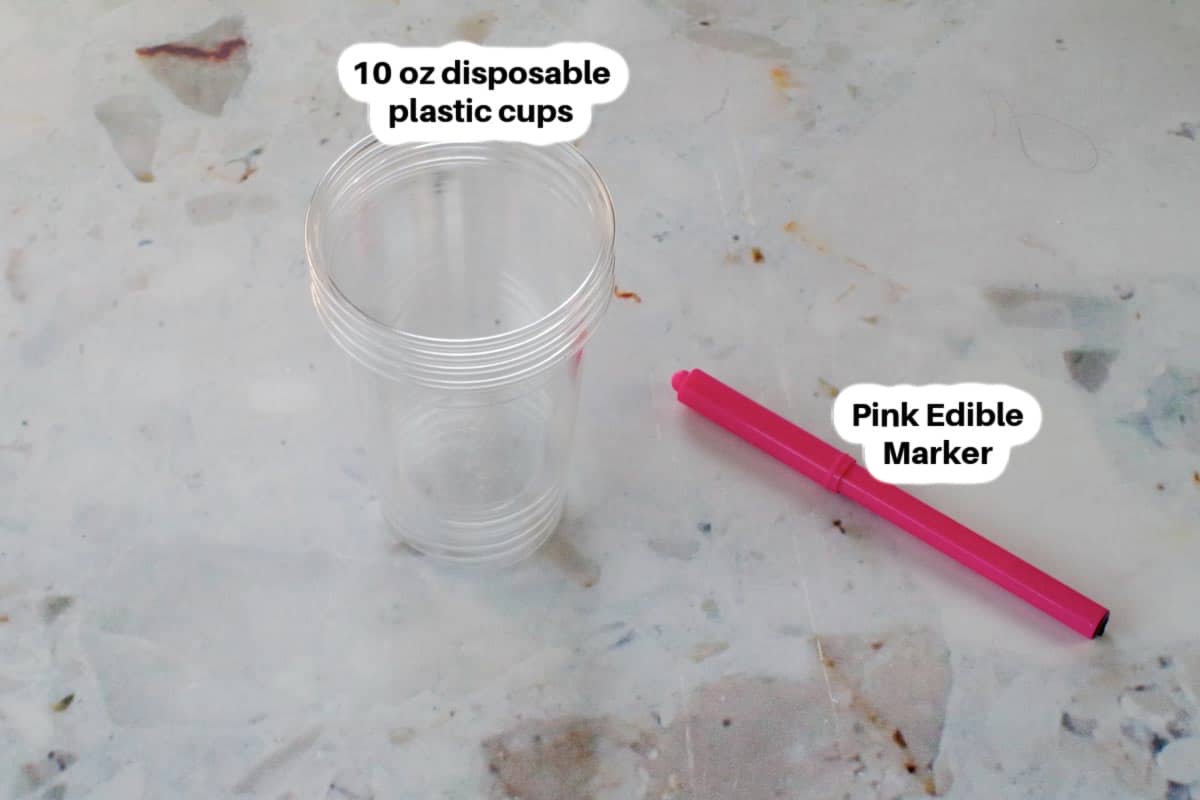
- Pink Edible Marker. You need an edible marker to draw the marks on the marshmallow bunny paws but you'll have to buy the whole package, as pink doesn't come as a single color (only black). This is so much simpler than fussing with fondant, like so many bunny burrow recipes require. As a cake and cookie decorator, I have done a lot of decorating with edible markers over the years and these Americolor Gourmet Food Writers , (affiliate link) are by far, my favorite ones! They have a fine end that makes for precise decorating, you don't have to press hard with them, they have a nice color and they don't dry out quickly like some other brands do. There are several other brands of edible markers you can purchase at a cake decorating or craft store or online.
- 10 oz clear cups. I use disposable clear plastic cups because they are easiest and you don't have to worry about them breaking. However, you could you any clear glass or cup you prefer. If you use a smaller or larger cup, adjust ingredient portions for size.
🔪How to Make Easter Dirt Cups
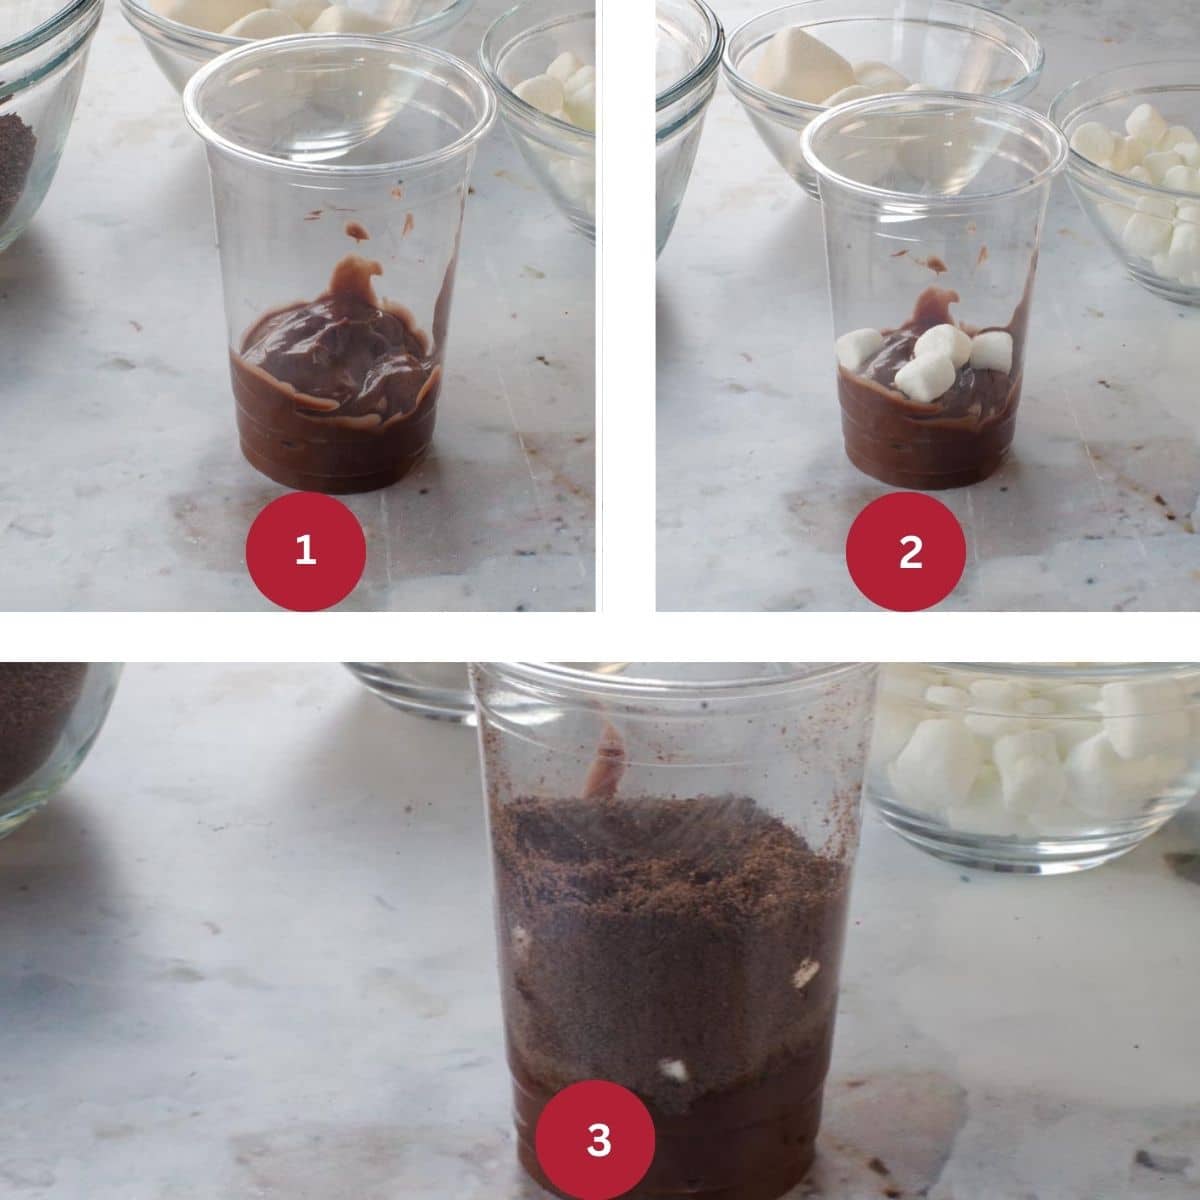
MAKE THE DIRT CUP FIRST LAYER (STEP 1): Add (approximately) 99 g container (3.25 - 3.5 oz approximately) of chocolate pudding to 10 oz plastic cups * You may only be able to find 92 g containers - as long as it's approximately the same amount. If you are using a smaller cup, adjust quantities (IMAGE 1). Then add about 3-4 mini marshmallows. Feel free to add more (in both layers) if you wish! (IMAGE 2). Add a layer of chocolate baking crumbs (¼ cup) *If you are using Oreo or chocolate cookies, you can break them up in the food processor or with a rolling pin (IMAGE 3).
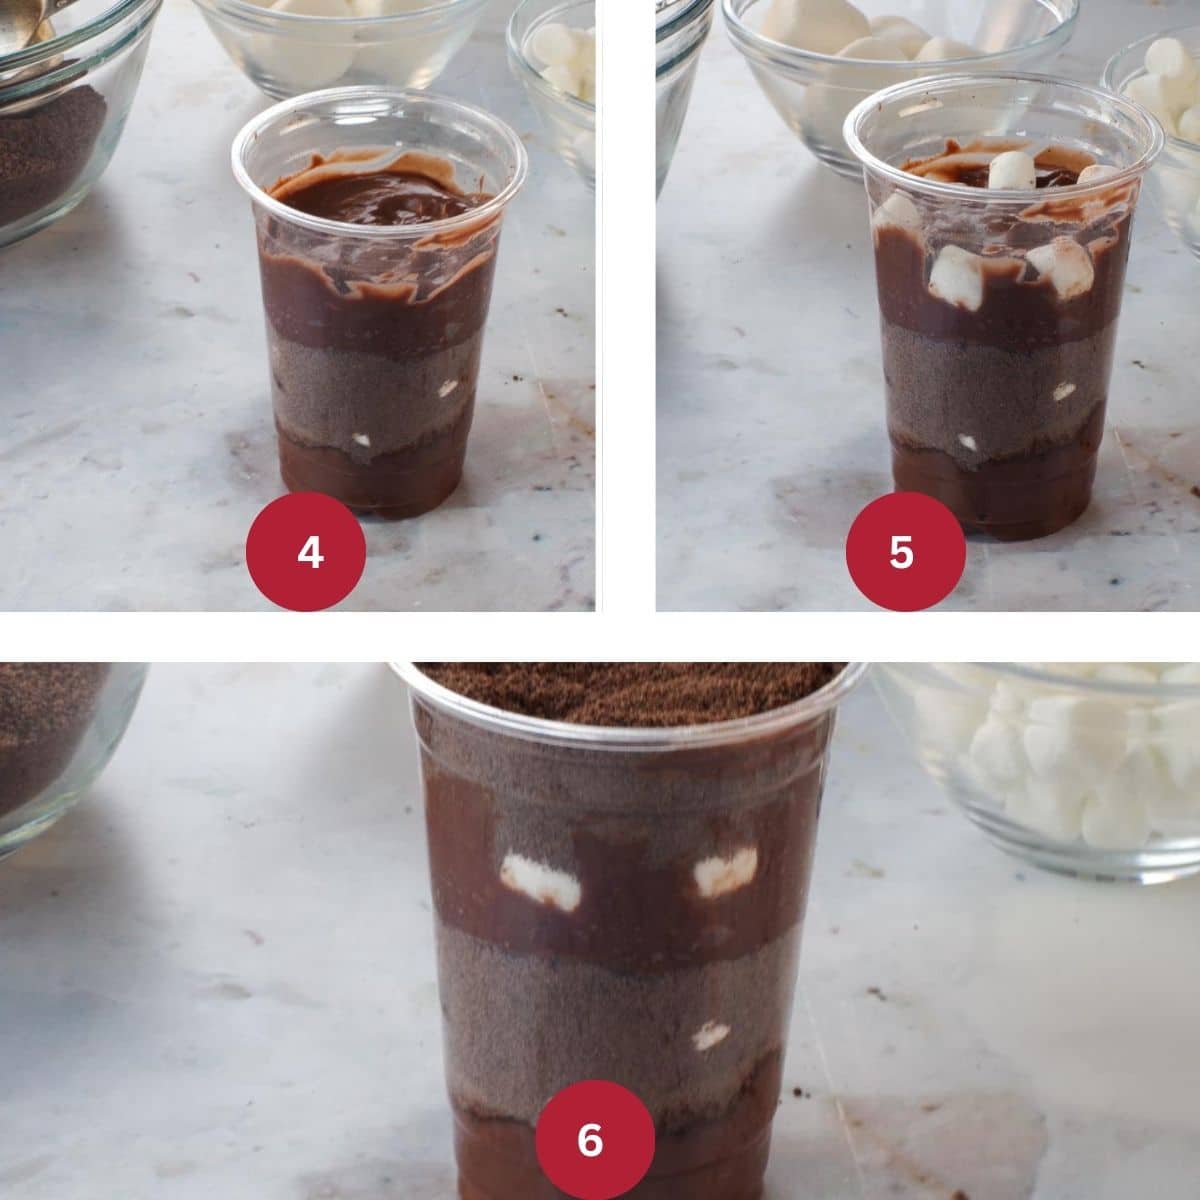
MAKE THE DIRT CUP SECOND LAYER (STEP 2): Then add another layer of chocolate pudding (IMAGE 4) and add a few more mini marshmallows, pushing them down into the cup so you can see them against the sides (IMAGE 5). Top with more chocolate baking crumbs (¼ cup) (IMAGE 6).
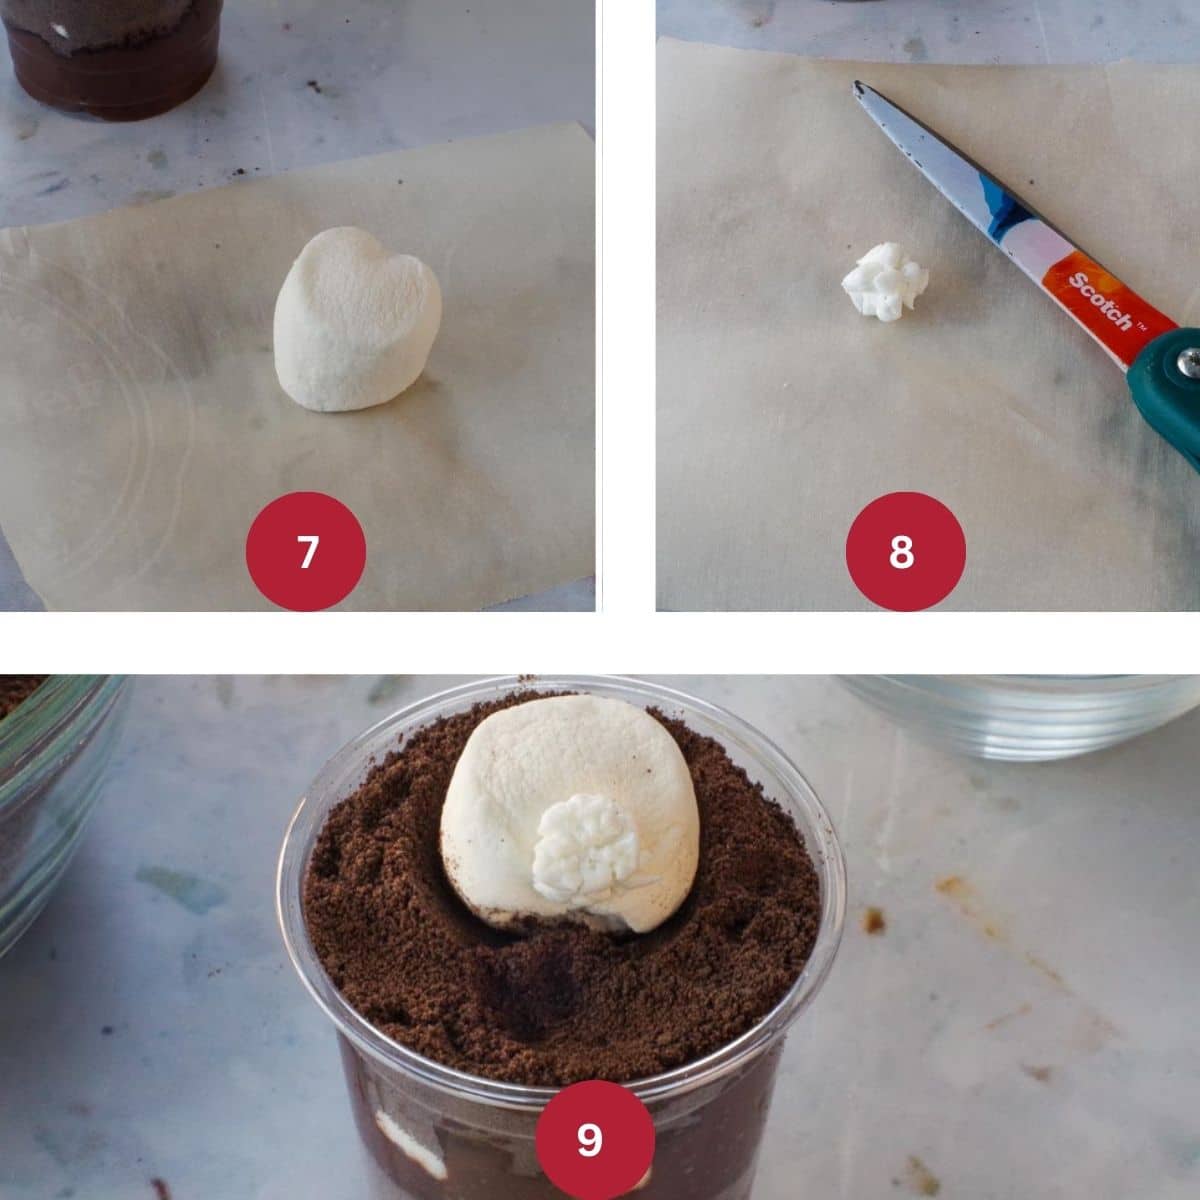
MAKE THE BUNNY BUTT (STEP 3): Take a large marshmallow and roll it between your palms to make it as round as possible *You can also heat it in the microwave for about 3 seconds to soften it (IMAGE 7). Take a mini marshmallow and cut into it from all sides, making tiny cuts, with clean/new scissors (I use a small pair of scissors I only use for food). ***SEE VIDEO IN NOTES (IMAGE 8). Place the bunny butt in the middle of the cup and stick the bunny tail onto the large marshmallow with a dab of water (IMAGE 9).
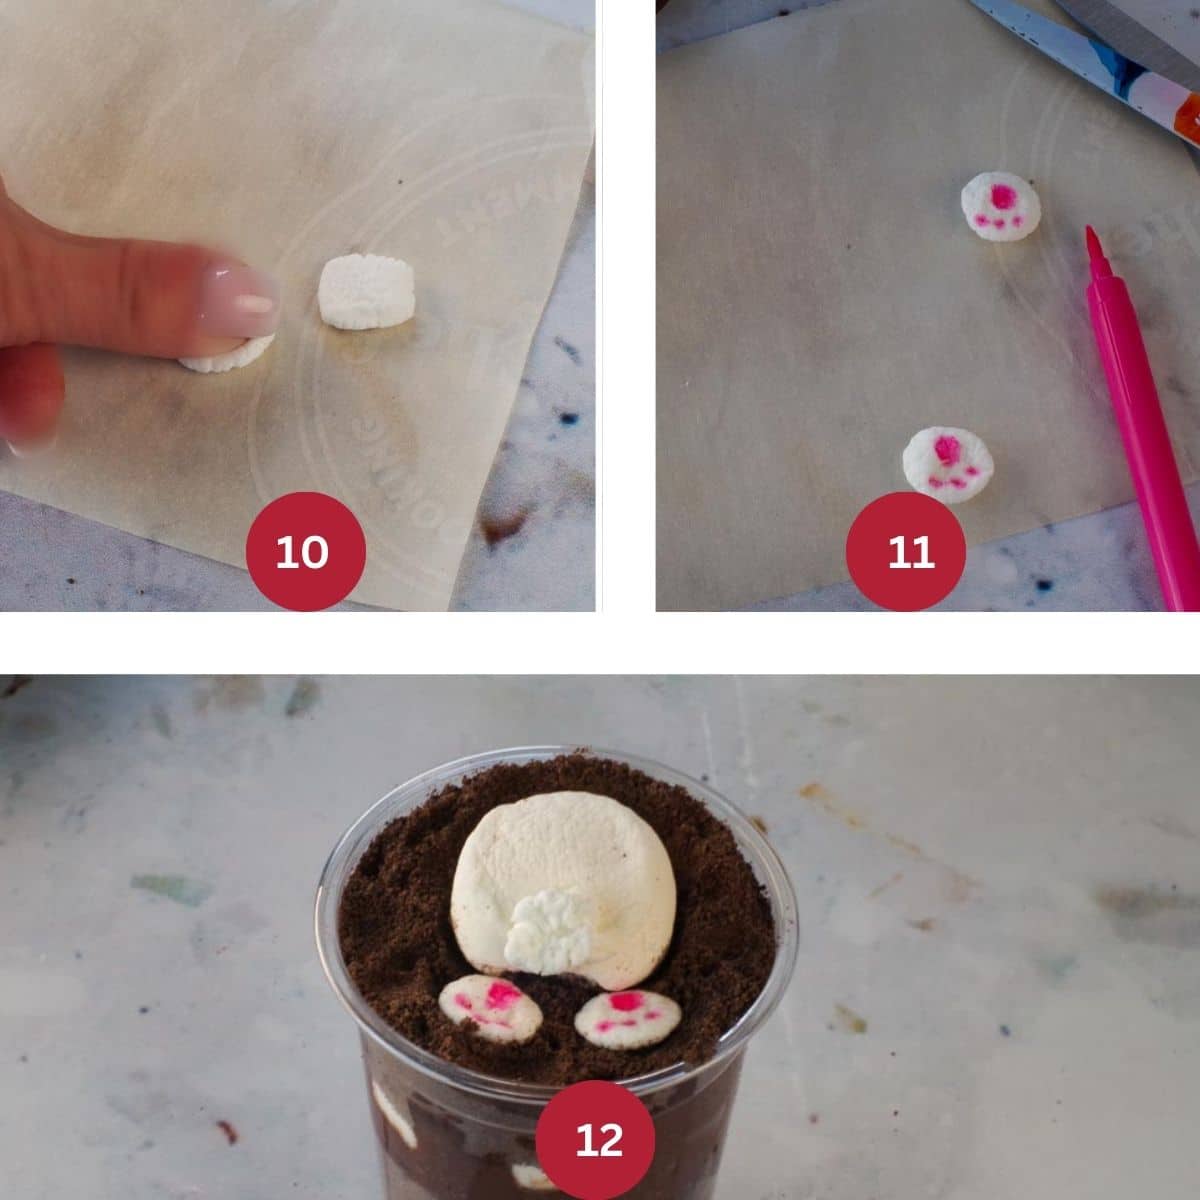
MAKE THE BUNNY PAWS (STEP 4): Flatten 2 mini marshmallows with your thumb. Trim the corners off and try to make it as round as possible, but it doesn't have to be perfect - you can cover any uneven edges with graham crumbs or 'chocolate dirt' (IMAGE 10). With your pink edible marker, draw a pink circle in the middle of the mini marshmallow, then draw 3 pink dots underneath. Repeat on the 2nd paw. (IMAGE 11). Add the paws and repeat for the remaining dirt cups (IMAGE 12).
Expert Tips
- Use Pre-Made Pudding for Convenience. Store-bought snack pack chocolate pudding is the easiest option, especially when making these with kids. No need to mix or measure-just open and pour! If using instant pudding, make sure to let it set fully before assembling the cups.
- Perfecting the Bunny Paws & Tail. To get even, rounded bunny paws, gently flatten mini marshmallows with your thumb before trimming them. Use an edible marker for easy decorating-no need to fuss with fondant or icing! To make a fluffy bunny tail, make tiny snips in a mini marshmallow using small, clean scissors.
- Make Ahead for Parties. These dirt cups can be made up to 24 hours in advance. Store them covered in the refrigerator and add the bunny decorations right before serving. If storing longer, separate the layers (pudding, crumbs, and decorations) and assemble just before serving to keep the texture fresh.
- Kid-Friendly AssemblyTips. If making with kids, prep the marshmallows and decorations ahead of time to keep things simple. Use small disposable cups to make mini versions for younger children.
- Use Clear Cups for Best Presentation. Transparent cups make the layered look stand out, so you can see the pudding, crumbs, and marshmallow details.
So, if you are looking for no bake Easter dessert ideas, Easter potluck ideas Easter treat ideas for kids, or Easter food crafts for kids, these are perfect. Older kids can easily do this marshmallow bunny craft too.
👪 Serving size
This marshmallow bunny recipe makes 4 servings but really small kids may be able to share one because they are pretty big. However, to be honest, I've never had a kid not be able to finish one (they are chocolate, after all 🙂 ).
❔Recipe FAQ's
While an edible marker makes it easier, you can also use pink gel icing, melted pink candy melts, or melted pink chocolate to draw the paw prints. You could also use pink fondant.
Store any leftover dirt cups covered in the refrigerator for up to 2 days. However, the crumbs may soften over time.
Yes! This is a kid-friendly recipe. However, younger children may need help cutting the mini marshmallows for the bunny paws and tail.
Yes! You can make them up to 24 hours in advance. Just cover and store them in the fridge. Add the bunny decorations right before serving for the best presentation.
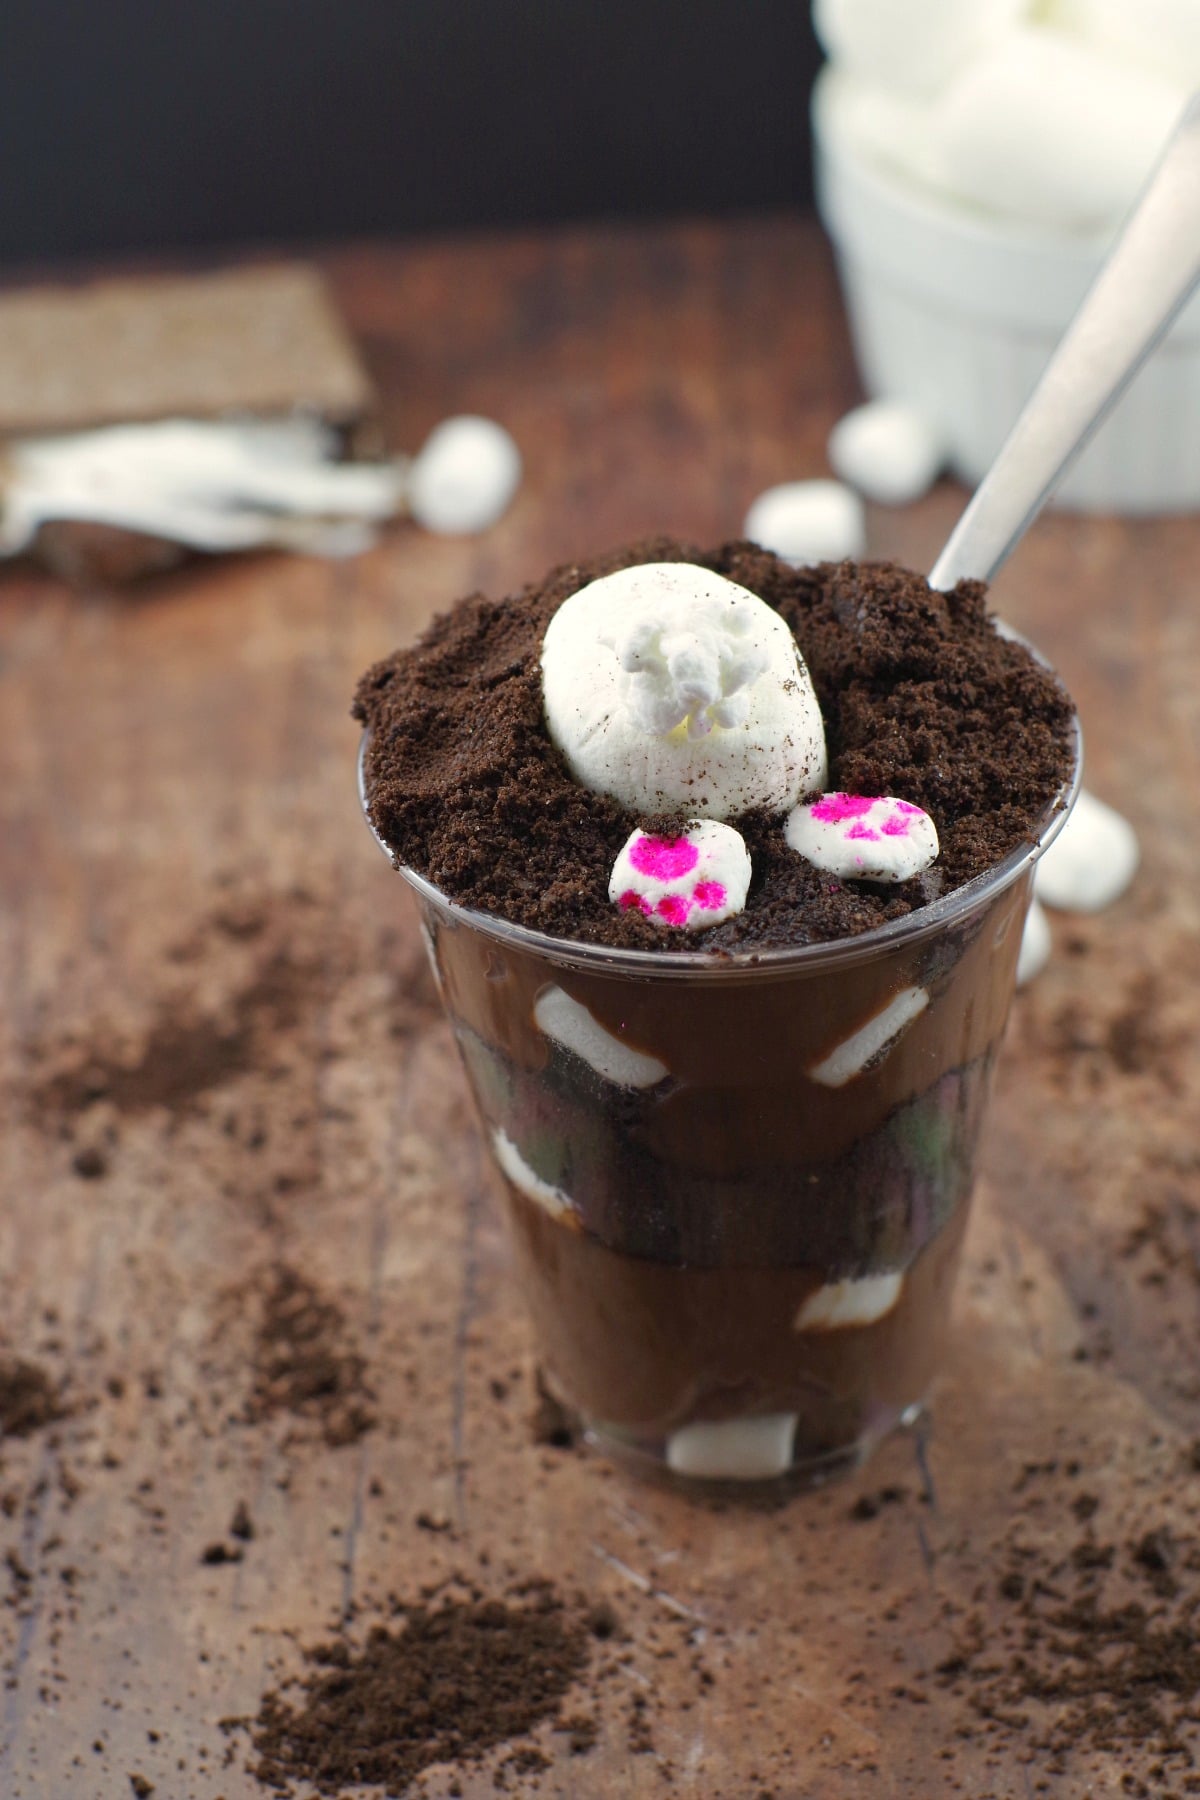
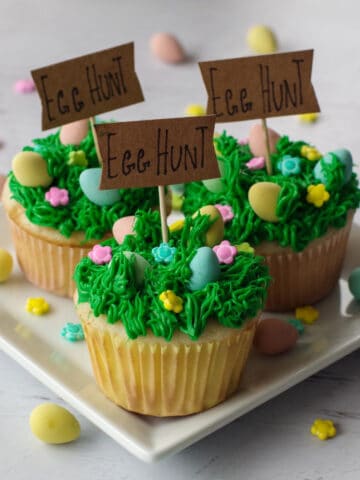
And if you are looking for other fun and easy Easter desserts you don't have to hunt your living room for, check out my NO Bake Easter Cream Egg Icebox Cake (shown). It's the perfect Easter dessert because it's quick, and easy and you get to use up your leftover Easter Cream eggs (or even buy more, which is just as good!)
If you're serving these at Easter Bunny Dirt Cups at an Easter Party, this Easter punch is the perfect drink to accompany your party food!
🐰More Easter Recipes
Did your family❤️this recipe? Did you know that commenting and⭐rating recipes is one of the best ways to support your favorite recipe creators? If you LOVED this recipe, please comment and rate it in the recipe card or share photos on social media using the hashtag #foodmeanderings or tagging @foodmeanderings !


📋 Easter Bunny Dirt Cups Recipe
Ingredients
- 8 3.25 oz chocolate pudding snacks (99 g) or substitute 2 pkgs of chocolate instant pudding
- 2 cups chocolate baking crumbs or Oreo cookie crumbs or crushed Oreo cookies
- 4 large marshmallows
- 32 mini marshmallows approximately
Instructions
Make the Dirt Cups:
- Add (approximately) a 99 g container (3.25-3.5 ounces) of chocolate pudding to 10 oz plastic cups * You may only be able to find 92 g containers - as long as it's approximately the same amount. If you are using a smaller cup, adjust quantities.
- Then add about 3-4 mini marshmallows (or add more if you wish).
- Add a layer of chocolate baking crumbs (¼ cup).
- Then add another container of pudding.
- Add a few more mini marshmallows, pushing them down into the cup so you can see them against the sides.
- Top with more crushed chocolate baking crumbs.
Assemble bunny butt:
- Take a large marshmallow and roll it between your palms to make it as round as possible. You can also heat it in the microwave for about 3 seconds to soften it.
- Take a mini marshmallow and cut into it from all sides, making tiny cuts, with clean/new scissors (I use a small pair of scissors I only use for food). ***SEE VIDEO IN NOTES
- Stick the bunny tail onto the large marshmallow with a dab of water, as shown.
Make the paws:
- Flatten 2 mini marshmallows with your thumb
- Trim the corners off and try to make it as round as possible, but it doesn't have to be perfect - you can cover any uneven edges with graham crumb or oreo'dirt'.
- With your pink edible marker, draw a pink circle in the middle of the mini marshmallow, then draw 3 pink dots underneath, as shown.
- Repeat on the 2nd paw.
- Place the bunny butt in the middle of the cup and add the paws as shown in the photo. Repeat for remaining bunny dirt cups
- Serve warm or cold.
Notes
- Use Pre-Made Pudding for Convenience. Store-bought snack pack chocolate pudding is the easiest option, especially when making these with kids. No need to mix or measure-just open and pour! If using instant pudding, make sure to let it set fully before assembling the cups.
- Perfecting the Bunny Paws & Tail. To get even, rounded bunny paws, gently flatten mini marshmallows with your thumb before trimming them. Use an edible marker for easy decorating-no need to fuss with fondant or icing! To make a fluffy bunny tail, make tiny snips in a mini marshmallow using small, clean scissors.
- Make Ahead for Parties. These dirt cups can be made up to 24 hours in advance. Store them covered in the refrigerator and add the bunny decorations right before serving. If storing longer, separate the layers (pudding, crumbs, and decorations) and assemble just before serving to keep the texture fresh.
- Kid-Friendly AssemblyTips. If making with kids, prep the marshmallows and decorations ahead of time to keep things simple. Use small disposable cups to make mini versions for younger children.
- Use Clear Cups for Best Presentation. Transparent cups make the layered look stand out, so you can see the pudding, crumbs, and marshmallow details.
How to make a bunny tail out of a mini marshmallow
Nutrition


Melainah Marie says
im going to make this in my coulanary class for 8th grade
Terri Gilson says
Great! I hope you have fun and enjoy it!
Terri
Eileen Kelly says
I am all about no bake treats. These easter treats are perfect for making with my niece. She loved it.
Carlos at Spoonabilities says
I really love no-bake dessert. They are easy and super tasty!
Thank you for adding the photo instructions on the recipe card. It's very helpful!
Terri Gilson says
Thank you, Carlos! I'm glad the directions help!
colleen kennedy says
Such a festive and cute idea! Almost to cute to eat!
Jersey Girl Cooks says
These are adorable! I have a weakness for pudding!
Anne Lawton says
This is such a cute idea! Perfect for Easter.
Laura says
I just pinned this recipe. I'm definitely making it. Thanks!
Terri Gilson says
So easy and fun 🙂
MariaMay says
These sound amazing! I have a soft spot in my heart for sandwiches. Always a favorite growing up! Can’t wait to try these homemade ones! They look perfect! My taste buds are dancing now with a taste excitation. Your presentation looks so good and cool.
Terri Gilson says
Thanks- I hope you enjoy them!