If you're tired of store-bought granola bars with all that refined sugar and preservatives, you will LOVE these homemade No Bake Granola Bars! Naturally sweetened and loaded with healthy seeds, nuts, fruit, chocolate, and oats, these granola bars are tasty, wholesome, hearty, and easy to make!
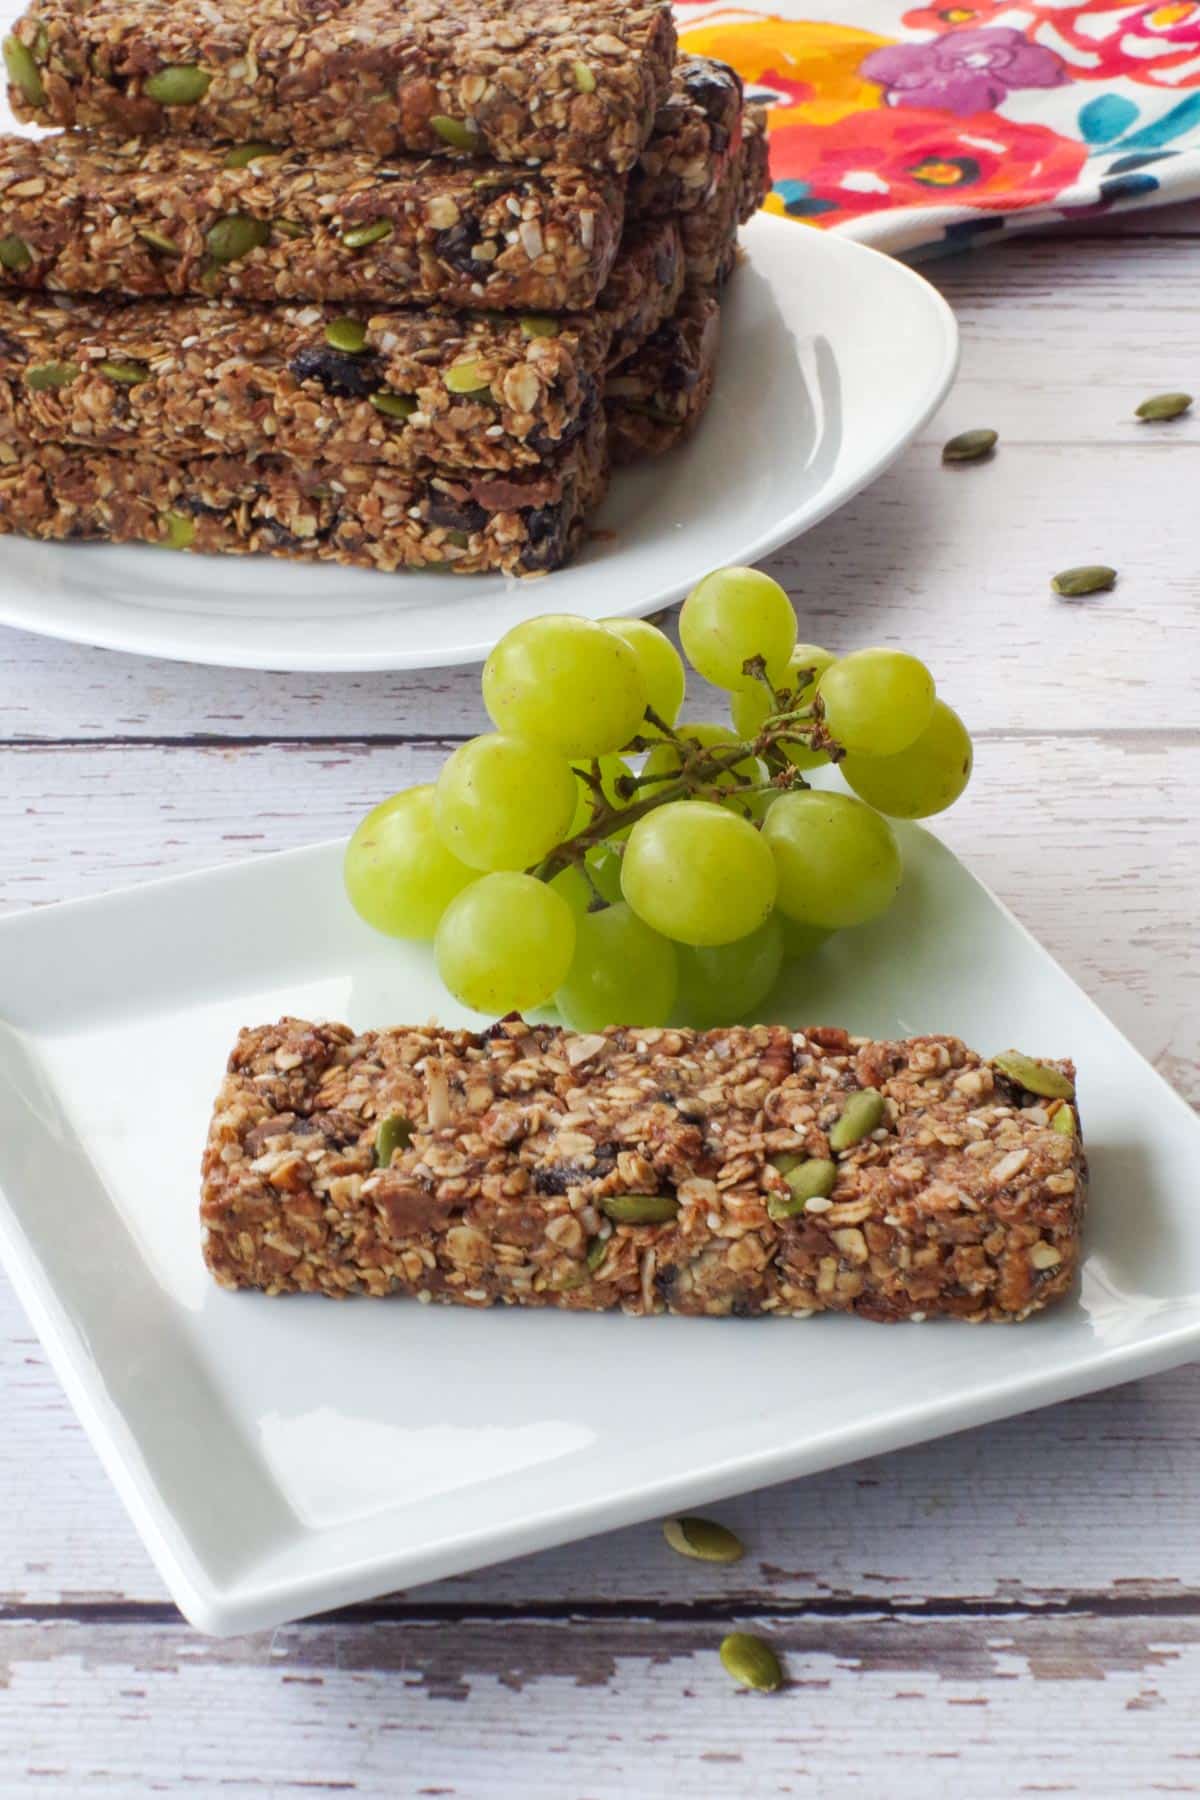
No Bake Granola Bars are popular in the summer, but great for any time of the year (especially back-to-school time). They make an easy breakfast, healthy snack, or dessert and are ideal for packing in a lunch bag! This recipe was inspired by my Pecan Brown Butter Granola and my Homemade Energy bars.
Jump to:
🥘Ingredients
I'm not a big fan of peanut butter in my granola bars, as the flavor tends to be somewhat overpowering. That's why I use almond butter- it has a milder taste that melds much better with the other flavors in these bars.

- 2 cups quick rolled oats
- ½ cup pumpkin seeds *raw unsalted
- ⅓ cup chopped pecans *raw unsalted
- ¼ cup shredded unsweetened coconut
- ¾ cup dried cherries (you can chop them up, if you prefer)
- ⅓ cup mini chocolate chips * I use semi-sweet chocolate chips
- 2 tbsp chia seeds
- 1 tbsp sesame seeds
- 1 tsp cinnamon
- ⅔ cup almond butter
- 2 tbsps coconut oil
- ¼ cup honey
🔪Instructions
Prep: Spray granola bar molds (or pan) with non-stick cooking spray.

- Step 1: Mix dry ingredients (dried cherries, pumpkin seeds, quick oats, sesame seeds, mini chocolate chips, chia seeds, cinnamon, coconut, and pecans) together in a large bowl.

- Step 2: Melt coconut oil, almond butter, and honey together on the stovetop on medium low, stirring frequently. Remove when fully combined and melted *Watch carefully because it can burn!

- Step 3: Pour the wet ingredients into dry ingredients and mix until fully incorporated.

- Step 4: If you have molds you can fill them or shape them into bars on your own. Alternatively, you can make them in a 8x8 pan, or double the recipe (for 20 bars) and make them in a 9x13 pan. Place in refrigerator to set for at least 2 hours or overnight.
Hint: Pack as much of the granola bar mixture tightly into the molds or your pan as possible - this will help them stay together. You can wet your spatula (or hands) to help you press the granola bar mixture into the molds - this will prevent it from getting sticky.
📖 Variations & Substitutions
- Pumpkin seeds - You can use raw unsalted sunflower seeds or hemp seeds instead
- Dairy-free- You can use dairy-free chocolate chips
- Chocolate chips- you can use mini dark chocolate chips instead
- Dried Fruit - You can use dried cranberries or chopped dried apricots instead
- Chia Seeds - you can use flax seeds instead
- Almond butter - you can use peanut butter or sunflower seed butter
- Coconut oil - you can use olive oil or avocado oil instead
- Honey- You can use either liquid honey or creamed honey *I have used both, but personally I prefer the creamed honey. Or you can use maple syrup instead, or agave, but if using agave, only use half the amount and add another ⅛ cup of almond butter
- Oats - you can use regular/old-fashioned rolled oats instead of quick, but you'll need to pulse the old-fashioned oats in the food processor a few times to break them down a little
- Nuts - you could use walnuts or almonds instead of pecans
Equipment
You will need a small saucepan, a spatula, and a large mixing bowl for these No Bake Granola Bars (no peanut butter). I recommend using granola bar molds. I love the ones I purchased (see recipe card)!
They are worth the buy because they are the ideal size (the size of each cavity is 4.52in*1.57in*0.78in/11.5cm*4cm*2cm.) and it's easier to deal with than cutting them from a pan. They are also multi-use. You can also use them for candy, chocolate, energy bars, and soap etc.
However, if you don't have any molds, you can simply use a pan. Use an 8x8 pan for this recipe or double the recipe and use a 9x13 pan. *See recipe card for recommended equipment photos and links
🌡️Storage
Homemade Granola Bars need to be stored in the fridge. Don't leave them sitting out at room temperature for very long or they fall apart. They can be kept in an airtight container in the fridge for up to 2 weeks. If you want to take them on the go and leave them without refrigeration for a lengthy period (like in a lunch bag), I recommend freezing them.
These healthy Granola Bars with Almond butter freeze well for up to 3 months in a freezer-safe container or Ziploc bag. I keep them in the freezer and then bring them along frozen, eating them once defrosted (it doesn't take long for them to defrost). Personally, I freeze them after a few days in the fridge.

👪 Serving Size
This healthy granola bar recipe makes 10 granola bars (4.5x1.5 inches) However, you can half, double, or triple the recipe by clicking on the serving number and selecting the number of servings you'd like. The ingredient quantities will automatically adjust.
You can also cut the bars smaller if you want to get more!
🔢WW Points
This chewy granola bars recipe is 12 WW points per granola bar. There is a lot of fat in these bars, but they are healthy fats. However, you can cut the bars smaller to reduce the points. You can also use olive oil instead of coconut oil to reduce points, light peanut butter instead of almond butter, and dried apricots (8 pts for ¾ cup) vs. dried cherries (18 pts for ¾ cup), and sugar-free chocolate chips (if you use sugar-free products). Using almonds instead of pecans will also reduce the points. Also, using agave instead of honey will reduce the points (but you'll need to add more light peanut butter- see substitutions and variations).
❔FAQ
Yes, oats can be eaten without cooking. There are several recipes for no-bake cookies that contain quick oats. However, it's a good idea to introduce raw oats to your diet gradually, especially if you have a more sensitive digestive tract. Drinking a lot of fluids when eating them is also recommended.

Comments & Reviews
Did your family❤️this recipe? Did you know that commenting and⭐rating recipes is one of the best ways to support your favorite recipe creators? If you LOVED this recipe, please comment and rate it in the recipe card or share photos on social media using the hashtag #foodmeanderings or tagging @foodmeanderings !
These Nut and Seed Granola Bars are the perfect snack, breakfast or healthy dessert and ideal for on the go!

📋 No Bake Almond Butter Granola Bars
Ingredients
- 2 cups quick rolled oats
- ½ cup pumpkin seeds *raw unsalted
- ⅓ cup chopped pecans * raw unsalted
- ¼ cup shredded unsweetened coconut
- ¾ cup dried cherries *you can chop them up, if you prefer
- ⅓ cup mini chocolate chips *semi- sweet
- 2 tbsps chia seeds
- 1 tablespoon sesame seeds
- 1 teaspoon cinnamon
- ⅔ cup almond butter
- 2 tbsps coconut oil
- ¼ cup honey
Instructions
- Spray granola bar molds or 8x8 pan with non-stick cooking spray.
- Mix dry ingredients together in a large bowl.2 cups quick rolled oats, ½ cup pumpkin seeds, ⅓ cup chopped pecans, ¼ cup shredded unsweetened coconut, ¾ cup dried cherries, ⅓ cup mini chocolate chips, 2 tbsps chia seeds, 1 tablespoon sesame seeds, 1 teaspoon cinnamon
- Melt coconut oil, almond butter and honey together on the stovetop on medium low, stirring frequently. Remove when it's fully combined and melted *Watch carefully because it can burn! You will want to remove it from the heat as soon as it has melted together.⅔ cup almond butter, ¼ cup honey, 2 tbsps coconut oil
- Pour liquid ingredients into dry ingredients and mix until fully incorporated.
- If you have molds you can fill them or shape them into bars on your own. Alternatively, you can make them in an 8x8 pan or double the recipe and make them in a 9x13 pan. Place in refrigerator to set for at least 2 hours or overnight.
- Unmold when hardened.
Notes
Nutrition
More Healthy Homemade Snacks
Looking for other recipes like this? Try these:




Terri Gilson
These No Bake Granola Bars have become a staple in my house. I love being able to control exactly what goes into them - no more mystery ingredients or excessive sugar. The almond butter is key, adding just the right amount of nutty flavor without overwhelming the other tastes.
They're so handy, too - I grab them for quick breakfasts and pop them in lunchboxes. And the best part is there's no need to turn on the oven, which is perfect for hot summer months!