


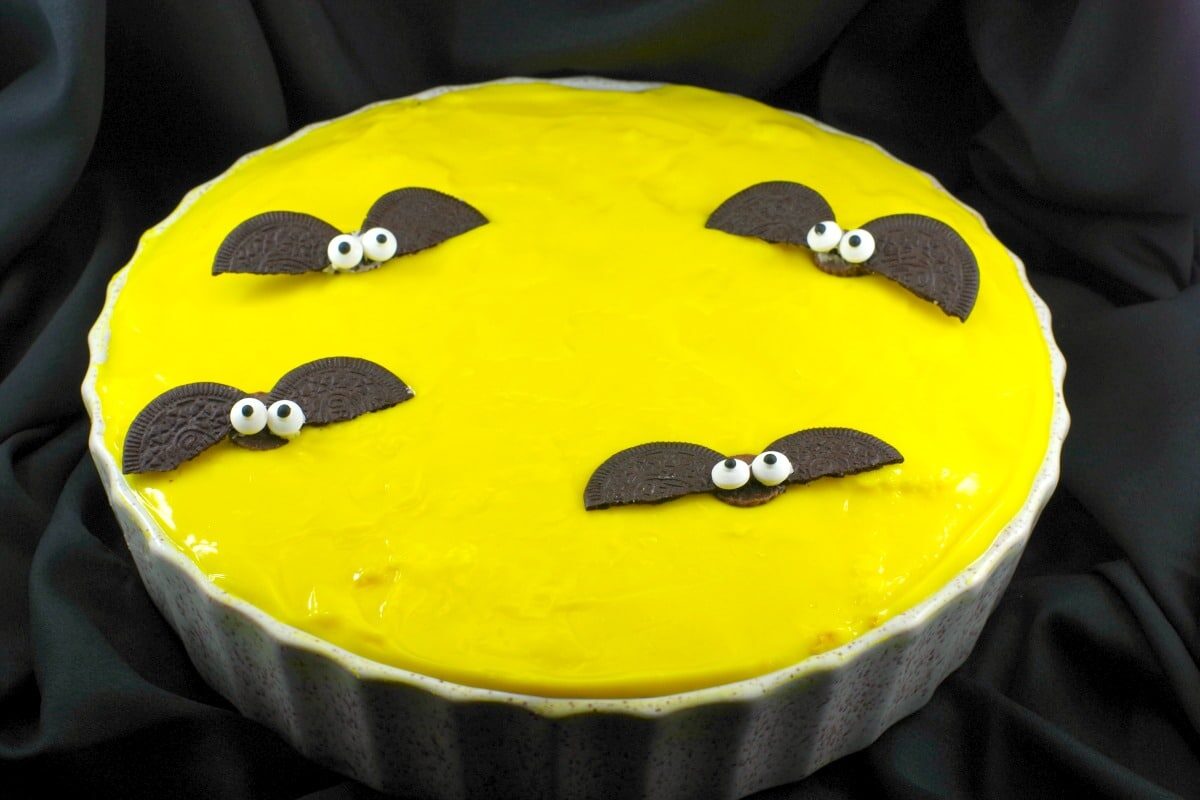
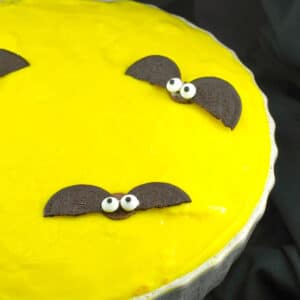
It can be a challenge to come up with Halloween-themed desserts that are different than the usual. This is not one of those typical Halloween Pies with jack-o'-lantern faces. This Halloween Boston Cream Pie Trifle has a chocolate cookie crust, a creamy whipped cream, cake and vanilla filling, and chocolate Oreo bats, It's the perfect dessert and easy Halloween pie for your next Halloween gathering!
This Boston Cream Moon Pie is popular at Halloween and is fun and easy to make. It's like an inside-out Boston Cream pie, and it was inspired by my love of Boston cream donuts! If you're looking for Halloween pie ideas, you'll love this one!
I created No Bake Pie Trifle because a big, full, bright Halloween moon with bats and witches has always been one of my favorite things that symbolize Halloween, and also because I love No Bake Boston Cream Pie!
If you are looking for cute Halloween Dessert Ideas and love Boston Cream pie, you will love this inside-out version. It's the perfect spooky Halloween dessert!
🥘 Ingredient Notes
For this Boston Cream Pie recipe, you'll need the following simple ingredients:
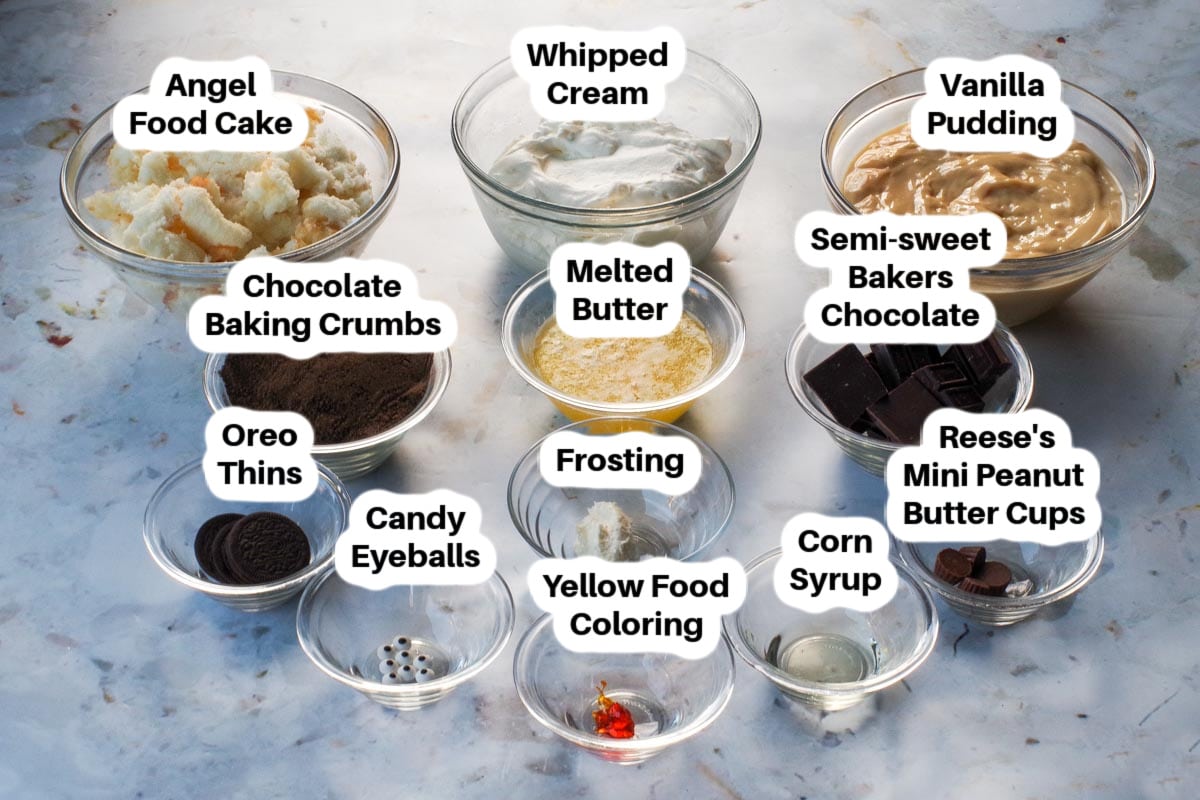
- Chocolate baking crumbs. I use chocolate baking crumbs because Oreo baking crumbs have been discontinued. You can use regular graham cracker crust or crush up Oreos and make a crust (as I do in this No Bake Black Forest Cheesecake) instead.
- Butter. I use unsalted butter because the salt content in salted butter varies by brand, and I like to control the salt in my recipes.
- Yellow food/icing color. I recommend you use an icing gel color, not store-bought food coloring. I used Wilton Lemon Yellow.
- Whipped Cream. I whipped up 2 cups of whipping cream (use at least 33-36% fat) and added 2 tablespoon of white granulated sugar to it (when it reached soft peaks). If you want to make it a day in advance, you can stabilize it with ¼ cup decorator's piping gel. You can substitute frozen dessert topping (Cool Whip).
- Instant vanilla pudding. I use the pre-made snack-sized. I buy 3 packs of 4. *Note that if you buy the no-name brand pudding, it's a little darker in color. You could use regular boxed instant vanilla pudding and add a little less milk (¼ cup less) so the pudding is thicker and easier to serve. You could use white chocolate pudding instead.
- Reese's mini peanut butter cups. Make sure you get the miniature ones!
- Icing. You can use store-bought or homemade icing for this - you only need a little to hold the bat 'wings' and eyes on. You could also use melted chocolate, royal icing, or candy melts. I have found that melted semi-sweet chocolate works best, as does Royal Icing.
- Edible eyes. I use the smallest ones.
*Please see recipe card for full list of ingredients and quantities.
🔪Step-by-Step: How to Make Boston Cream Pie Trifle
PREP: Spray the inside of 10.5 inch round (2.5 inches deep) dessert dish OR 2 shallow (1.5 inch) - 9 inch pie plates with non-stick cooking spray.
*Note: For one 9-inch pie plate, cut the recipe in half. Simply input the number of servings (8) and the recipe will automatically adjust quantities.
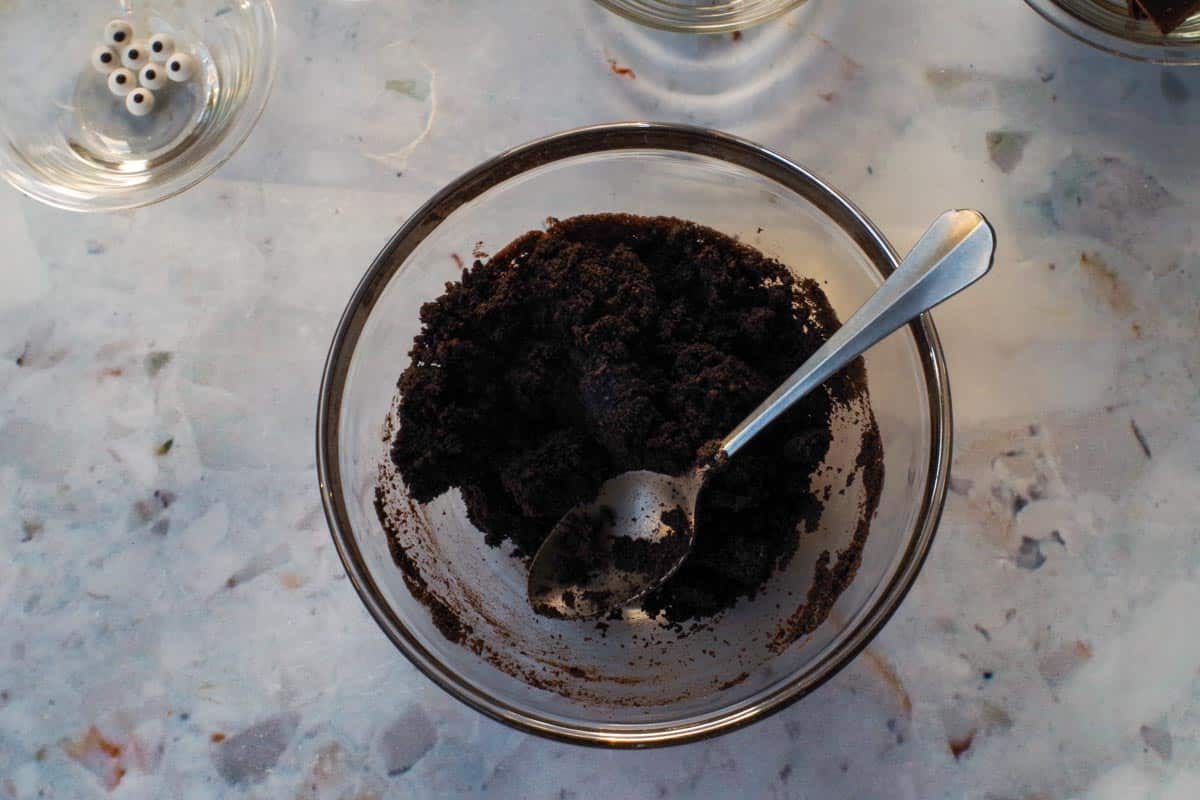
- Step 1: Mix the chocolate baking crumbs and ¼ cup melted butter in a large bowl until they cling together.
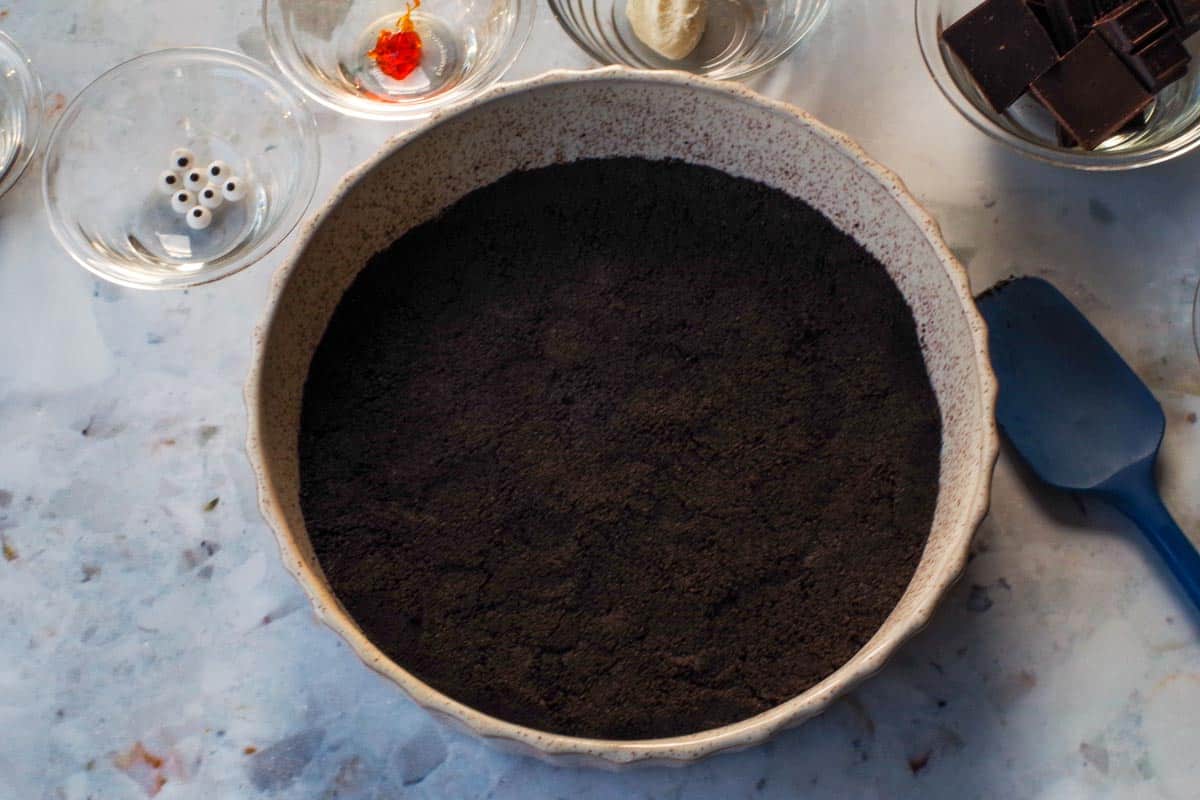
- Step 2: Press evenly into the bottom of the pie plate. Chill for 10 minutes.

- Step 3: Glaze: Meanwhile, melt semi-sweet chocolate in microwave on ½ power (50% on my microwave) for about 2 ½ - 3 minutes or until melted, then mix with ¼ cup melted butter and corn syrup. *NOTE: You can also choose to use a double boiler to melt chocolate for this step. **NOTE: Be careful: If you cook the chocolate at too high a temperature in the microwave or if it comes in contact with any water, it will seize.
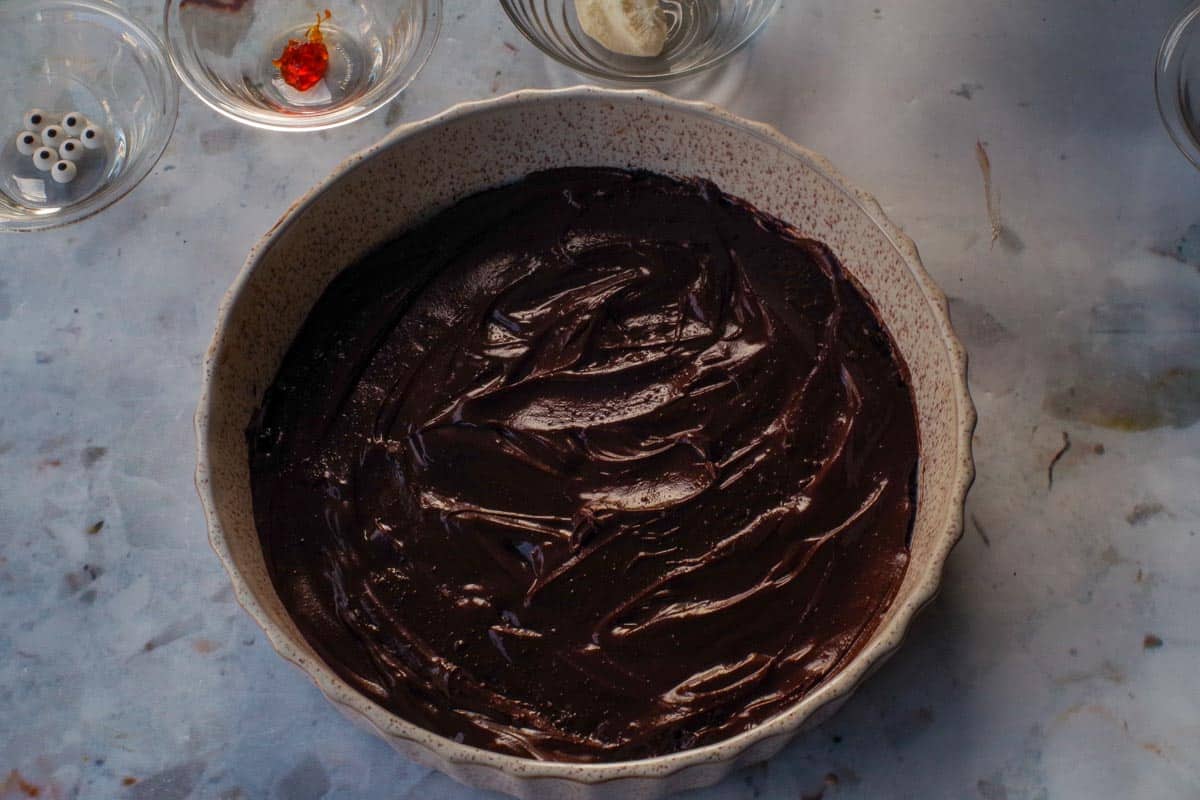
- Step 4: Pour glaze evenly over the chocolate crust, very gently spreading with a spatula, so as not to break up the cookie or get the crumbs into the chocolate mixture. Evenly cover the entire area. Refrigerate until firm (about 15 minutes)
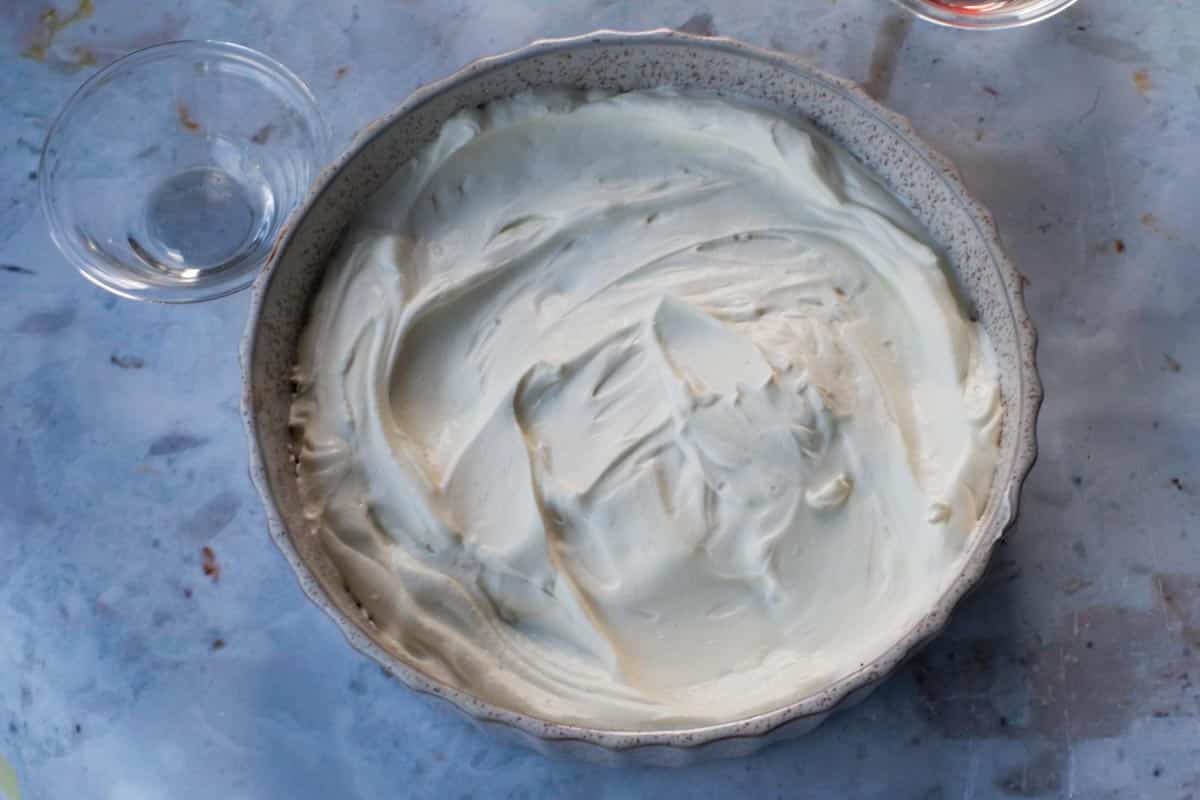
- Step 5: Filling: Spread whipped cream evenly over the chocolate cookie crust.
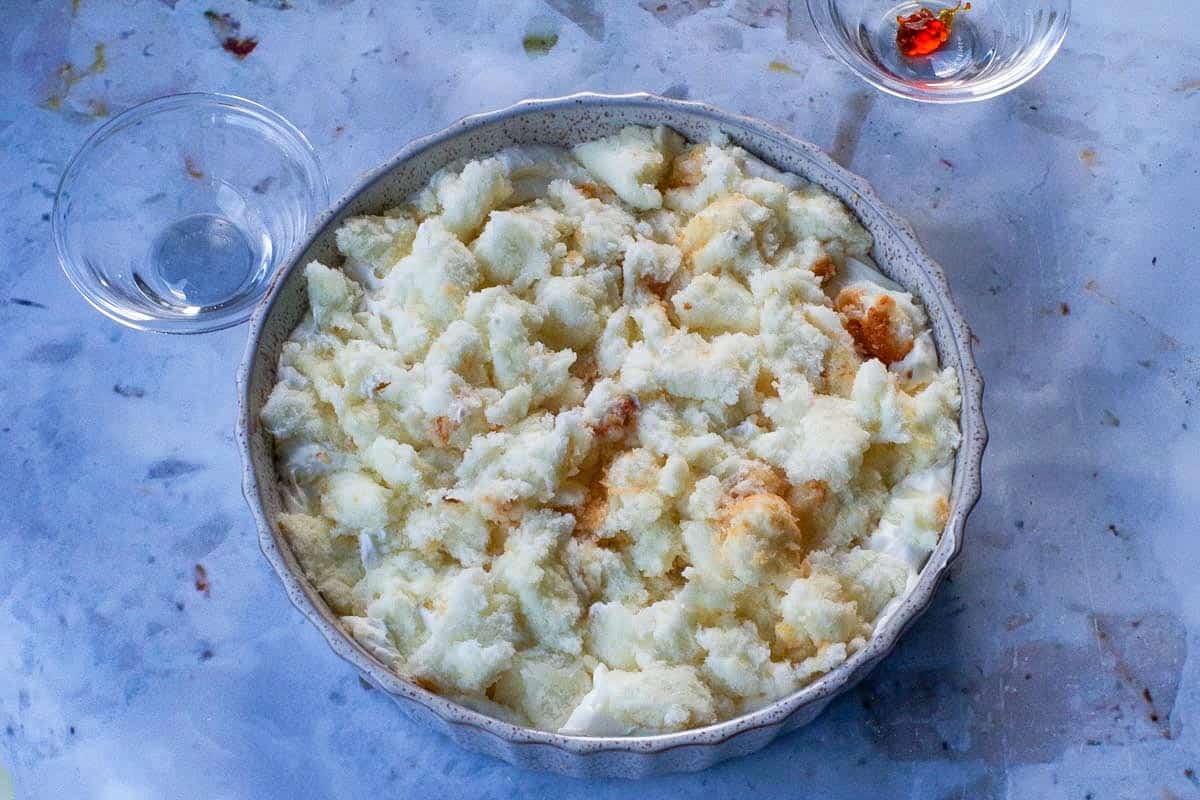
- Step 6: Then add sliced or broken-up pieces of white cake.
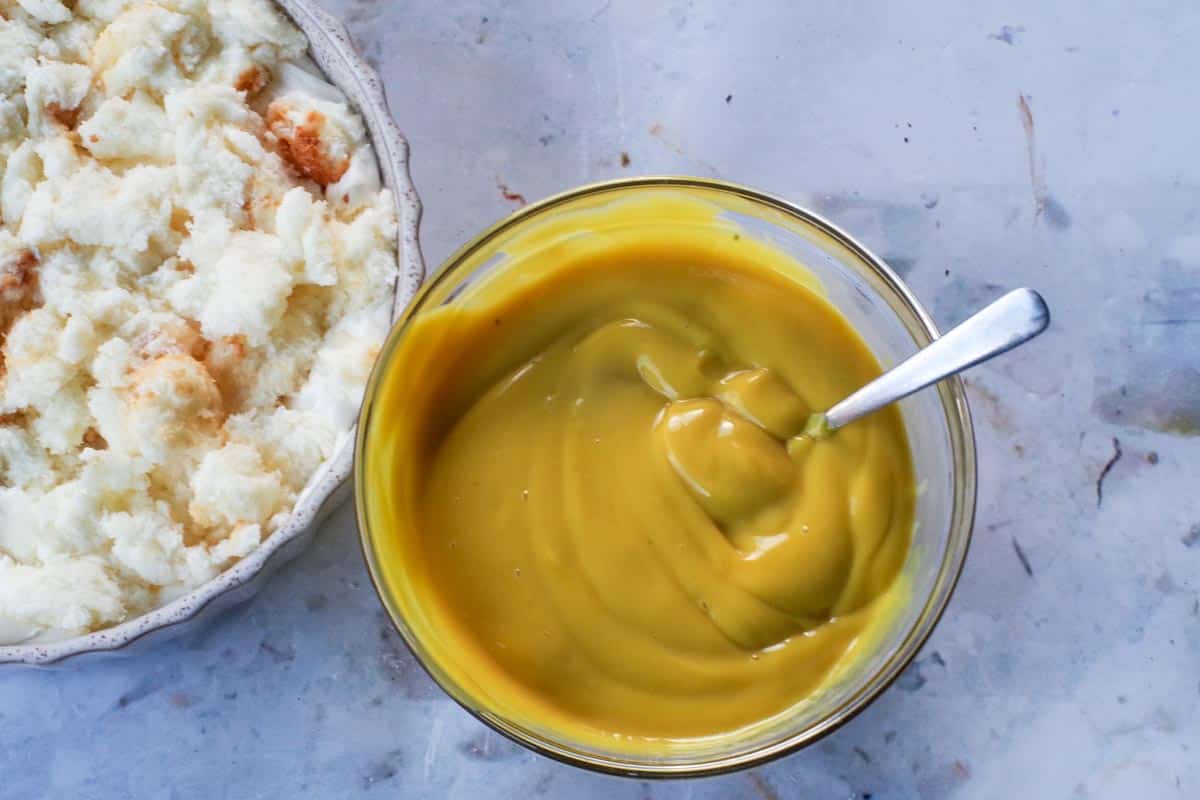
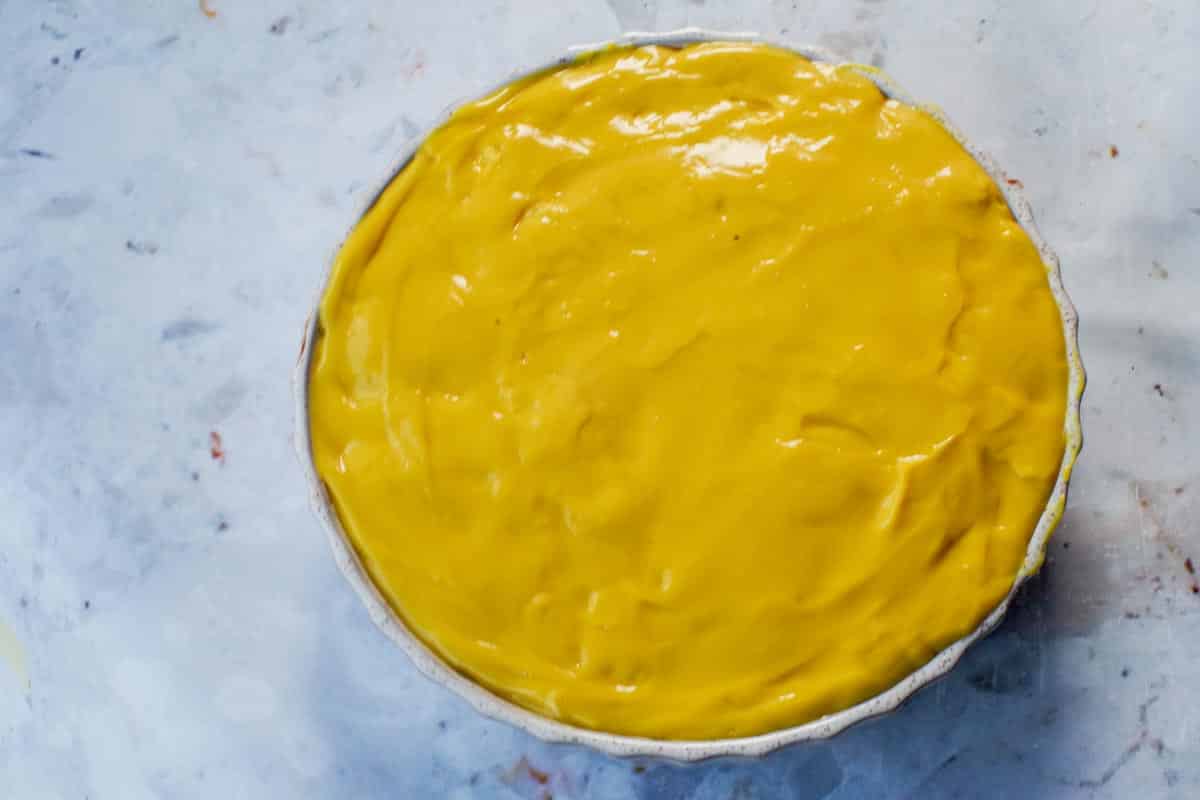
- Step 7: Add yellow gel food/icing coloring to vanilla pudding until you get the desired color of yellow. Set aside.
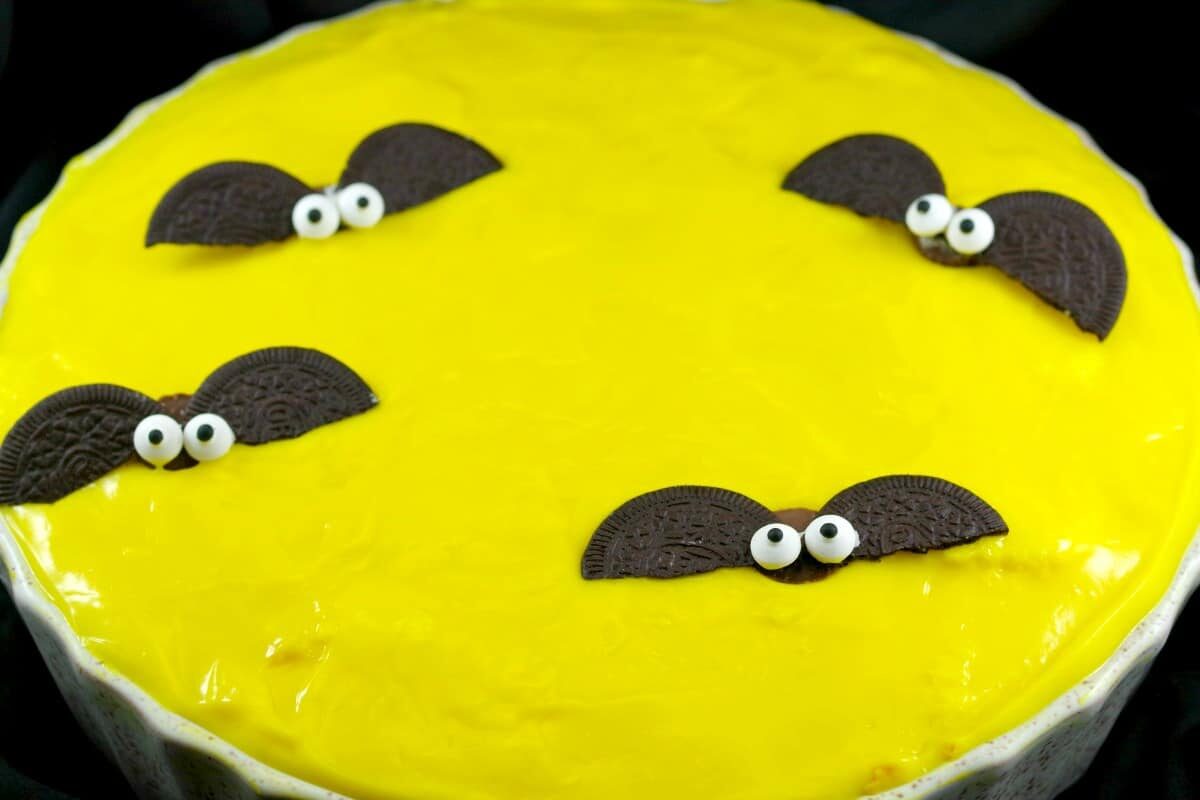
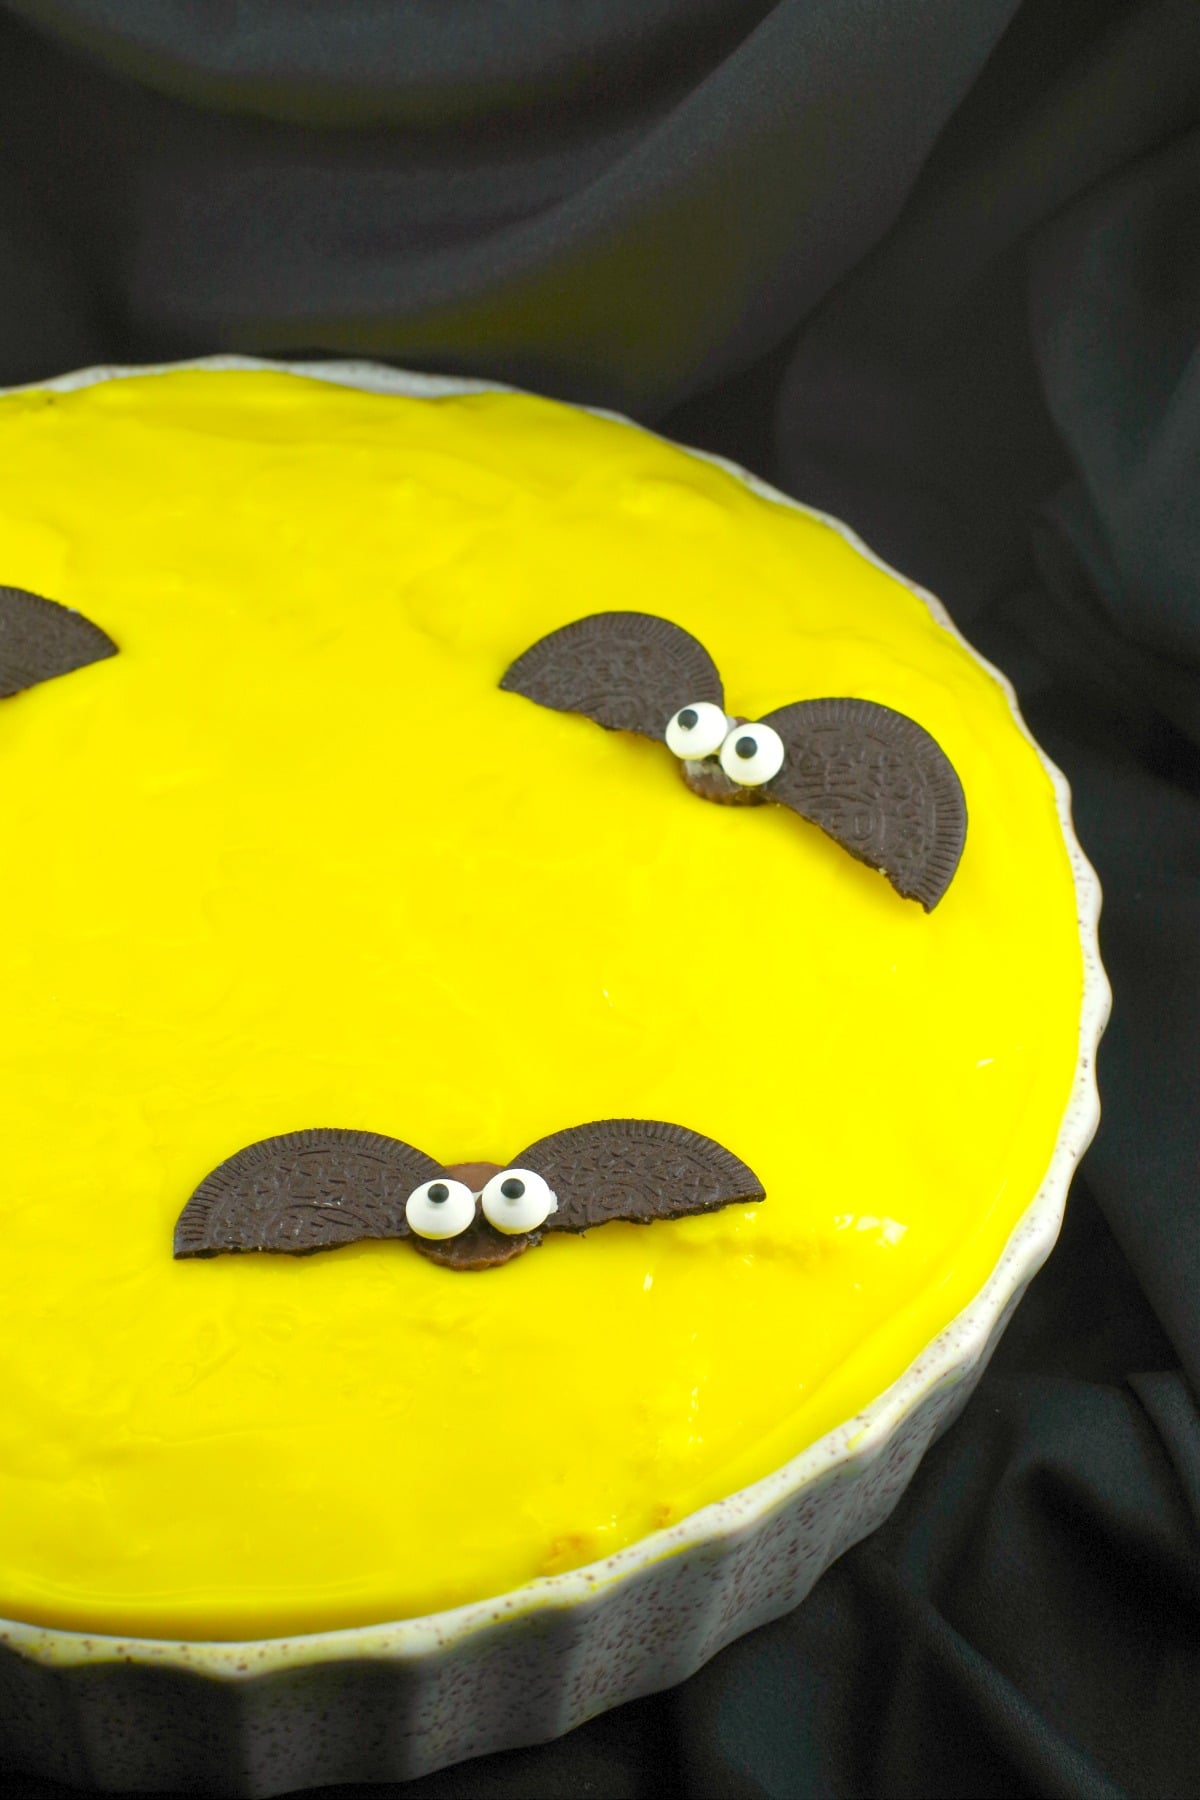
- Step 8:Top with yellow vanilla pudding. Then use a butter knife to even out until it's flush with the edge of the pie plate, adding more or removing excess pudding, as needed. Make the Bats: I got the chocolate bats from: Chelsea's Messy Apron - the ultimate bat party. Head on over there for excellent step-by-step photo instructions on how to make these bats.*But don't put the bats on this Halloween pie until right before serving!
Expert Recipe Tips
- Use gel icing color, not grocery-store food coloring: Regular liquid food coloring won't give you that bright, vibrant "Halloween moon" yellow. I recommend using Wilton Lemon Yellow or another concentrated icing gel for best results.
- Stabilize your whipped cream if making ahead: If you're preparing the dessert a day in advance, stabilize your whipped cream with ¼ cup of decorator's piping gel or 1 tablespoon of instant vanilla pudding mix. This helps it hold up beautifully in the fridge.
- Don't add the bats until serving: The chocolate bats look adorable but can quickly become soggy and lose their shape if placed on too early. Add them right before serving so they stay crisp and the candy eyes don't run.
- Chill before cutting: For the cleanest slices, refrigerate the trifle for at least 30-45 minutes before serving. It will set up slightly, making it easier to cut and serve neatly.
- Make it in smaller dishes for parties: This recipe can easily be divided into individual dessert cups or mini trifle bowls - perfect for Halloween parties, school events, or potlucks.
- Use quality chocolate for the glaze: Since the glaze is a key flavor element, choose a good-quality semi-sweet chocolate. Cheap chocolate chips may seize or produce a grainy texture.
- Control the salt: Use unsalted butter in both the crust and glaze. The amount of salt in salted butter varies by brand and can overpower the dessert's flavor.
- Avoid plastic wrap: When refrigerating, use a lid or cover the dish loosely with foil. Plastic wrap tends to stick to the pudding layer and can ruin the smooth top.
- Transporting tip: If you're bringing it to a Halloween gathering, assemble it in a deep pie dish or trifle bowl with a lid. Keep it chilled until ready to serve and add the bats at the last minute for the best presentation.
- Customize your toppings: You can add extra Halloween flair by decorating with edible glitter, candy eyeballs, or festive sprinkles around the "moon."
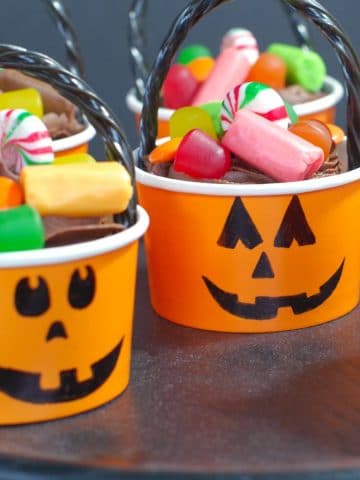
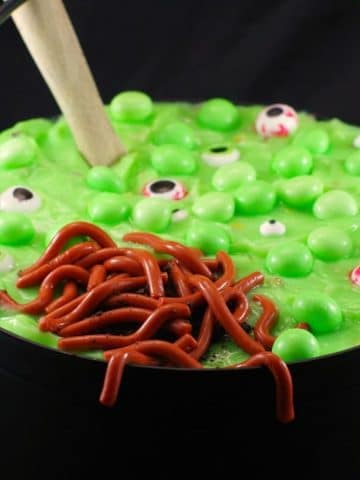
And as far as easy no-bake Halloween treats go, it's so easy that the kids can help, and the big kids could make it on their own. If you don't want to bring dirt and worms or cupcakes to your next Halloween potluck again, then give this easy and kid-friendly Halloween dessert a try!
Equipment
You will need a large deep pie dish at least 10.5 X 2.5 for this recipe, as well as an electric hand mixer. (affiliate links).
👪 Serving
- This Halloween pie recipe has a pie crust, but the rest is the consistency of a trifle. Before serving, it's best to cut right down into the bottom to break it up, as you would a pie.
- If you do not plan to serve right away, refrigerate until ready to serve, but do NOT put the bats on until immediately before serving. They will get mushy, their eyeballs run, and they look awful (this happened to me).
🌡️Storing
Store this Halloween pie trifle in an airtight container in the fridge for up to 3 days. *Do NOT cover it in plastic wrap (it will stick to the pudding and wreck it).
It does not stand up to freezing and thawing, but you can freeze it and eat it as a frozen treat.
❔ Recipe FAQs
Yes! You can make the trifle up to 24 hours in advance. Just cover it with an airtight lid (not plastic wrap, as it can stick to the pudding) and refrigerate. Wait to add the chocolate bats until right before serving so they don't get soggy or lose their shape.
You can, but the yellow layer won't have that fun "moon" look. If you prefer to skip artificial coloring, use natural food color alternatives such as turmeric powder (a small pinch) or a natural yellow gel.
Chocolate can seize if it comes into contact with water or is overheated. The recipe warns: "Be careful: If you cook the chocolate at too high a temperature in the microwave or if it comes in contact with any water, it will seize." Food Meanderings To prevent this: use dry utensils and bowls, microwave at 50% power (or use a double-boiler), stir gently until smooth, avoid overheating, and ensure no steam or water gets into the chocolate.
Definitely. While the recipe uses chocolate "bats" made from mini Reese's cups + Oreo cookie wings + edible eyes for a fun Halloween theme, you could adapt for other occasions - e.g., chocolate hearts for Valentine's, or leave off the themed decorations entirely for a more neutral "Boston Cream Pie-style no-bake dessert." The structural layers (crust, glaze, whipped cream + cake + pudding) will remain the same.
Didn't find the answer you're looking for?
Ask AI to answer based on this specific recipe
This Halloween Pie is the perfect portable pie for bringing along to a potluck or Halloween
Here's another fun Halloween party recipe: My Phantom Pierogi Pizza Pops, and Halloween witch punch to go with it!
If you are looking for Halloween pie recipes, it's great to have an easy dessert in your back pocket, and this No Bake Inside Out Boston Cream Halloween Moon Pie is that dessert! So step away from your typical apple pie, cherry pie, or pumpkin pie and make this for dessert!
Happy Halloween!
👻More Halloween Recipes
Did your family❤️this recipe? Did you know that commenting and⭐rating recipes is one of the best ways to support your favorite recipe creators? If you LOVED this recipe, please comment and rate it in the recipe card or share photos on social media using the hashtag #foodmeanderings or tagging @foodmeanderings !

🌕 No Bake Boston Cream Pie Trifle Recipe
Equipment
Ingredients
Pie:
Pie Crust:
- ½ 400g -pkg of chocolate baking crumbs 200g
- ¼ cup unsalted butter melted
Pie Glaze:
- 6 oz semi- sweet chocolate melted
- 1 tablespoon corn syrup
- ¼ cup melted butter
- ½ teaspoon yellow gel paste food/icing colouring * don't use grocery store food coloring- it will be difficult to get the right color. I use Wilton Lemon yellow
Pie Filling:
- 2 cups whipped cream homemade or frozen dessert topping -e.g. Cool whip
- 12 99g containers snack size instant vanilla pudding *These come in packages of 4 puddings - you will need 3 of them.
- 1 270g - 370 g white pound, angel food or loaf cake sliced or broken up
Chocolate Bats:
- 4 miniature Reeses peanut butter cups
- 4 Oreo Chocolate (thins) Sandwich Cookies
- dabs frosting/icing * I use royal icing
- 8 Edible eyes
Instructions
Pie:
- Spray the inside of 10.5 inch round (2.5 inches deep) dessert dish OR 2 shallow (1.5 inch) - 9 inch pie plates with non-stick cooking spray. Note: For one 9 inch pie plate, cut recipe in half. Simply input the number of servings (8) and the recipe will automatically adjust quantities.
Crust:
- Mix the chocolate baking crumbs and ¼ cup melted butter in a large bowl until they cling together. Press evenly into bottom of pie plate. Chill for 10 minutes.
Glaze:
- Meanwhile: Melt semi-sweet chocolate in microwave on ½ power (50% on my microwave) for about 2 ½ - 3 minutes or until melted, then mix with ¼ cup melted butter and corn syrup. *NOTE: You can also choose to use a double boiler to melt chocolate for this step. **NOTE: be careful: If you cook the chocolate on too high of a temperature in the microwave or it comes in contact with any water, it will seize.
- Pour glaze evenly over the chocolate cookie crust and spread it very gently, with a spatula, so as to not break up the cookie or get the crumbs into the chocolate mixture. Evenly cover the entire area. Refrigerate until firm (about 15 minutes)
Filling:
- Spread whipping cream evenly over the chocolate cookie crust, then add a sliced or broken up pieces of white cake.
- Add yellow gel food/icing coloring to vanilla pudding until you get desired colour of yellow. Set aside.
- Top with yellow vanilla pudding. Then use a butter knife to even out, until it's flush with the edge of the pie plate, adding more or removing excess pudding, as needed.
Chocolate Bats: (**SEE NOTES)
- Remove the wrappers from the Reese's cups.
- Separate the cookies from the filling, then scrape the filling off. Break the cookies in half (I found it worked best to break them in half with my hand, rather than a knife). Now have 8 "bat wings". Scrape off the frosting.
- Press one cookie piece on the left of the Reeses cup and another cookie piece on the right of the Reeses cup.
- Pipe frosting on the back of the edible eyes and secure on top of the center of the Reeses cup. Repeat for remaining 3 bats.
- Place bats on the top of the pie. Serve immediately.***NOTE: If you do not plan to serve right away, refrigerate until ready to serve but do NOT put bats on until immediately before serving. They will get mushy, eyeballs run and they look awful (this happened to me).
Notes
- Use gel icing color, not grocery-store food coloring: Regular liquid food coloring won't give you that bright, vibrant "Halloween moon" yellow. I recommend using Wilton Lemon Yellow or another concentrated icing gel for best results.
- Stabilize your whipped cream if making ahead: If you're preparing the dessert a day in advance, stabilize your whipped cream with ¼ cup of decorator's piping gel or 1 tablespoon of instant vanilla pudding mix. This helps it hold up beautifully in the fridge.
- Don't add the bats until serving: The chocolate bats look adorable but can quickly become soggy and lose their shape if placed on too early. Add them right before serving so they stay crisp and the candy eyes don't run.
- Chill before cutting: For the cleanest slices, refrigerate the trifle for at least 30-45 minutes before serving. It will set up slightly, making it easier to cut and serve neatly.
- Make it in smaller dishes for parties: This recipe can easily be divided into individual dessert cups or mini trifle bowls - perfect for Halloween parties, school events, or potlucks.
- Use quality chocolate for the glaze: Since the glaze is a key flavor element, choose a good-quality semi-sweet chocolate. Cheap chocolate chips may seize or produce a grainy texture.
- Control the salt: Use unsalted butter in both the crust and glaze. The content of salt in salted butter varies by brand and can overpower the dessert's flavor.
- Avoid plastic wrap: When refrigerating, use a lid or cover the dish loosely with foil. Plastic wrap tends to stick to the pudding layer and can ruin the smooth top.
- Transporting tip: If you're bringing it to a Halloween gathering, assemble it in a deep pie dish or trifle bowl with a lid. Keep it chilled until ready to serve and add the bats at the last minute for the best presentation.
- Customize your toppings: You can add extra Halloween flair by decorating with edible glitter, candy eyeballs, or festive sprinkles around the "moon."


Terri Gilson says
This No Bake Boston Cream Halloween Pie is my fun twist on Halloween desserts. I love how it combines Boston cream flavors with a spooky vibe - the Oreo crust and chocolate bats make it perfect for Halloween parties. It's super easy to whip up and always disappears fast at potlucks!
Sue Slaght says
I want to come to a Halloween party at your place! These look super fun, not to mention delicious!
Food Meanderings says
Thanks Sue! If I ever have a Halloween party, you are definitely on the guest list! 🙂