

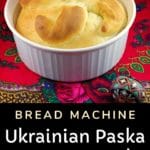
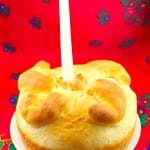
This easy Paska bread recipe in the bread machines is a traditional Ukrainian Easter Bread. The dough is made in the bread maker, then decorated with simple decorations, and baked for a short time. The wonderful thing about making it in the bread machine is that it does all the hard work for you kneading and punching down, while still preserving the traditional aspects of this recipe.

This Bread Machine Easter Bread is popular at Easter. It's perfect as a side for Easter dinner or as part of an Easter brunch. And it looks amazing decorated with these Ukrainian Easter Bread Doves!
🍒Reader Review
"I made your bread for the first time. Like you, I long for my grandmother and her baking. I pray I make her proud by trying and keep her memory alive. She was my best friend and miss her terribly. The smell radiating from my oven melts my soul. Thank you dear friend." ⭐⭐⭐⭐⭐
Jump to:
It was a beautiful summer day when I got the call from my Mom asking me to come home. She didn't want to tell me over the phone. I was over at a friend's house watching "The Shining." I already knew what she was going to say, so I stayed and watched the rest of the movie. l didn't want to hear it because then it would be real.
Baba never seemed to care about being fat or losing weight. And if she did, I never heard her talk about it. From my grandkid's perspective, she was just perfect and exactly like a Baba should be - round, pudgy, and huggable. She was also an amazing baker.
Every Easter, my Baba made Ukrainian Easter Bread (this Paska bread recipe), and that Easter was no exception. It was something I ate with abandon and without the remorse of middle age.
🍞Bread Machine Paska Recipe
Ukrainian Paska bread is the only homemade bread I have ever made. And the amount of work that went into it was exhausting! It was truly a labor of love. But it's really a lot of unnecessary punching down and waiting and kneading and waiting and well, you get the picture.
Since I discovered I can make traditional Paska bread with a bread machine, I don't plan on making it by hand ever again. Why do all that labor and waste all that time when the bread maker can do it on your behalf?
I'm guessing Baba would have done the same, given the opportunity. I also make my Ukrainian Babka the same way now! If you love to make Easter bread in the bread machine, then be sure to try my Bread Machine Babka too!
🥘 Ingredient Notes
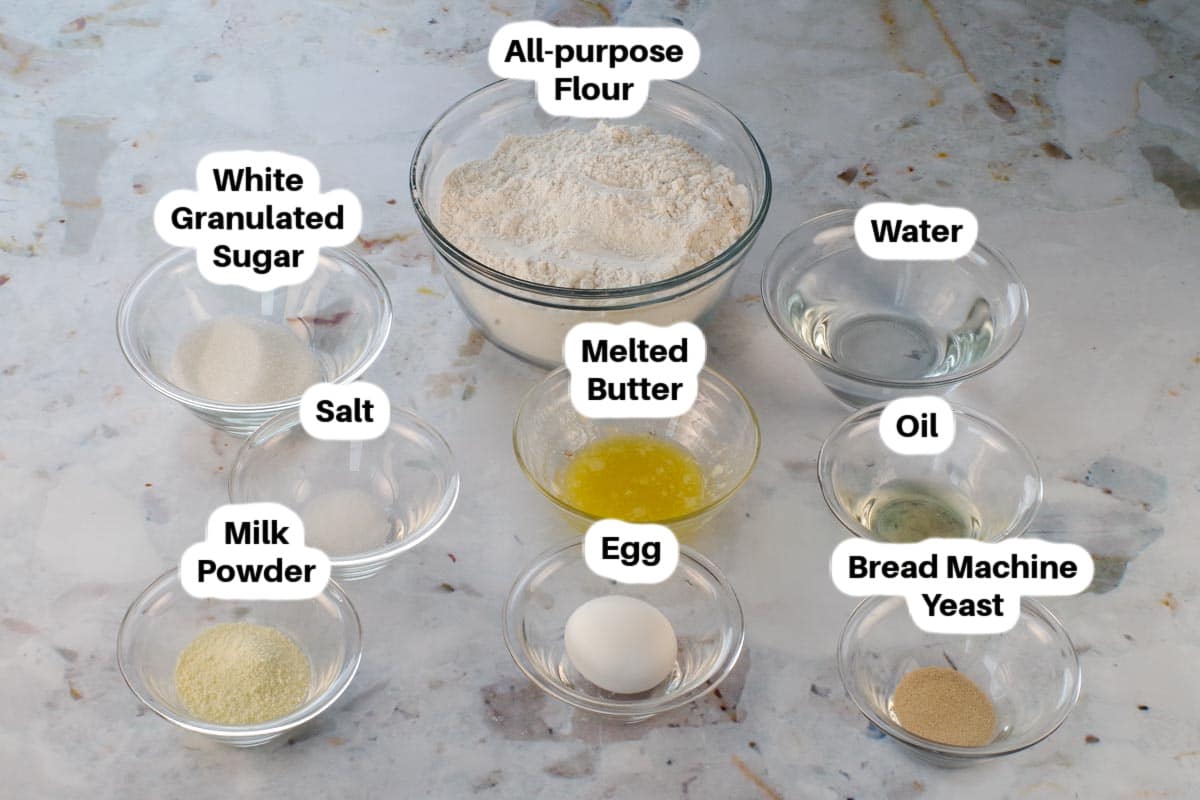
- Milk powder. I use skim milk powder.
- Oil. I use canola oil.
- Butter. I use unsalted butter, as I like to control the salt in my baking. The salt content in salted butter varies by brand. Measure AFTER you melt it.
- Bread machine yeast. Make sure you are using yeast made specifically for the bread machine.
- Egg Wash (not shown). This will give your bread a shiny finish.
🔪 How to Make Paska (in the Bread Machine)
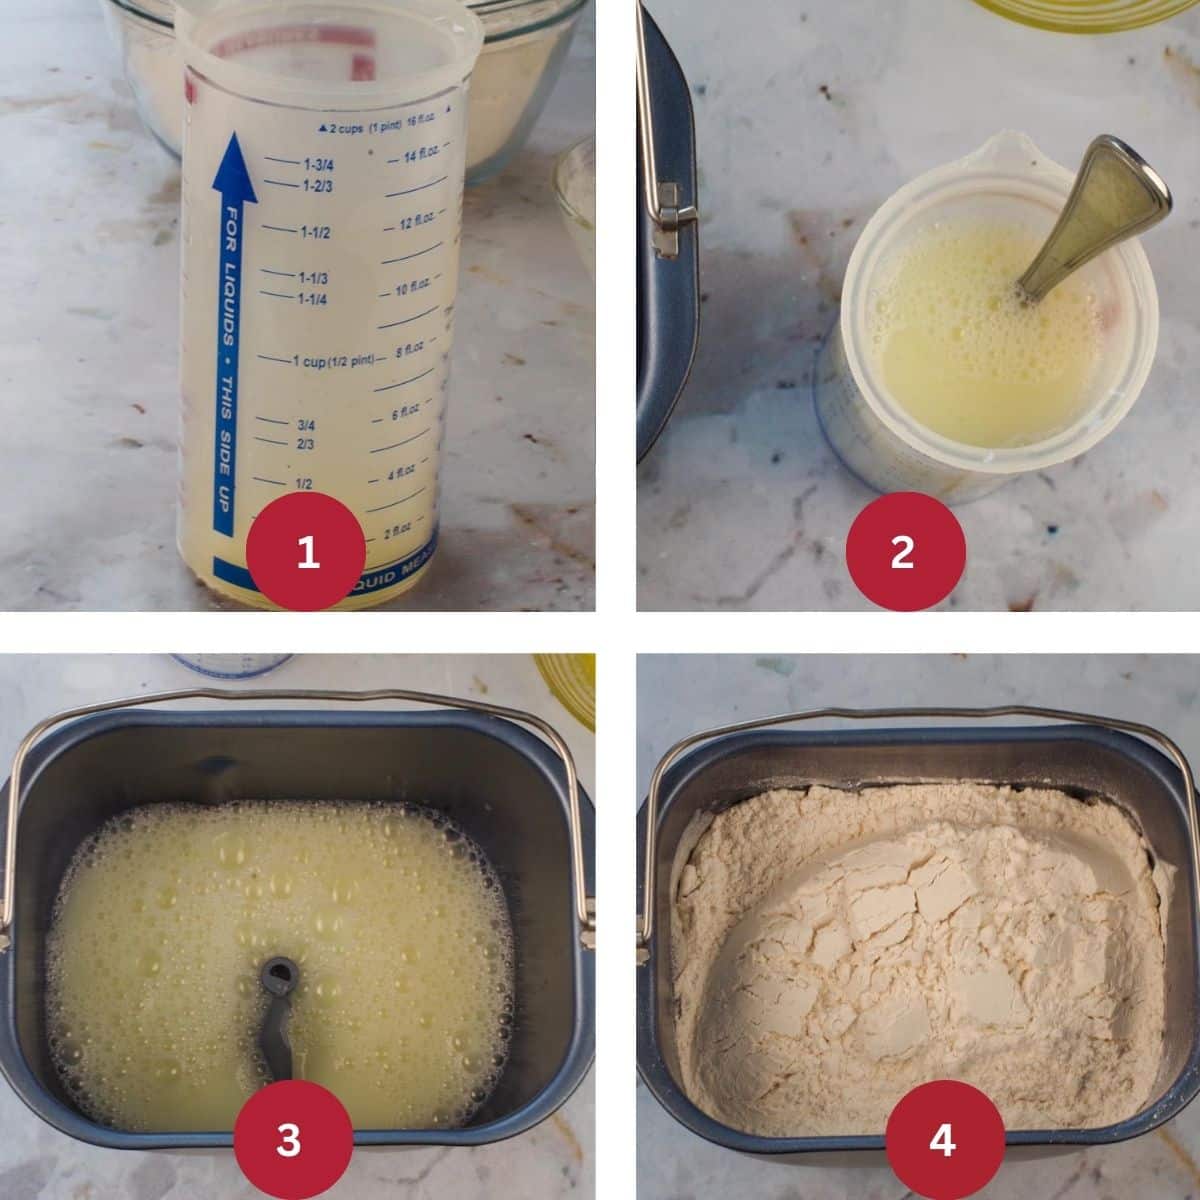
MIX THE DOUGH INGREDIENTS (STEP 1): Break the egg into a 2 cup measuring cup and add enough water to make 1 ½ cups (IMAGE 1). Beat well with a fork (IMAGE 2) and place in bread machine (IMAGE 3). Add milk powder, sugar, melted butter, oil, salt, and flour (IMAGE 4).
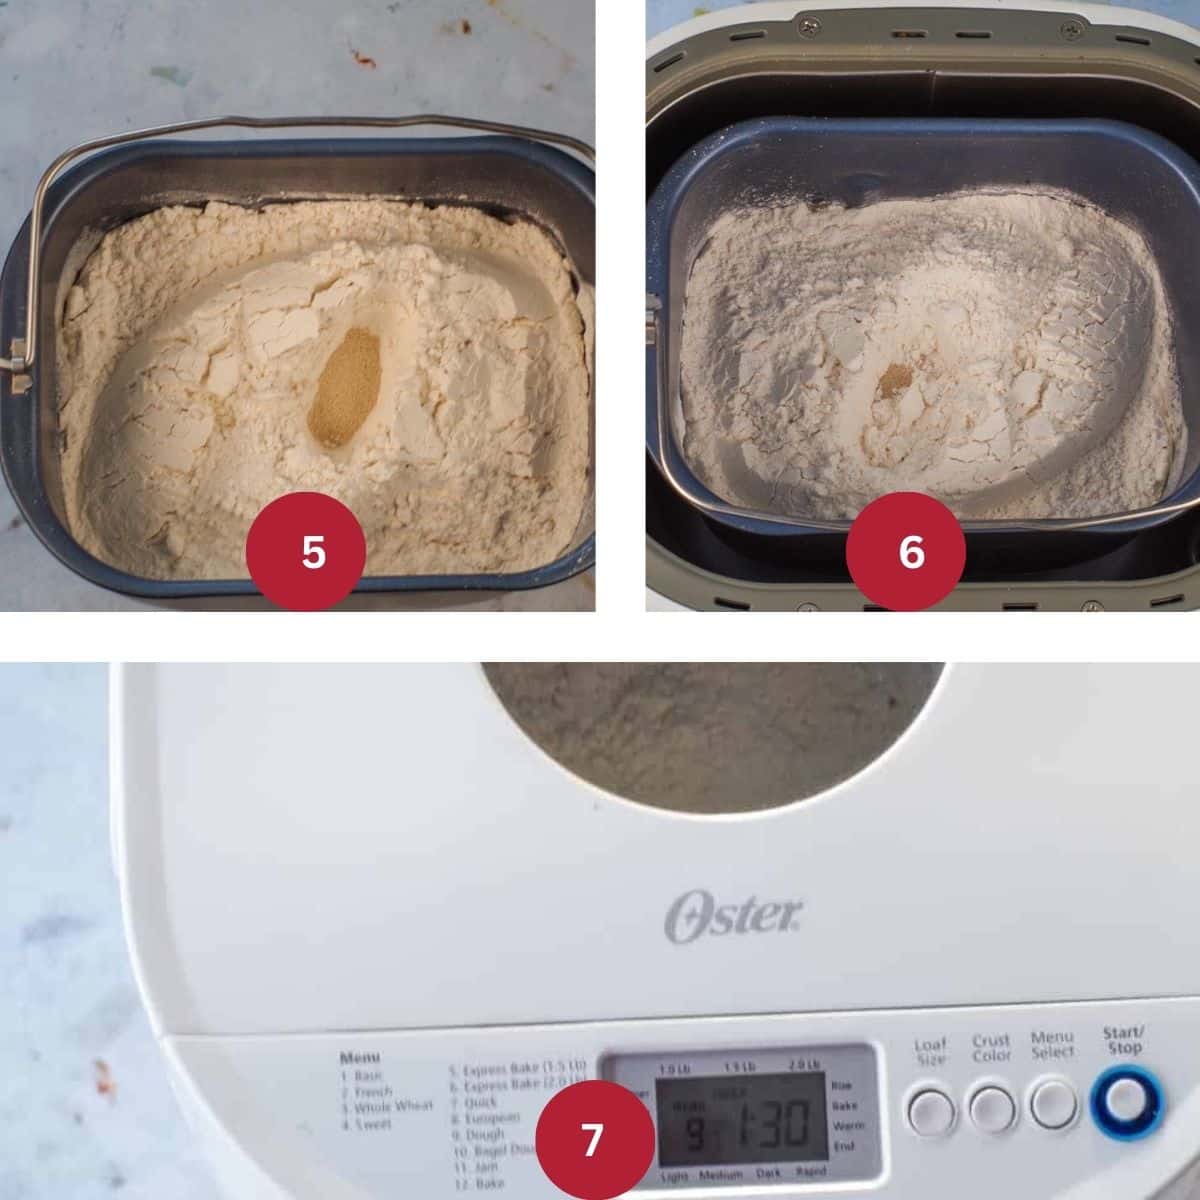
MAKE THE DOUGH (STEP 2): Dig a little hole in the flour and add the yeast (be sure not to make contact with the water (the yeast should never touch liquid because you don't want it to activate before the machine starts - this will affect the rise of the bread) (IMAGE 5). Place the bread pan in the bread maker (IMAGE 6). Set the bread machine to the dough cycle and press start (IMAGE 7).
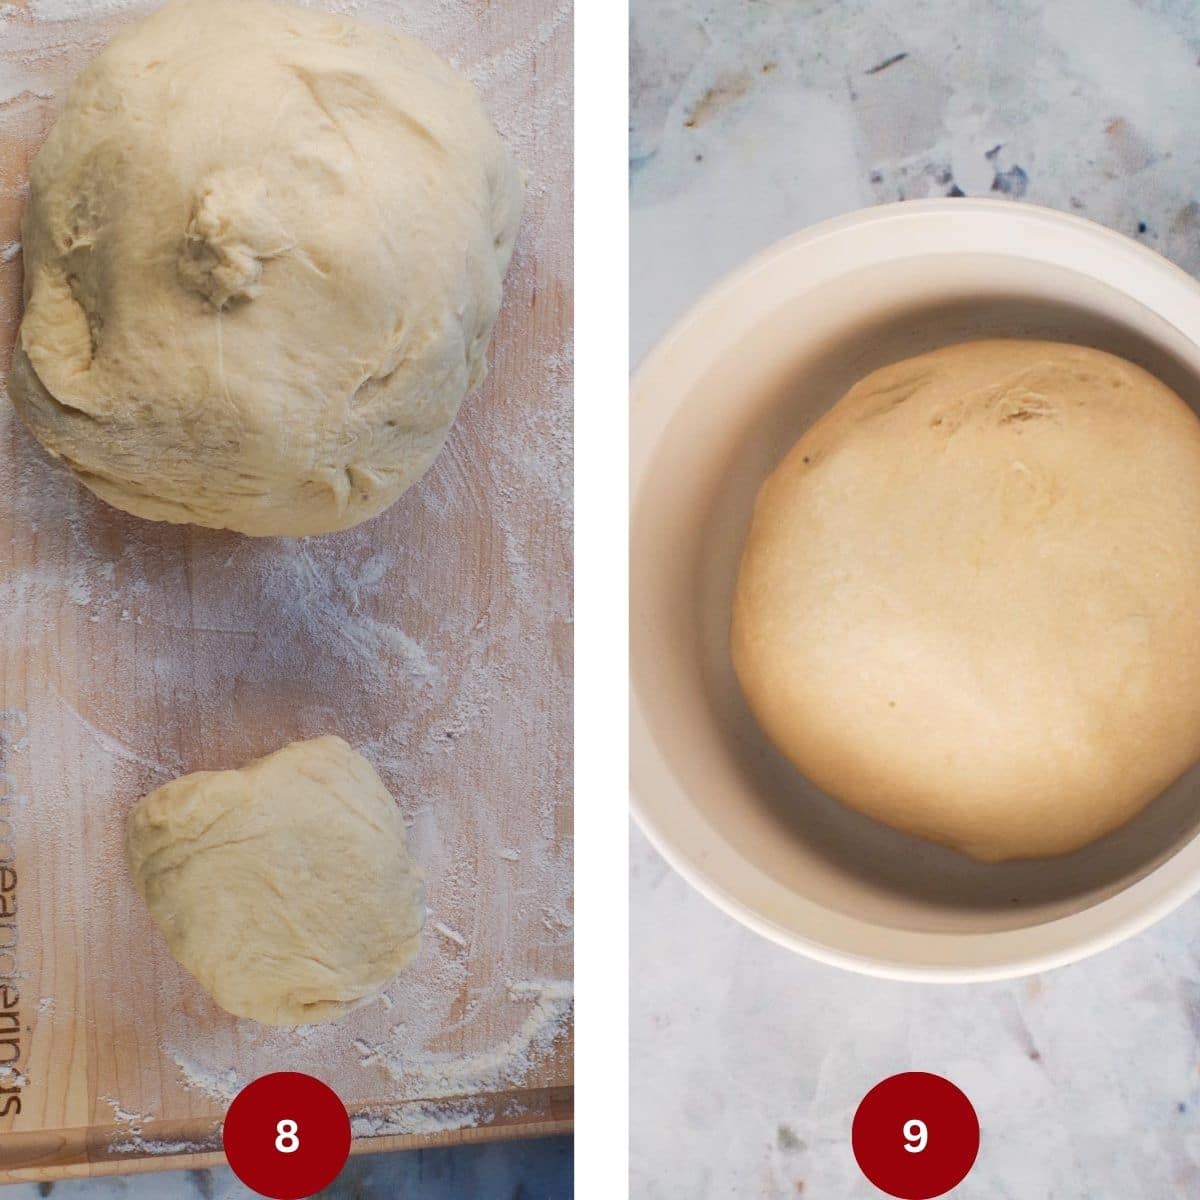
SHAPE THE DOUGH (STEP 3): When the dough cycle is finished, remove dough from the bread machine . Set aside enough dough to create the decorations to be placed on top (* Note: I set aside about ⅙ of the dough, but it will be more or less depending on the decorations you make) (IMAGE 8). Shape the rest of the dough into a round loaf and place it in a greased (with vegetable shortening or non-stick cooking spray), round, shallow pan. Depending on the size you use, you may need to use more than one pan. (IMAGE 9 ).
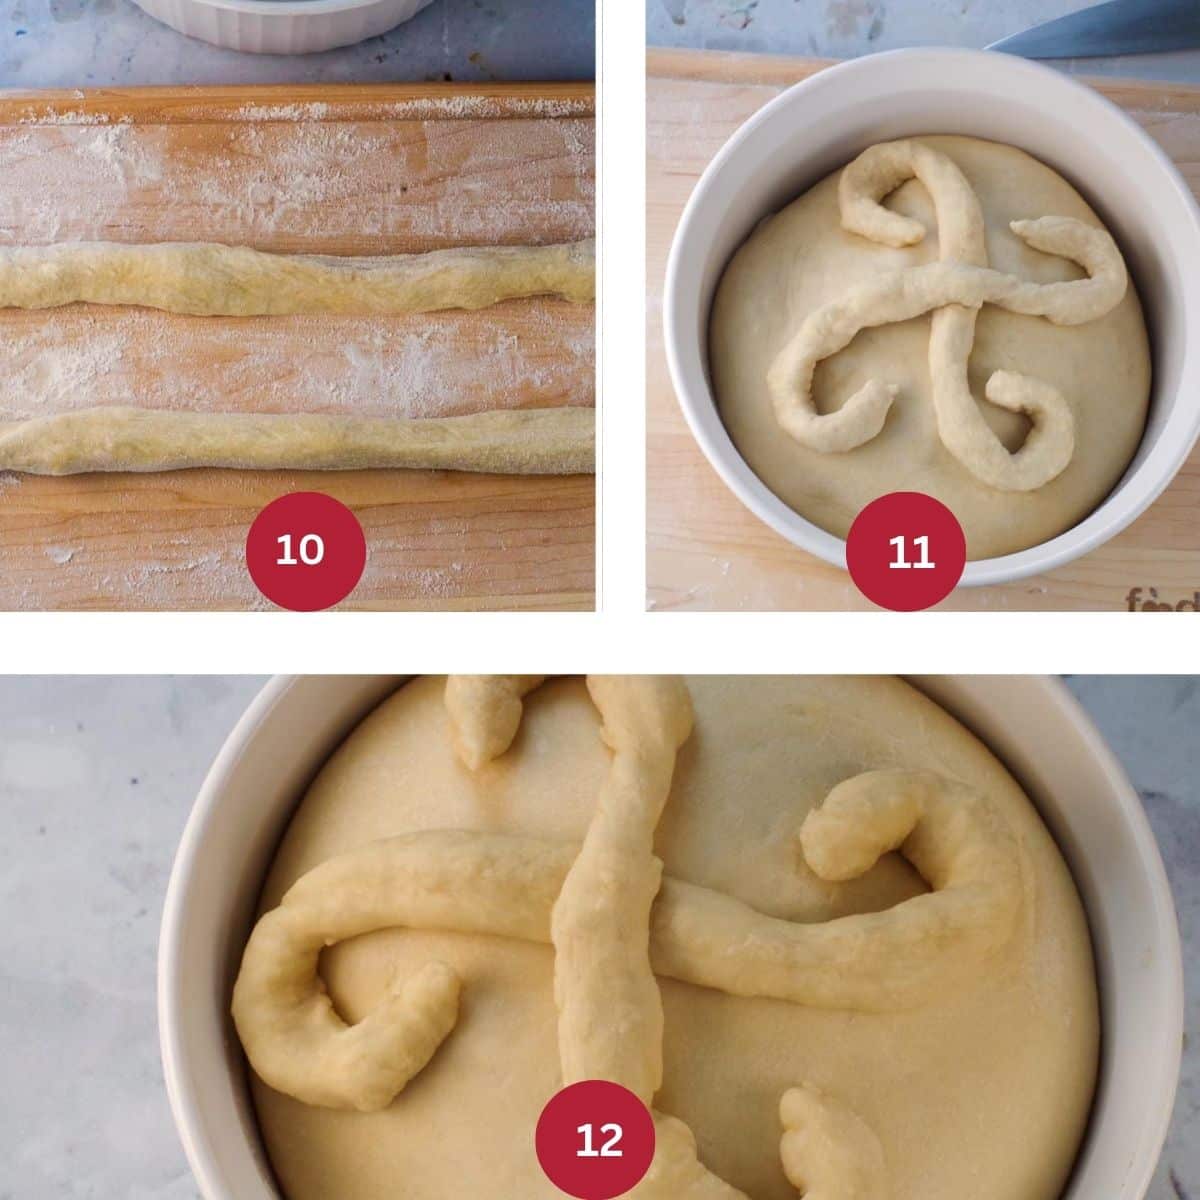
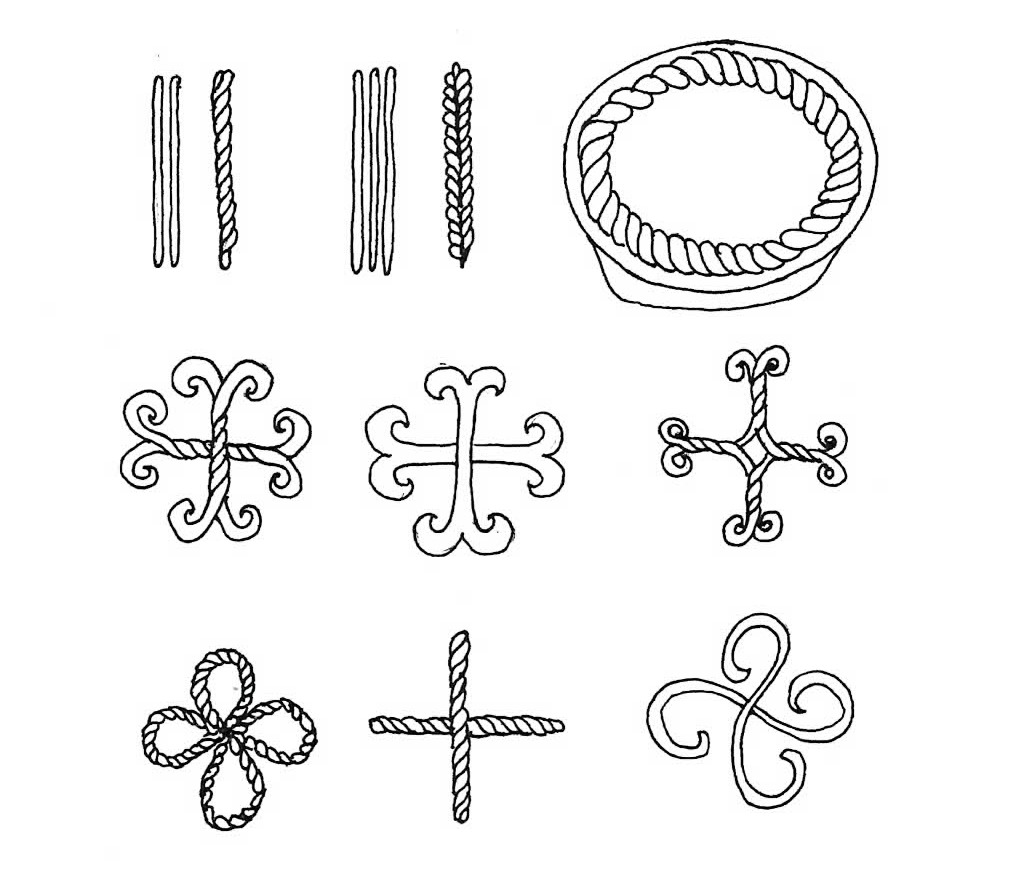
DECORATE THE BREAD (STEP 4): Decorate the loaves with the dough previously set aside. The central ornament on pasta is usually a cross. Roll the strips of dough approximately ¼- ½ inch in diameter. (IMAGE 10). If you want to make the simple decoration as I did, it's the one that's on the bottom row, to the far right). Place the decoration on the bread (IMAGE 11). Set the loaf/loaves in a warm place and let the dough rise for 45 minutes to 1 hour. *Be sure to include the time that you spent making the decorations as part of that time. **Carefully watch the ornaments while rising so that it does not get out of shape. The shape can be corrected by gently inserting a wooden toothpick or cake tester, along the side of the ornamentation that has risen too much. *My decorations rose quite a bit in the main photos, but it didn't bother me. Alternatively, you don't have to decorate it at all if you prefer not to. (IMAGE 12).
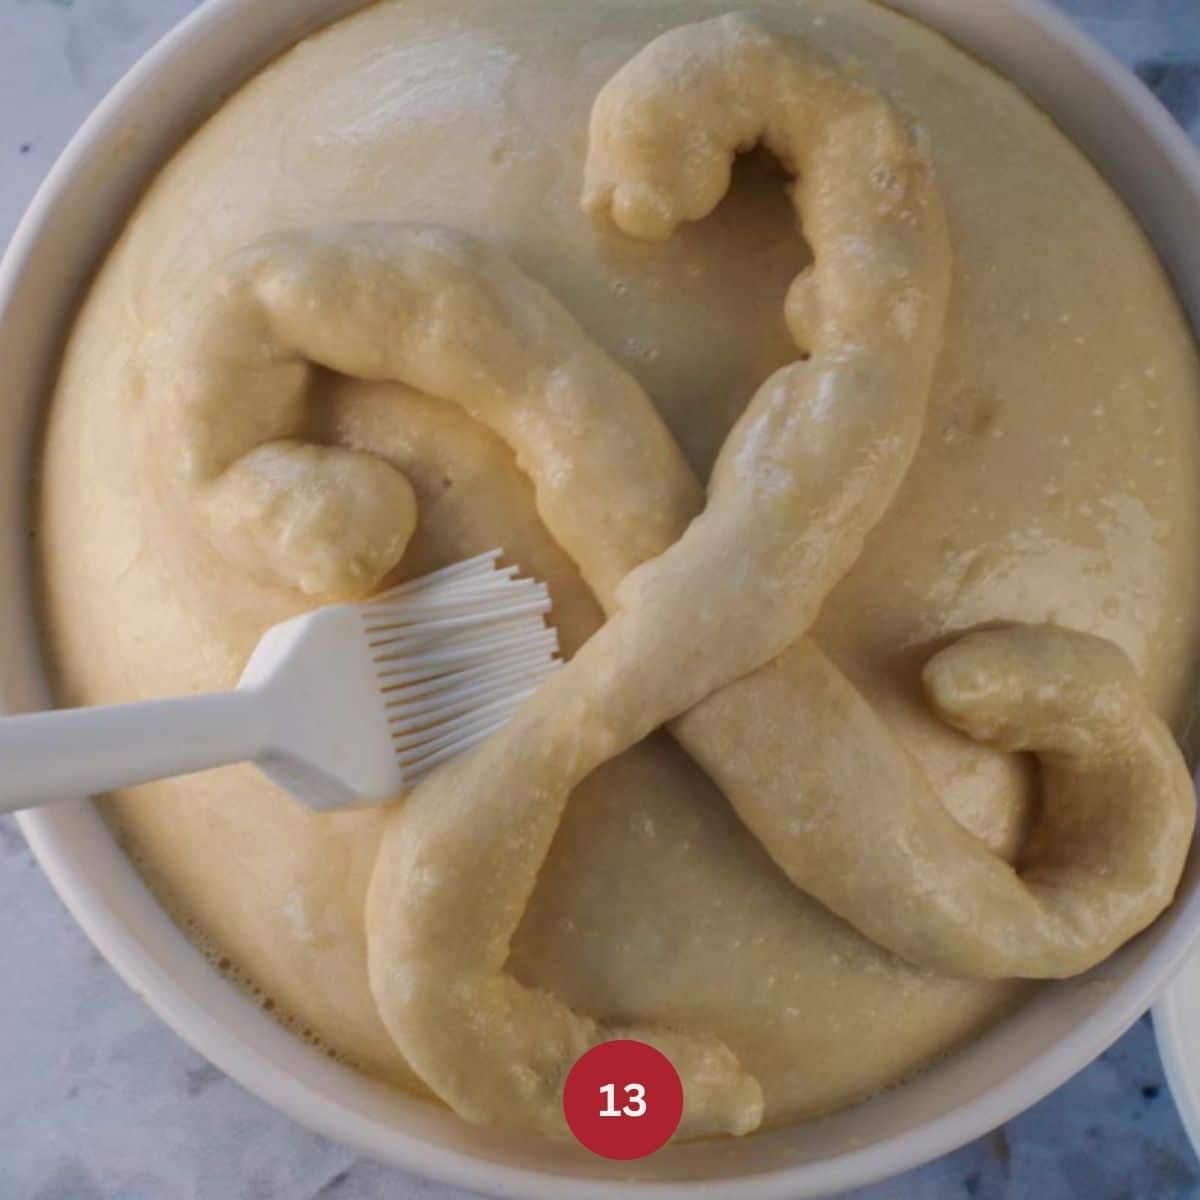
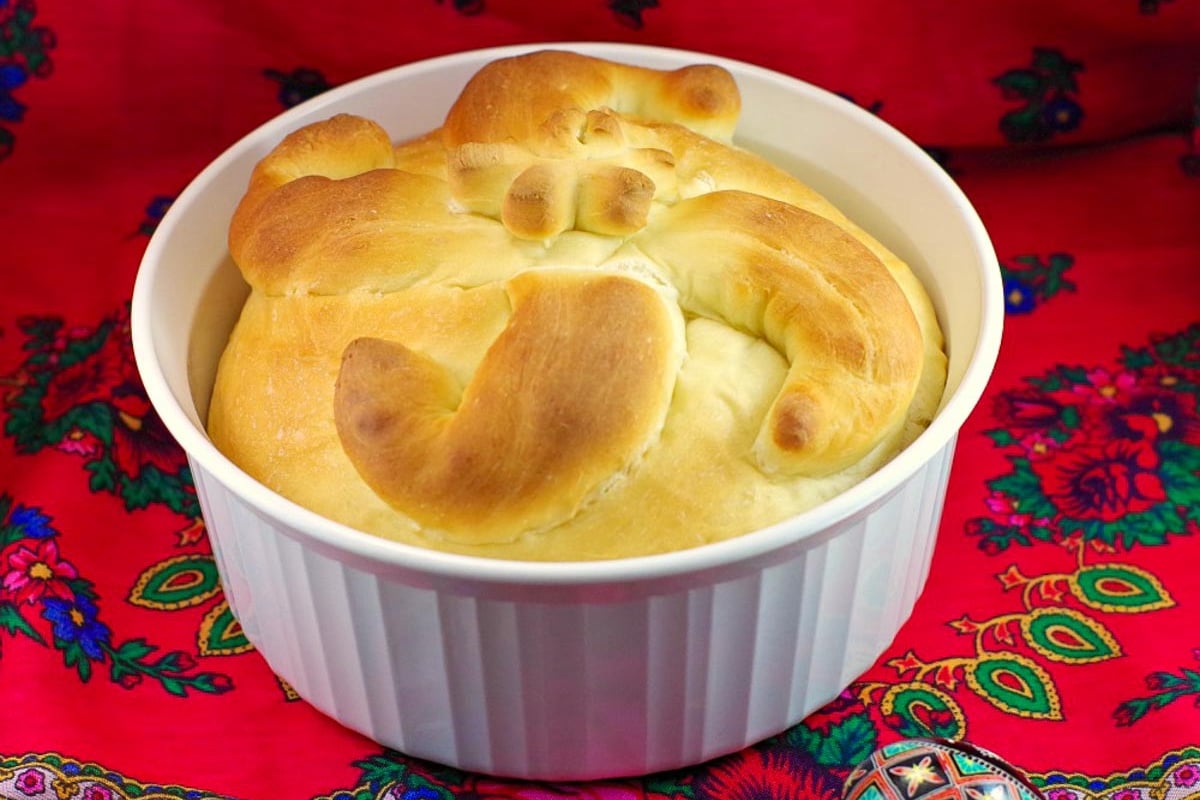
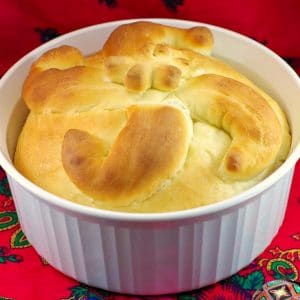
BAKE THE BREAD (STEP 5): Just prior to baking, brush the top of the Paska with a beaten egg diluted with 1 tablespoon of water (which I forgot to do in the main photos) * It's not absolutely necessary, but it's just not as shiny (IMAGE 13). Bake at 350 degrees F/175 degrees C for 25-35 minutes or until golden brown. The bread is done when its internal temperature reaches 190 degrees F/87 degrees C. Alternatively, you can also knock on the bottom of the casserole dish. If it sounds hollow, it is done. * If ornaments are browning too quickly, cover very loosely with tinfoil or parchment paper. Cool in pans for approximately ten minutes before gently removing. Cool on a wire cooling rack.
Expert Recipe Tips
- Use Fresh Yeast - Ensure your bread machine yeast is fresh and not expired, as old yeast may not rise properly.
- Proper Liquid Temperature - When adding water to the dough, it should be lukewarm (around 100°F/38°C). Too hot can kill the yeast, while too cold can slow down rising.
- Egg Measurement Tip - Break the egg into a measuring cup first, then add water to reach the total required amount of liquid for accuracy.
- Avoid Direct Yeast Contact with Liquid - Dig a small hole in the flour and add the yeast there to prevent premature activation before the bread machine starts
- Egg Wash for Shine - Brushing the bread with an egg wash (1 egg beaten with 1 tablespoon of water) before baking gives it a golden, shiny crust.
- Covering Decorations While Baking - If the decorative elements start browning too quickly, cover them loosely with foil or parchment paper to prevent burning.
- Check for Doneness - The bread should have a golden brown crust and sound hollow when tapped. You can also check for doneness with an instant-read thermometer; the internal temperature should be around 190°F (88°C).
- Cooling for Best Texture - Let the bread cool in the pan for about 10 minutes before transferring it to a wire rack to prevent it from becoming soggy.
- Best Way to Store - Store at room temperature in an airtight container for up to 4 days. Refrigeration can dry bread out, so freezing is the best option for longer storage.
What to serve with Paska
Paska is often enjoyed with butter, honey, or jam. It also pairs well with savory dishes like ham, cheese, or Easter brunch spreads.
If you're looking for more Ukrainian Easter food, check out these Ukrainian Easter Recipes!

👪 Serving Size
This Easter Paska bread recipe is for a 1 lb bread maker and makes about 10 servings/slices.
🌡️Storage
- This traditional Easter bread can be stored, at room temperature, in a sealed container, for up to 4 days. *I find that putting it in the fridge dries it out faster
- Freezing: This bread Machine Paska freezes really well. The best way to prep it for freezing is to wrap it in plastic wrap (I use Glad Press n' seal wrap) and place it in a Ziplock freezer bag. It will last for at least 3 months in your freezer.
❔Recipe FAQ's
Paska and Babka are both traditional Ukrainian Easter breads. Paska is baked in a large round baking dish (like a casserole dish) decorated on the top with religious symbols including crosses, and other designs representing aspects of Orthodox and Eastern Catholic faith, as well as flowers and braids. It is a slightly sweet bread, but not as sweet as Babka. Babka is traditionally tall and cylindrical, often baked in coffee cans. It is a slightly sweeter and more delicate bread and often has raisins added to the dough.
If the dough ornaments sink or lose their definition while rising, they may be too heavy or too wet. Try rolling them slightly thinner and allowing them to dry out a little before placing them on the bread. You can also try adding a little flour (1 teaspoon at a time). If you add too much flour, it will dry out and be hard to work with. You can also gently adjust them during the rising process using a toothpick.
Absolutely! You can divide the dough into smaller portions and bake in muffin tins or small round pans for individual-sized Paskas. Just be sure to adjust the baking time accordingly-start checking for doneness around 15-20 minutes.
Yes! If you don't have a bread machine, you can mix and knead the dough by hand or with a stand mixer using the dough hook attachment and use traditional yeast, instead of bread machine yeast. Let it rise and double in size. Punch down the dough and allow it to rise again, then proceed with shaping, decorating, and baking as directed.
Several factors can affect the rise of your bread: Ensure your yeast is fresh and active. Expired or old yeast won't work well. The water used should be warm (but not too hot) to activate the yeast properly. If your kitchen is too cold, the dough may take longer to rise. Try placing it in a warm, draft-free spot.
Baba never made it to the annual Mother's Day Brunch that year. Then she spent what felt like an eternity in the hospital in a coma. She was 66. I was 12. That call I received from my Mom on that beautiful sunny summer day fundamentally altered me.
It altered me in a way that only losing someone you love can, as you desperately try to pack the wound, then spend the rest of your life trying to fill that scarred and hollow space with something that gives you even an inkling of pleasure. But I didn't know how to fill it because I was just a kid. So I floundered.
Had I known that Easter would be my last Easter eating her Ukrainian Easter bread, I would have eaten even more, I would have savored every bite, but most importantly, I would have hugged her even that much tighter and longer.
I later found out that she had a stroke and was not in the greatest of health for quite some time leading up to it. She was an uncontrolled Type 2 diabetic, likely never exercised a day in her life and loved to eat the naughty and delicious things she created. And although I know my family history, the importance of exercise and healthy eating, have my own concerns about my weight, it still takes a lot of will power to practice moderation and not indulge in too much of my own baking.
That hollow, scarred space still aches and echoes at times, but I have learned how to fill it with some pleasurable things, like making this Easter bread recipe every year and sharing it with my kids. It has become a family tradition.
And each and every time those flaky Paska morsels meet my taste buds, they wrap around me in a really long, tight Baba hug. And for that moment in time, I put aside the worry about weight, indulge in too much Ukrainian Easter bread, and savor every last bite.
So if you are looking for an easy way to make Paska bread, then give my family recipe for Ukrainian Paska recipe a try! Paska is a delicious bread and a great accompaniment to any Easter meal.
If you are looking for Easter brunch ideas for Easter morning, check out my Easter Brunch Menu~!
🍽 More Ukrainian Recipes


Did your family❤️this recipe? Did you know that commenting and⭐rating recipes is one of the best ways to support your favorite recipe creators? If you LOVED this recipe, please comment and rate it in the recipe card or share photos on social media using the hashtag #foodmeanderings or tagging @foodmeanderings !

📋 Paska Bread Recipe (Bread Machine)
Ingredients
- 1 egg
- 1 cup water, approximately *warm - NOT hot
- 2 tablespoon milk powder *I use skim milk powder
- 3 ½ tablespoon white granulated sugar
- 1 tablespoon oil *I use canola
- 2 tablespoon unsalted butter melted, measure AFTER melting
- 1 teaspoon salt
- 4 cups all-purpose flour
- 1 teaspoon breadmaker/breadmachine yeast regular
Egg wash (optional)
- 1 tablespoon water
Instructions
- Break egg into a 2 cup measuring cup and add enough water to make 1 ½ cups. Add to loaf pan.1 egg, 1 cup water, approximately
- Add milk powder, sugar, melted butter, oil, salt, and flour.2 tablespoon milk powder, 3 ½ tablespoon white granulated sugar, 1 tablespoon oil, 2 tablespoon unsalted butter, 1 teaspoon salt, 4 cups all-purpose flour
- Dig a small hole/crater in the flour (without touching the liquid). The yeast should not come in contact with the liquid before the machine starts because it will activate prematurely, affecting the rise of your bread.1 teaspoon breadmaker/breadmachine yeast
- Set bread machine to dough cycle and press start. When finished, remove dough from the machine. Divide dough by setting aside enough dough to create the decorations to be placed on top (* Note: I set aside about ⅙ of the dough, but it will be more or less depending on the decorations you make)
- Shape the rest of the dough into a round loaf and place in a greased (with vegetable shortening), round shallow pan. Depending on the size you use, you may need to use more than one pan.
- Decorations: decorate the loaves with the dough previously set aside.The central ornament on pasta is usually a cross. Roll the strips of dough approximately ¼- ½ inch in diameter. See decoration ideas in NOTES below.
- Set the loaves in a warm place and let the dough rise for 45 minutes to 1 hour.
- Carefully watch the ornaments while rising so that it does not get out of shape. The shape can be corrected by gently inserting a wooden toothpick or cake tester, along the side of the ornamentation that has risen too much.
- Before baking brush the top of the Paska with a beaten egg diluted with 1 tablespoon of water (which I forgot to do in the main photos) * It's not absolutely necessary, but it's just not as shiny.1 egg, 1 tablespoon water
- Bake at 350 degrees F/175 degrees C for 25-35 minutes or until golden brown. * Check at about 15-20 minutes and if ornaments are browning too quickly, cover very loosely with tinfoil or parchment paper.
- Cool in pans for approximately ten minutes before gently removing. Cool on a wire cooling rack.
Notes
-
- Use Fresh Yeast - Ensure your bread machine yeast is fresh and not expired, as old yeast may not rise properly.
-
- Proper Liquid Temperature - When adding water to the dough, it should be lukewarm (around 100°F/38°C). Too hot can kill the yeast, while too cold can slow down rising.
-
- Egg Measurement Tip - Break the egg into a measuring cup first, then add water to reach the total required amount of liquid for accuracy.
-
- Avoid Direct Yeast Contact with Liquid - Dig a small hole in the flour and add the yeast there to prevent premature activation before the bread machine starts
-
- Egg Wash for Shine - Brushing the bread with an egg wash (1 egg beaten with 1 tablespoon of water) before baking gives it a golden, shiny crust.
-
- Covering Decorations While Baking - If the decorative elements start browning too quickly, cover them loosely with foil or parchment paper to prevent burning.
-
- Check for Doneness - The bread should have a golden brown crust and sound hollow when tapped. You can also check for doneness with an instant-read thermometer; the internal temperature should be around 190°F (88°C).
-
- Cooling for Best Texture - Let the bread cool in the pan for about 10 minutes before transferring it to a wire rack to prevent it from becoming soggy.
-
- Best Way to Store - Store at room temperature in an airtight container for up to 4 days. Refrigeration can dry bread out, so freezing is the best option for longer storage.
-
- This traditional Easter bread can be stored, at room temperature, in a sealed container, for up to 4 days. *I find that putting it in the fridge dries it out faster
-
- Freezing: This bread Machine Paska freezes really well. The best way to prep it for freezing is to wrap it in plastic wrap (I use Glad Press n' seal wrap) and place it in a Ziplock freezer bag. It will last for at least 3 months in your freezer.


Janet L Oresick says
Now that I think of it...I do have buttermilk powder. Could I use that as a substitute? If you are using it to make buttermilk, you use four tbsp to one cup of water.
Terri Gilson says
Hi Janet,
I would use the non-fat milk instead! Just because it's closer to the skim that I use.
Thanks,
Terri
Janet Oresick says
Thanks! I didn't know the milk in your recipe was skim. It just says milk powder. Also I'm not sure what size or type of pan to use. I have a 3.75 quart dutch oven, but that might be too high. I also have a springform pan that I use for making cheesecake. A one pound loaf of bread doesn't sound like I would need a huge pan--but is the height important...or the type of pan--glass, metal, etc? Thanks!
Terri Gilson says
Hi Janet,
You could use either pans. I used a round corningware casserole dish (3 quart I think).
As you can see in the photo, it doesn't bake up that high.
Thanks,
Terri
Janet Oresick says
Thanks for your response. I'm looking forward to giving this a try!
Janet Oresick says
I have milk powder, but it is nonfat milk. Is that okay or should I use full fat milk powder. This recipe looks great! I’m going to give it a try!
Tara says
This recipe is so easy and it baked up just perfectly. Got many compliments on it!
Terri Gilson says
So happy to hear you loved it, Tara!
Terri
Shirley says
Fun, and easy. Turned out great! I USED KING ARTHUR bread flour, and red label Saf instant yeast. Rose beautiful. Thank you for the bread machine recipes.
Terri Gilson says
Hi Shirley,
You are welcome! So glad it worked so well for you!
Terri
Alan Hough says
Thank you for the Paska Easter bread recipe. I made the dough in my breadmaker, as I do with all my breads, and baked it in the oven. It turned out to be a beautiful loaf. I just have to work on my decorations.
I increased the yeast to 2 teaspoons for 4 cups flour due to my experience with New Zealand flour and yeast and it proved perfectly.
Christine, the failure to rise is either the yeast is stale or increase to 2 teaspoons.
Make sure it is breadmaker yeast as it contains an improver.
As I made this bread my heart and prayers went out to the Ukraine people.
Thank you once again.
Alan
Bethlehem
New Zealand
Terri Gilson says
Hi Alan,
I'm so glad it turned out perfectly for you!
And thank you for your kind words and prayers!
Terri