


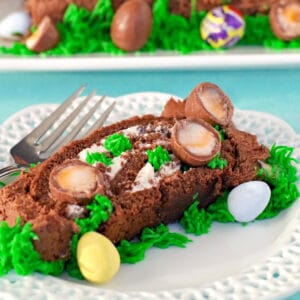
I love the look of a rolled cake. Not only is it fun and whimsical, but you're also guaranteed whipped cream and chocolate with every bite. That's my kind of cake! But even better, this Easter Creme Egg Swiss Roll marries the Chocolate Swiss Roll with Easter Creme Eggs; you just can't go wrong with that union!
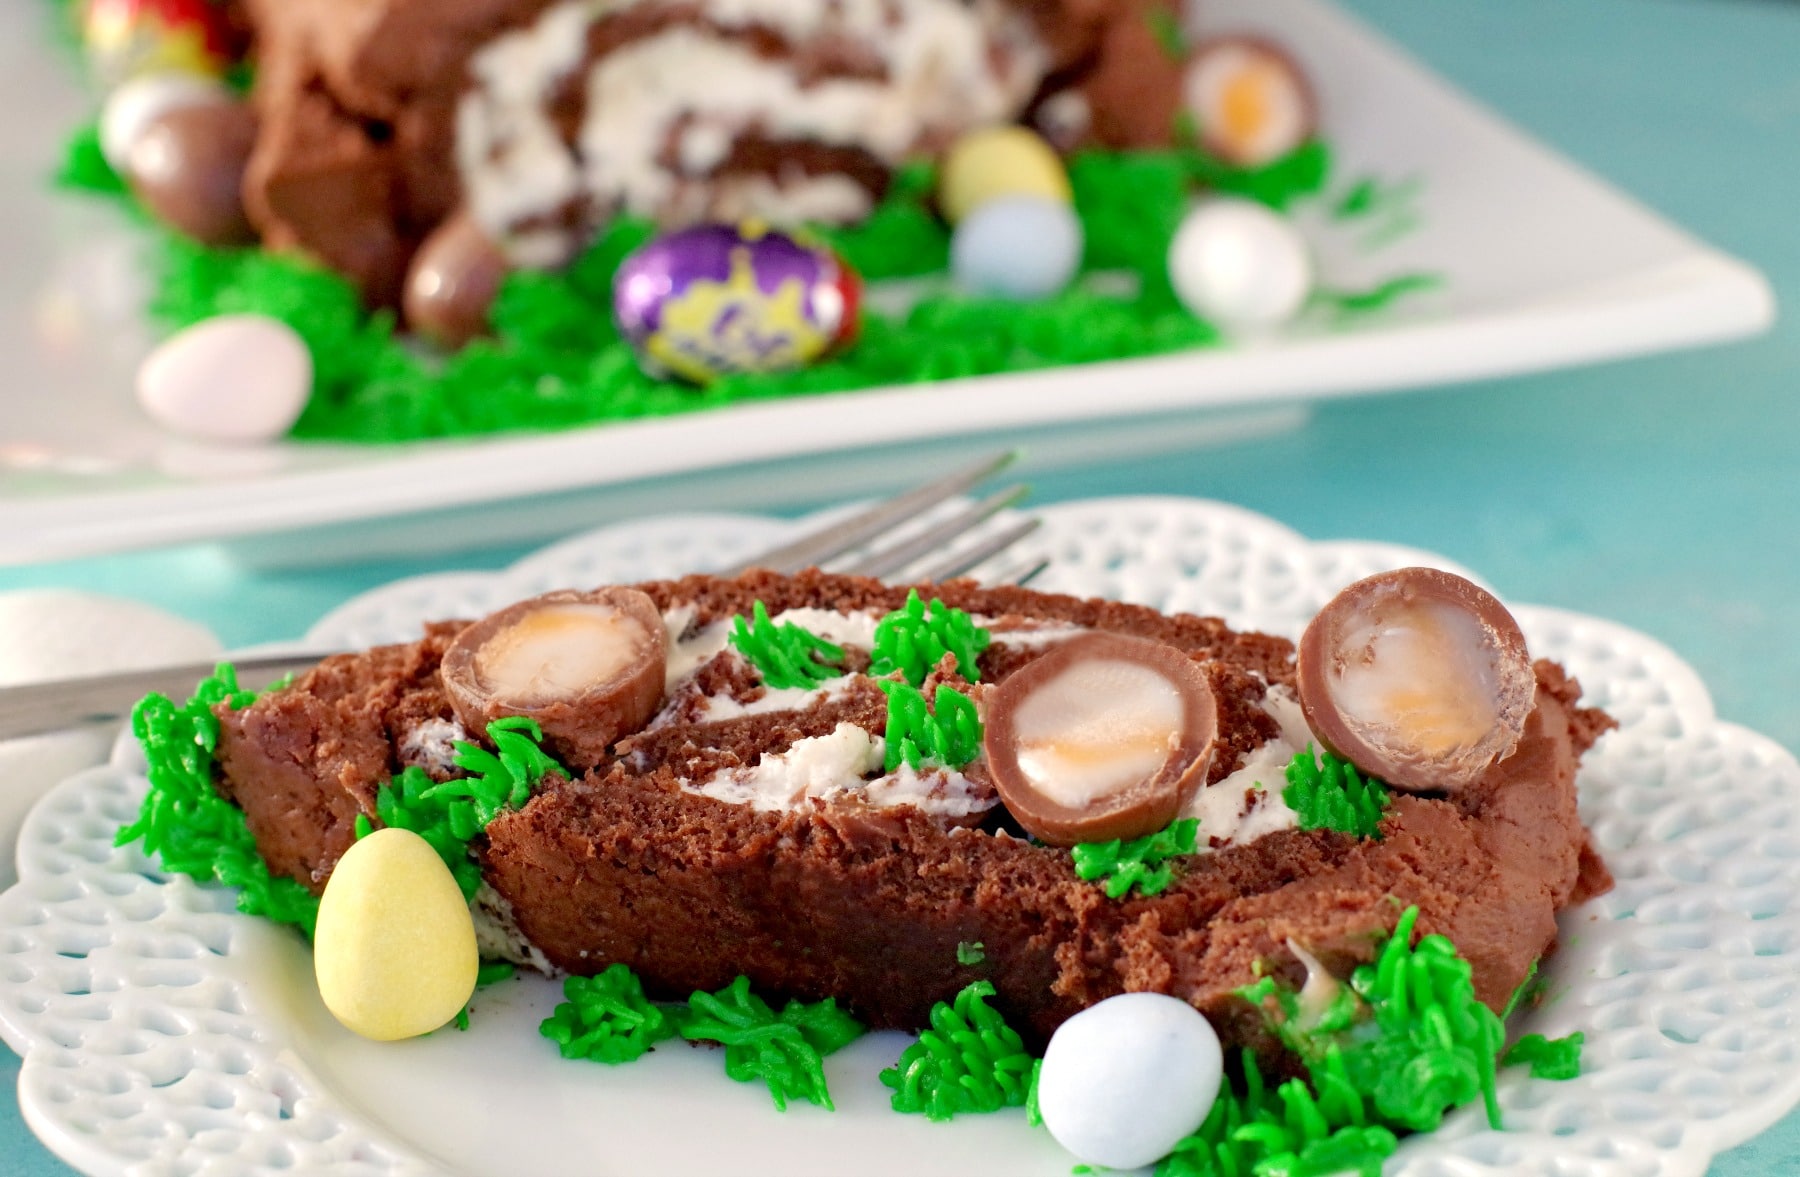
I just adore that classic and tasty combination of the light sponge cake and whipped cream filling in this Chocolate Easter Roll Cake. Who wouldn't? This recipe is very popular during Easter, obviously, but great any time of year for Easter creme egg lovers! And it makes a great centrepiece for your Easter table. It was inspired by my Easter Creme Egg Icebox Cake.
Jump to:
In a May 2019 post, Martha Stewart proclaims that rolled cakes are ready for a revival- I couldn't agree more! She says, "When sliced, the spiral sweets look graphic and modern, yet still retaining a nostalgic charm." You can read more about the revival of rolled cakes HERE. I have always loved rolled cakes and have made several holiday yule logs over the years.
It just isn't Easter without Creme Eggs, and that's why I added them to this cake's filling. I used the mini Easter Creme Eggs, as they are easier to crush and roll up with the whipped cream. And it was perfect!
If you love Creme Eggs and chocolate mini eggs as much as I do, try my Mini Egg Cupcakes and this Easter Creme Egg Microwave Fudge. They are all really fun and delicious Easter desserts, or you can use leftover chocolate creme eggs to make them after Easter!
🥘Ingredient Notes
This is essentially a chocolate Swiss Roll (with a chocolate sponge cake) with a whipped cream Easter Creme Egg middle. For this Easter Swiss Roll, you only need simple ingredients and some chocolate eggs.
- Unsalted Butter. I prefer to use unsalted butter in my baking so I can control the salt. The salt content in salted butter varies by brand.
- Unsweetened cocoa. Make sure you are using 'unsweetened' cocoa.
- Whipping cream. You should use whipping cream/ heavy cream that's at least 35% fat.
- Cadbury Creme Mini Eggs. I use the mini Easter Creme eggs for this recipe. If you can't find them, use the regular ones (see variations and substitutions below).
- Mini chocolate eggs. I use a variety of mini eggs to decorate, some with the wrappers on.
- Chocolate Frosting. You can use store-bought chocolate frosting (I prefer Betty Crocker) or homemade chocolate frosting. I prefer this Chocolate Frosting (no butter) recipe.
- Green Frosting. I recommend using a store-bought white frosting and coloring it green with food coloring. If you prefer to use homemade, then I recommend my Whipped Cream Buttercream Frosting. I use gel food coloring because you get a deeper, more vibrant color without using too much. I use Wilton brand Leaf Green or Kelly Green. Americolor also makes great gel food coloring!
*See printable recipe card for full list of ingredients and quantities.
📖Variations & Substitutions
- Frosting: You can use any frosting that you prefer. Cream cheese frosting, vanilla buttercream, or even a light ganache (try my ganache in my Black Forest Yule Log Cake) would work great with this cake. Just make sure the frosting is easy to spread, as you'll be covering the entire Swiss Roll.
- Salted Butter: If you only have salted butter, you can use it. Just eliminate the salt in the Swiss roll cake recipe.
- Whipped Cream: You can substitute the whipped cream with a store-bought whipped topping (Cool Whip or Dream Whip, for example) or use mascarpone cheese mixed with some cream for a thicker filling. However, the lightness of the whipped cream is part of what makes this cake so delightful.
- Easter Creme Eggs: You can use regular-sized Cadbury Creme Eggs instead of mini ones. Simply crush them into smaller pieces to make it easier to incorporate into the whipped cream filling. The mini eggs are just easier to crush and mix in, but the regular ones will work just as well.
🔪How to Make a Creme Egg Easter Cake Roll
If you've never made a Swiss Roll cake aka cake roll, don't be intimidated- it's really quite straightforward. In fact, it's so straightforward that my son's Grade 9 cooking class made this Chocolate Swiss Roll as a lesson.
This is a really fun cake to make with your kids, but my son actually made it by himself for Christmas dessert this year! That's how simple it is- you just have to follow my step-by-step instructions.
PREP: Preheat the oven to 425 degrees F/218 degrees C.

Step 1: MAKE THE CAKE BATTER: Place parchment paper on a 17X12 sheet pan (jelly roll pan) and grease with butter. If you don't have a jelly roll pan, you can use a regular baking sheet (my son did this when he made it at Christmas, and it turned out just fine) (IMAGE 1). Bring an inch of water to a simmer in a medium saucepan. Whisk the eggs and sugar in a heatproof large mixing bowl, then place in the simmering water. Make sure the water doesn't touch the bottom of the bowl at any time. *Alternatively, you can do this in a double boiler if you have one. (IMAGE 2). Using a hand mixer or standing mixer, at medium speed, continuously beat the egg mixture until the eggs are thick, pale yellow, and warm to the touch (120 degrees F). It should feel like hot tap water (IMAGE 3).

STEP 2: MAKE THE CAKE BATTER & BAKE THE CAKE (CONT'D): Remove the egg bowl from the heat and continue beating on a high speed until the mixture is thick and airy, and has reached the ribbon stage. This means that when you drag and drizzle a spoonful of liquid, it shouldn't settle back into the liquid for a good 5-10 seconds. Mix in the melted butter with a spoon (do NOT beat in with mixer). (IMAGE 4). In a separate bowl, whisk together the cocoa powder, flour, and salt. Add the dry ingredients to the egg mixture and gently fold it into the eggs with a rubber spatula (IMAGE 5). Spread the cake batter onto the buttered parchment, leaving approximately an inch from the edges of the parchment. Bake the cake for 8 minutes until it is springy to the touch (IMAGE 6).

STEP 3: PREP THE CAKE FOR ROLLING: Sprinkle cocoa on a large piece of parchment paper while the cake is baking (STEP 7). As soon as you take the cake out of the oven, flip it onto the cocoa-covered parchment paper (STEP 8). Remove the parchment paper that the cake was baked on by gently peeling it off. Then, trim the parchment around it, leaving a 1 ½ - 2 inch border (STEP 9).

STEP 4: ROLL THE CAKE: IMMEDIATELY and gently roll the cake up in the parchment paper into a log while it's warm. *You can also do this using a clean kitchen towel or tea towel (I just find the parchment paper easier) (IMAGE 10). Keep rolling up (IMAGE 11). Leave it in a rolled-up state until cool (this is like muscle memory for cakes)(IMAGE 12). You can set this on a wire rack.

STEP 4: MAKE THE FILLING: While the cake is cooling, whip the whipping cream in a medium bowl until soft peaks form, then add vanilla and sugar and beat until stiff peaks form (IMAGE 13). Crush the Easter Creme Eggs. TERRI'S TIP: I do this by placing them on a cutting board and placing a large plastic ziplock bag over them. Then I hit each egg a couple of times gently with a hammer or mallet to crush them, with the plastic between the tool and the eggs. * This is the best and cleanest way I have come up with to crush them. If you enlist your kids to help you unwrap and crush them, it goes much faster, and it's fun for them! Mix the crushed Easter creme eggs into the whipped cream (IMAGE 14). Unroll the cake and spread the filling all over the cooled cake, leaving a 1-inch border around all the edges (IMAGE 15).

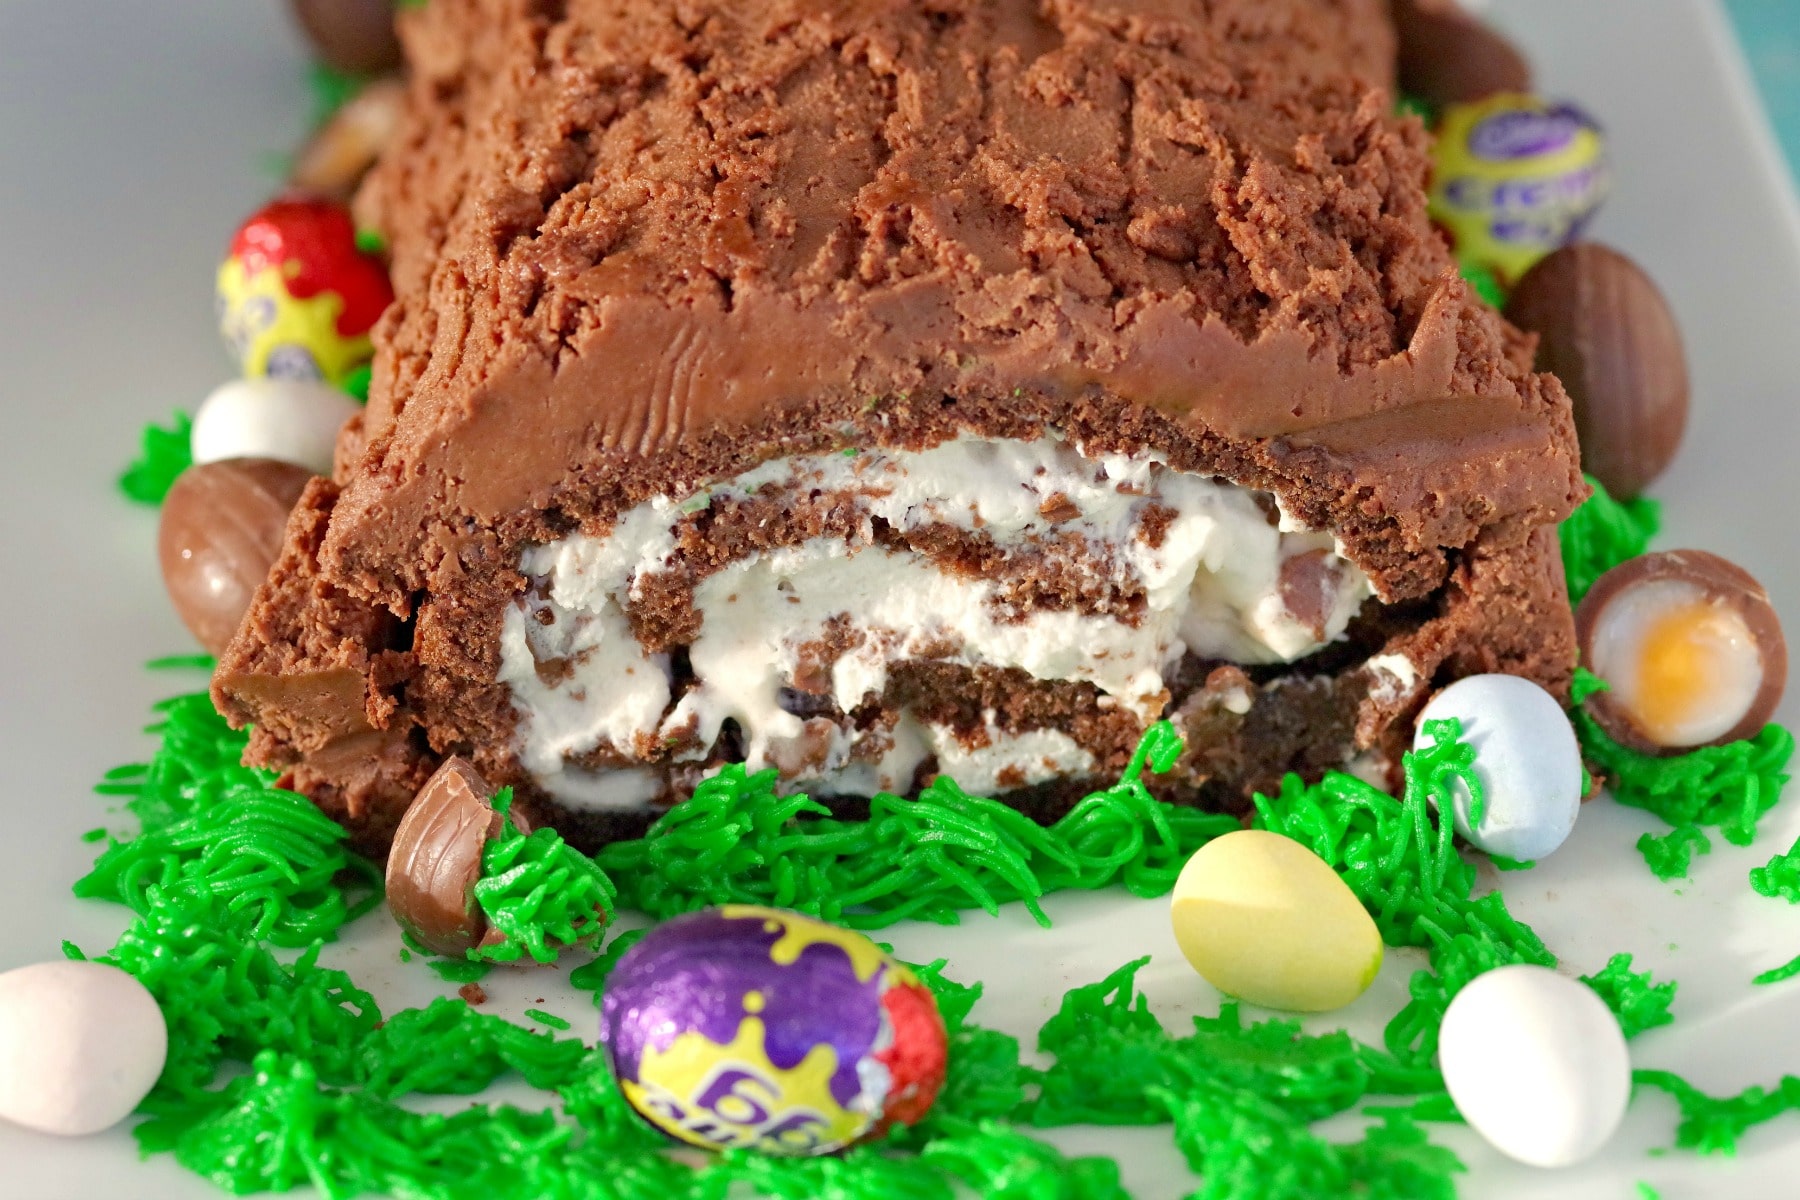
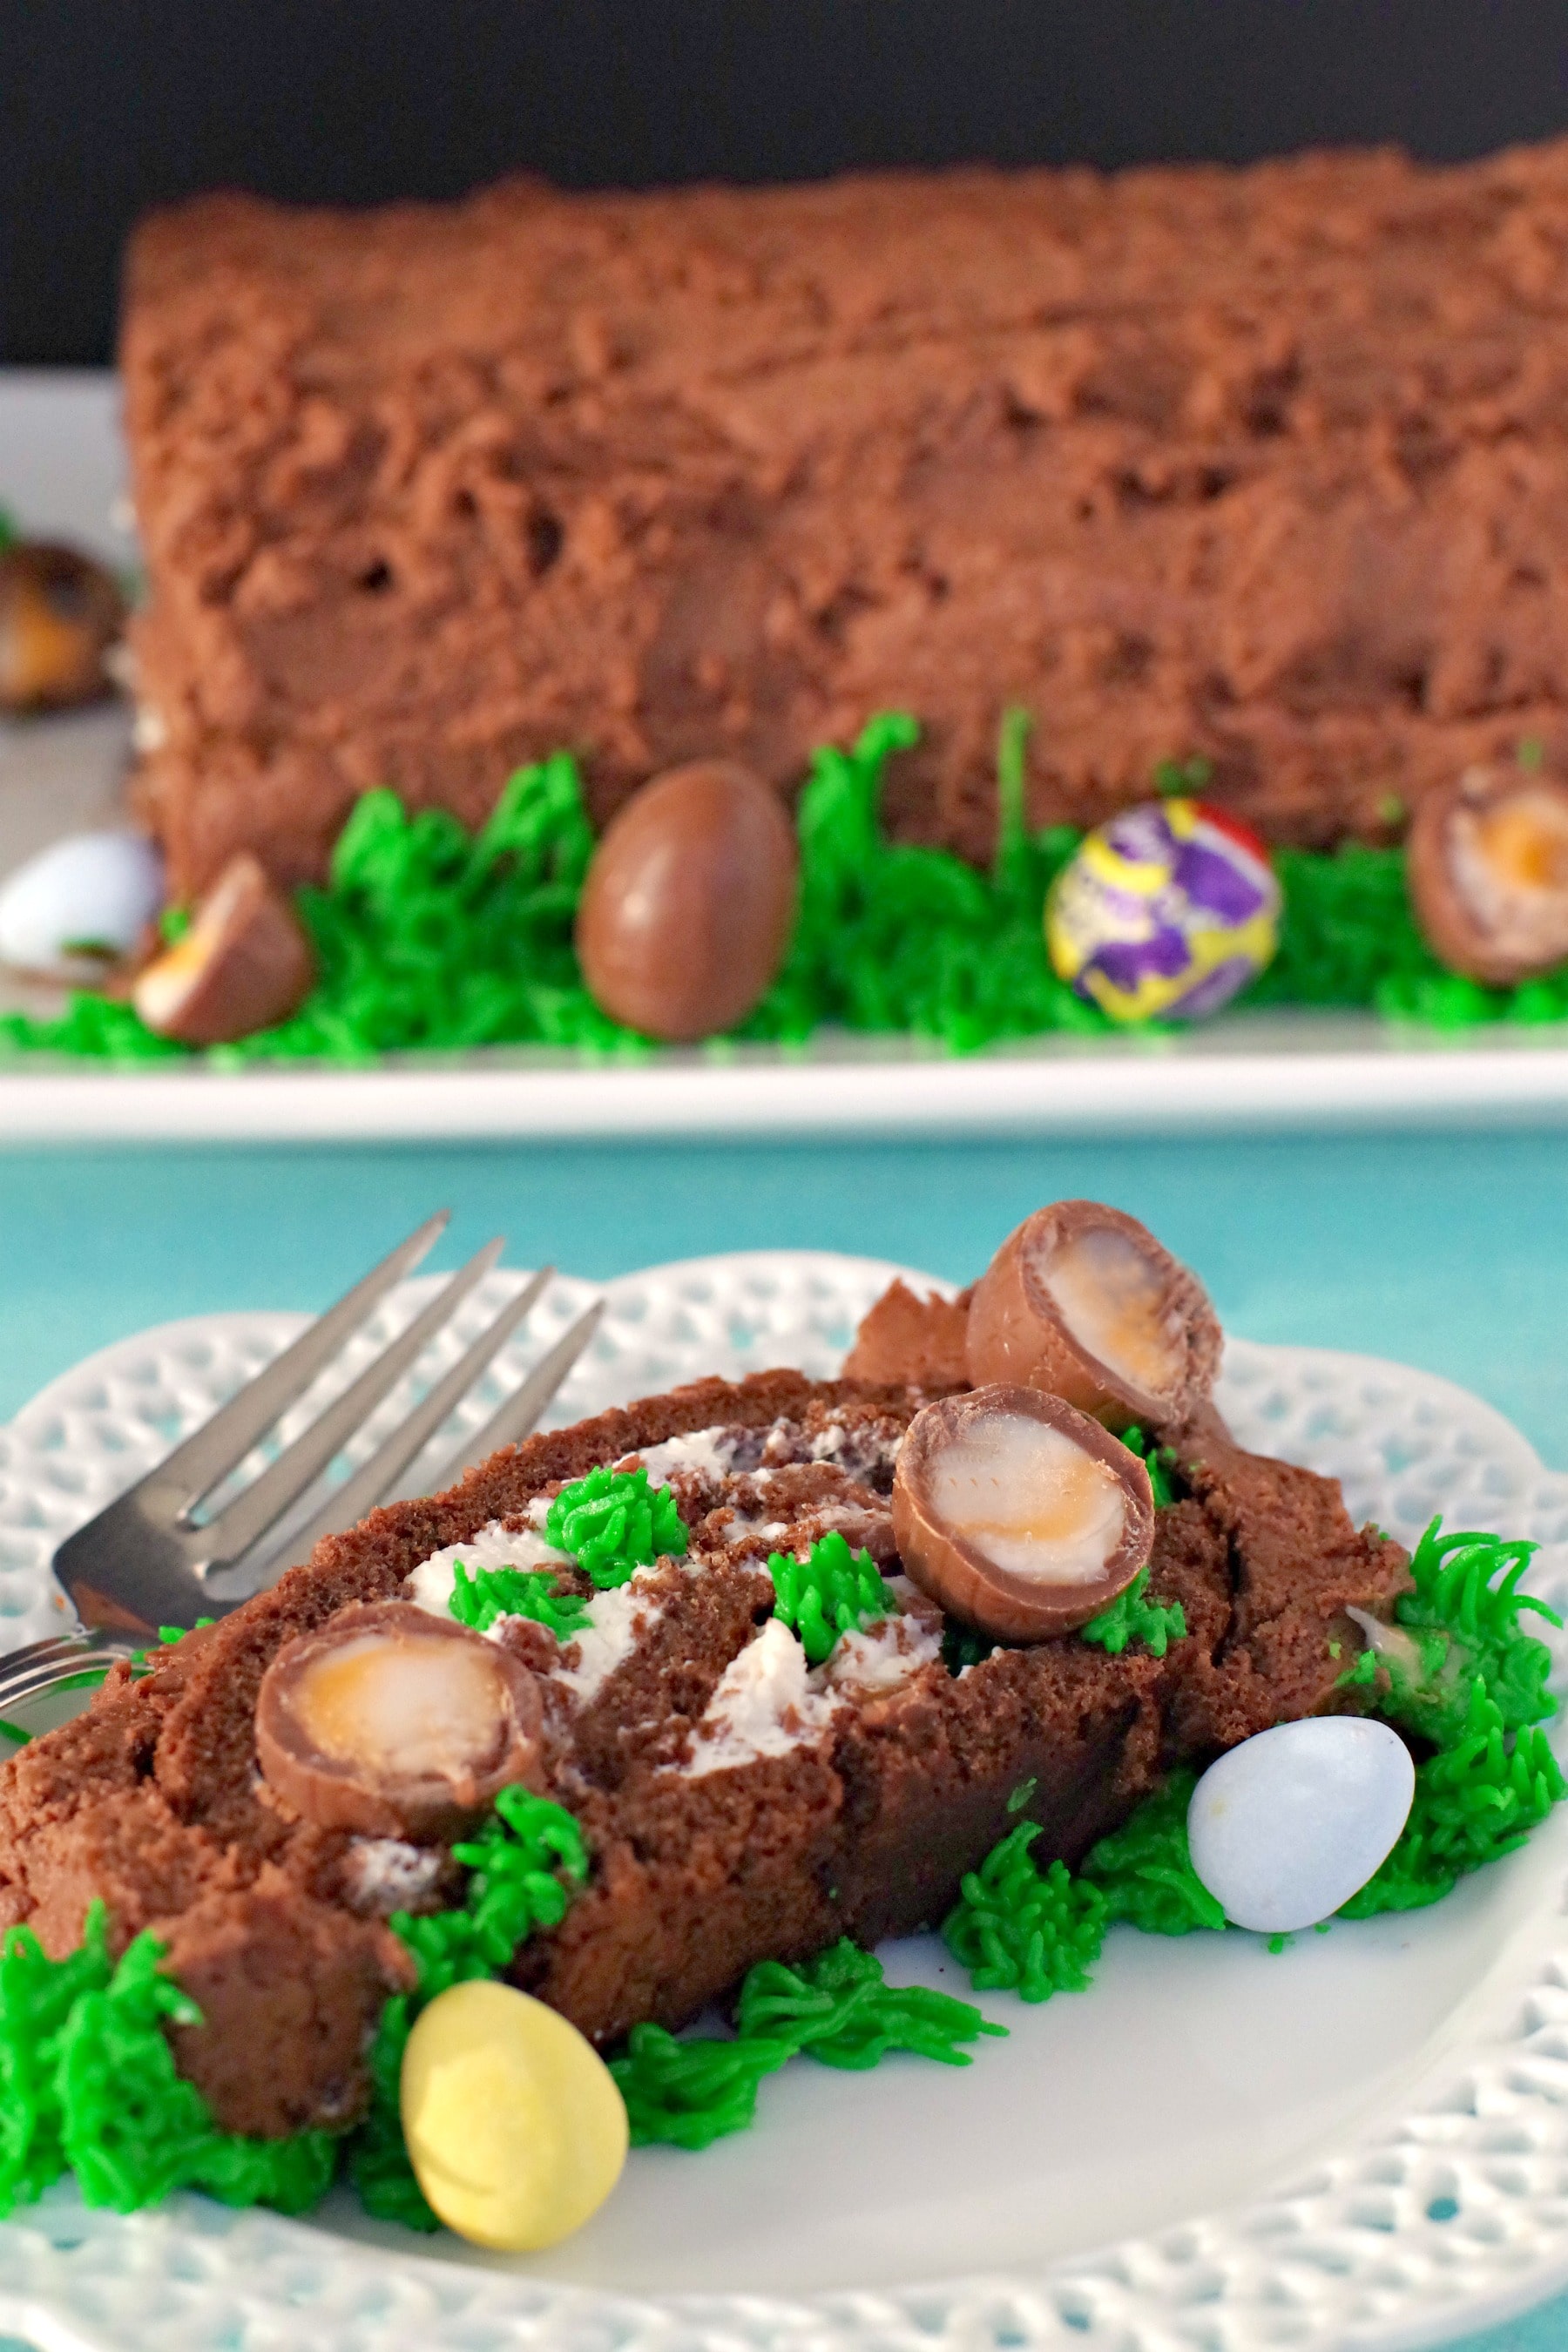
STEP 5: ASSEMBLE THE CAKE: Then gently roll the cake back up, leaving the parchment paper behind. * If it cracks a little, don't worry, as it will be covered in frosting. Trim about an inch off each end (the edges of the cake) to make it look neater (IMAGE 16). Frost the cake with chocolate frosting, then drag the dull side of a butter knife across it all over to look like a wood texture. Pipe grass around the cake with green frosting (see video in NOTES on how to pipe grass). * If you have never piped grass before, don't worry - it's one of the easiest types of piping to do (easier than most borders!) (IMAGE 17). Add eggs around the cake and serve with additional chocolate eggs on each slice and a little grass piped on (IMAGE 18).
Expert Recipe Tips
- Egg Beating Technique for a Light Sponge Cake: When beating the eggs with sugar over simmering water (called the bain-marie method), make sure the water doesn't touch the bowl. The key is to achieve a ribbon stage, where the mixture holds its shape for a few seconds before sinking back in. This ensures your sponge cake will be light and fluffy. Pro Tip: If you have a hand mixer with multiple speed settings, start on low and gradually increase speed to prevent the eggs from splattering as they begin to foam.
- Perfect Cake Rolling: Roll the cake immediately after removing it from the oven while it's still warm. This helps it hold the rolled shape without cracking. If you do find a crack, don't worry! It's easy to hide with frosting and decorations later on. Pro Tip: Use parchment paper instead of a kitchen towel for rolling. The parchment gives you a cleaner release from the cake, reducing the chances of sticking.
- Whipped Cream Filling: Be sure to whip the cream to stiff peaks but not over-whip it. If you over-whip, it may separate or become too firm and difficult to spread evenly. Pro Tip: Keep the whipping cream cold, and chill your mixing bowl and beaters for even faster whipping. This helps the cream whip up to stiff peaks much quicker.
- Crushing Cadbury Creme Eggs: Crushing mini Cadbury Creme Eggs can get messy, so use the ziplock bag method! It makes cleanup easy and prevents any eggs from flying around. Just gently tap them with a mallet or hammer to crush them into small pieces. *You could also use a rolling pin. Pro Tip: If you're working with regular-sized Cadbury Creme Eggs, chop them into smaller pieces to ensure they blend smoothly into the whipped cream filling.
- Decorating with Frosting: For the wood-textured frosting on the outside, use the back of a butter knife to create a rough, vertical pattern. It adds a rustic feel, perfect for an Easter-themed dessert. Pro Tip: For piping the grass, using a grass piping tip #233 will give you perfect strands. If you don't have one, a simple leaf tip or even a star tip can mimic grass with practice. You can always use a toothpick to add fine details if needed.
- Extra Touches: Garnish your cake with extra mini Easter Creme Eggs and colorful chocolate mini eggs around the edges. It'll not only make the cake look festive but also enhance the flavor with more chocolatey goodness. Pro Tip: If you're feeling creative, use edible flowers or pastel-colored sprinkles (you can get these in flower shapes too - I use them on my Mini Egg Cupcakes for an extra pop of Easter charm).
👪 Serving size
This Chocolate Swiss Roll Cake serves 8, but it was perfect for our family of 4 - everyone got a leftover second slice the next day! Although we were left wanting even more. However, if you want to make more than one cake, you can double or triple the recipe by clicking on the serving number and selecting the number of servings you'd like. The ingredient quantities will automatically adjust.
🥗 What to eat with Easter Swiss Roll
For the ideal Easter appetizer, try these dill devilled eggs! (shown) Picnic Ham with glaze , a Strawberry Spinach Pecan salad, and Old Fashioned Scalloped Potatoes make up the perfect holiday meal to accompany this Chocolate Easter roll cake.

🌡️Storage
Store the leftovers of this Easter Roll Cake recipe in an airtight container in the fridge for up to 4 days.
This cake does not freeze well due to the whipped cream filling (the whipped cream will get watery when defrosted).
If you are just storing it overnight, you can simply cover the cake with plastic wrap.
❔ Recipe FAQ's
In short- not much. They are all sponge or chiffon cakes baked on a sheet pan (usually a jelly roll pan) and rolled with a filling inside. The big difference is the name; the French call it a "Roulade" while the Americans call it a "Jelly Roll" and the English call it a "Swiss roll." You can read more about the differences between Swiss Rolls, Jelly Rolls, and Roulades HERE. Despite the name "Swiss roll," the cake doesn't seem to have anything to do with Switzerland or the word 'swiss, unlike Swiss Steak, which is named so because of its preparation method. Swiss Rolls appear to have originated elsewhere in Central Europe and were invented in the nineteenth century. They are also referred to as "Cake Rolls" and "Roll Cakes" in North America.
No worries! You can use any baking sheet you have. The key is to ensure that the parchment paper is large enough to hold the cake batter and that the batter is spread evenly. The cake will still roll up beautifully even if the pan is a bit different.
It's normal for the cake to crack a bit when rolling, especially with the cream filling. However, if you're worried, make sure to roll the cake while it's still warm and be gentle. A little crack won't show once it's frosted, so don't stress! If cracks do occur, you can always trim the edges to make them neater.
Piping grass is easy! Just use a #233 tip (grass tip) and green frosting. If you don't have a grass tip, you can still achieve a similar look using a regular piping bag and snipping a small hole at the end. Check the video in the recipe for a step-by-step tutorial.
Yes, you can! You can bake the cake and prepare the filling a day in advance. Once assembled, store the cake in the fridge until you're ready to serve. It will stay fresh for up to 4 days.
It's not easy to find an Easter cake with a full-on Easter theme that looks and tastes as good as this show-stopping dessert! So if you're looking for Easter baking ideas, Swiss Rolls look great and are inexpensive to make.
Although the recipes are involved, if you follow the steps, they are quite simple to make. If my 14-year-old can master this beautiful Easter cake roll recipe, so can you. It's the perfect dessert for Easter!
Happy Easter cake baking!
🐇More Easter Recipes


Did your family❤️this recipe? Did you know that commenting and⭐rating recipes is one of the best ways to support your favorite recipe creators? If you LOVED this recipe, please comment and rate it in the recipe card or share photos on social media using the hashtag #foodmeanderings or tagging @foodmeanderings !

📋 Easter Creme Egg Swiss Roll Recipe
Ingredients
Swiss Roll Cake
- 1 tablespoon butter for greasing parchment
- 4 large eggs at room temperature
- ½ cup white granulated sugar
- 4 tablespoon unsalted butter melted
- ½ cup all purpose flour
- ¼ cup unsweetened cocoa plus more for sprinkling
- ¼ teaspoon salt
- additional cocoa powder for sprinkling
Filling
- 1 cup whipping cream (35% +)
- 2 tablespoon white granulated sugar
- 1 teaspoon vanilla extract
- 25 Cadbury Easter creme mini eggs *about a 300 g bag (save remainders for decorations)
Frosting
- 2 cups chocolate frosting either homemade or store bought (See NOTES for recipe) * You can use any chocolate frosting but I used my No Butter Chocolate Frosting
Decorations
- additional mini Easter Creme eggs (some wrapped and some unwrapped
- mini colored eggs
- 1 cup green frosting (for grass) * you can use store bought or color white frosting. * I use Wilton leaf green icing color mixed in with white icing - I find it gives it a nice vibrant green
Instructions
Cake
- Preheat the oven to 425 degrees F. Place parchment paper on a 17X12 sheet pan (jelly roll pan) and grease with butter. If you don't have a jelly roll pan, you can use a regular baking sheet (my son did this when he made it at Christmas and it turned out just fine)1 tablespoon butter for greasing parchment
- Bring and inch of water to simmer in a medium saucepan. Whisk eggs and sugar in a heatproof bowl, then place on the simmering water. Make sure the water doesn't touch the bottom of the bowl at any time.4 large eggs, ½ cup white granulated sugar
- Using a hand mixer, continuously beat the egg mixture until the eggs are thick, pale yellow and warm to the touch (120 degrees F) It should feel like hot tap water.
- Remove the egg bowl from the heat and continue beating on a high speed until the mixture is thick and airy, and has reached the ribbon stage. This means that when you drag and drizzle a spoonful of liquid, it shouldn't settle back into the liquid for a good 5-10 seconds. Mix in the melted butter with a spoon (do NOT beat in with mixer).4 tablespoon unsalted butter
- In a small bowl, whisk together the cocoa powder, flour and salt. Add the dry ingredients to the egg mixture and gently fold it into the eggs with a rubber spatula½ cup all purpose flour, ¼ cup unsweetened cocoa, ¼ teaspoon salt
- Spread the batter onto the prepared pan, leaving approximately an inch from the edges of the parchment. Bake the cake for 8 minutes until springy to the touch.
- Sprinkle cocoa on a large piece of parchment paper while cake is baking.additional cocoa powder for sprinkling
- As soon as you take the cake out of the oven, flip it onto the cocoa covered parchment paper.
- Remove the parchment paper that the cake was baked on by gently peeling it off. Then trim the parchment around it, leaving a 1 ½ - 2 inch border.
- IMMEDIATELY gently roll the cake up in the parchment paper into a log while it's warm.
- Keep rolling, as shown.
- Leave it in a rolled up state until cool (this is like muscle memory for cakes)
Filling
- While cake is cooling, whip the whipping cream in a large bowl until soft peaks form, then add vanilla and sugar and beat until stiff peaks form.1 cup whipping cream (35% +), 2 tablespoon white granulated sugar, 1 teaspoon vanilla extract
- Crush the Easter Creme Eggs. TERRI'S TIP: I do this by placing them on a cutting board and placing a large plastic ziplock bag over them. Then I hit each egg a couple of times gently with a hammer or mallet to crush them, with the plastic between the tool and the eggs. * This is the best and cleanest way I have come up with to crush them. If you enlist your kids to help you unwrap and crush them, it goes much faster and it's fun for them!25 Cadbury Easter creme mini eggs
- Mix the crushed Easter creme eggs into the whipped cream.
Assembly
- Unroll the cake, spread the filling all over, leaving a 1 inch border around all the edges.
- Then gently roll the cake back up, leaving the parchment paper behind. * If it cracks a little, don't worry, as it will be covered in frosting. Trim about an inch off each end to make it look neater.Gently ransfer to a serving plate (or you can wait until after you frost it).
Decorations
- Frost the cake with chocolate frosting, then drag the dull side of a butter knife across it all over to look like wood texture. Pipe grass around the cake with green frosting (see video in NOTES on how to pipe grass) * If you have never piped grass before, don't worry - it's one of the easiest types of piping to do (easier than most borders!)2 cups chocolate frosting either homemade or store bought (See NOTES for recipe)
- Add eggs around the cake and serve with additional chocolate eggs on each slice and a little grass piped on.additional mini Easter Creme eggs (some wrapped and some unwrapped, mini colored eggs, 1 cup green frosting (for grass)
Notes
- Egg Beating Technique for a Light Sponge Cake: When beating the eggs with sugar over simmering water (called the bain-marie method), make sure the water doesn't touch the bowl. The key is to achieve a ribbon stage, where the mixture holds its shape for a few seconds before sinking back in. This ensures your sponge cake will be light and fluffy. Pro Tip: If you have a hand mixer with multiple speed settings, start on low and gradually increase speed to prevent the eggs from splattering as they begin to foam.
- Perfect Cake Rolling: Roll the cake immediately after removing it from the oven while it's still warm. This helps it hold the rolled shape without cracking. If you do find a crack, don't worry! It's easy to hide with frosting and decorations later on. Pro Tip: Use parchment paper instead of a kitchen towel for rolling. The parchment gives you a cleaner release from the cake, reducing the chances of sticking.
- Whipped Cream Filling: Be sure to whip the cream to stiff peaks but not over-whip it. If you over-whip, it may separate or become too firm and difficult to spread evenly. Pro Tip: Keep the whipping cream cold, and chill your mixing bowl and beaters for even faster whipping. This helps the cream whip up to stiff peaks much quicker.
- Crushing Cadbury Creme Eggs: Crushing mini Cadbury Creme Eggs can get messy, so use the ziplock bag method! It makes cleanup easy and prevents any eggs from flying around. Just gently tap them with a mallet or hammer to crush them into small pieces. *You could also use a rolling pin. Pro Tip: If you're working with regular-sized Cadbury Creme Eggs, chop them into smaller pieces to ensure they blend smoothly into the whipped cream filling.
- Decorating with Frosting: For the wood-textured frosting on the outside, use the back of a butter knife to create a rough, vertical pattern. It adds a rustic feel, perfect for an Easter-themed dessert. Pro Tip: For piping the grass, using a grass piping tip #233 will give you perfect strands. If you don't have one, a simple leaf tip or even a star tip can mimic grass with practice. You can always use a toothpick to add fine details if needed.
- Extra Touches: Garnish your cake with extra mini Easter Creme Eggs and colorful chocolate mini eggs around the edges. It'll not only make the cake look festive but also enhance the flavor with more chocolatey goodness. Pro Tip: If you're feeling creative, use edible flowers or pastel-colored sprinkles (you can get these in flower shapes too - I use them on my Mini Egg Cupcakes for an extra pop of Easter charm).


JasenSammons says
kool me and the JIP Gang are giong to make it Tonight,,, Here at Paul's Place!!=))
Terri Gilson says
Great- hope you enjoy it and Happy Easter!
JasenSammons says
kool!!=))
Ayngelina says
I don't usually make desserts but this seems like a fun project right now while we're all struck at home.
Terri Gilson says
Hi Ayngelina- it really is a fun project - my son and I made it together! But they'll love the eating part best 🙂
Colleen says
I love Easter Creme Eggs and this is a perfect way to incorporate them into an Easter dessert. Your "grass" is a cute finishing touch, too!
Terri Gilson says
Thanks, Colleen! I started this whole food thing as a cake decorator so it's hard for me to control myself haha!
Bernice Hill says
Your step by step photos are very helpful! I've never made a swiss roll but I sure love to eat them! I have to try making one soon.
Terri Gilson says
That's great to hear, Bernice! I know I appreciate step by steps photos myself. Yes, agreed- they're so good to eat! You should try it - it's super fun to make!