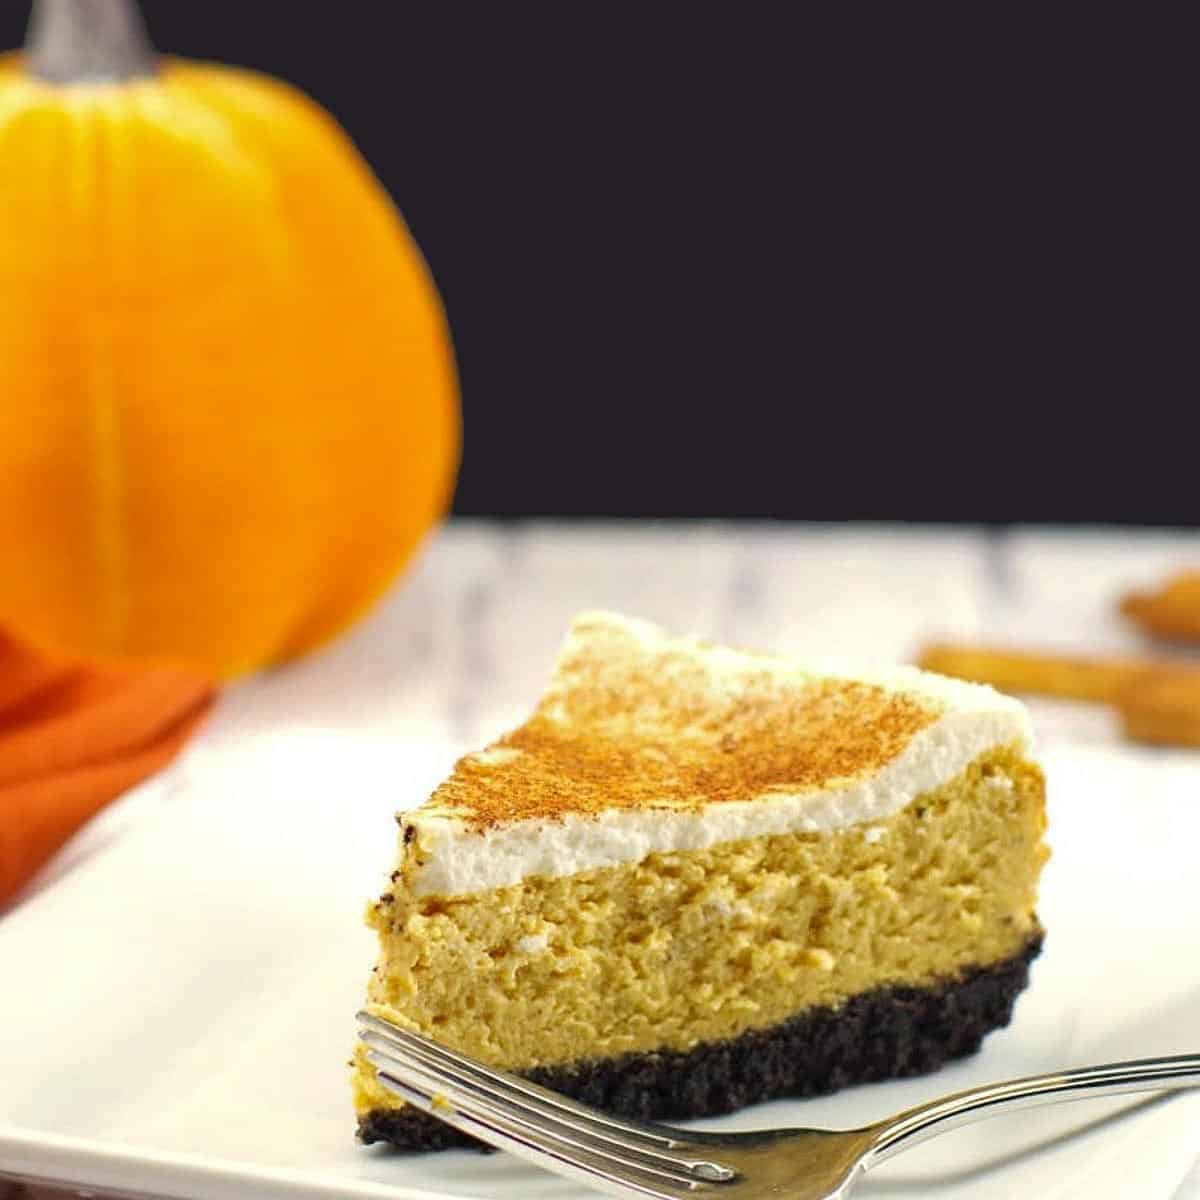
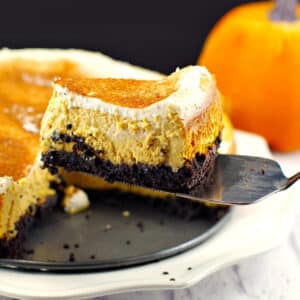
Just in time for Thanksgiving! This Light Pumpkin Cheesecake is a great pumpkin pie alternative. Cheesecake can be really heavy but this one isn't. It's a light and delicious low-fat pumpkin cheesecake made with a creamy pumpkin cheesecake filling, and a chocolatey Oreo crust. This skinny pumpkin cheesecake is Weight Watchers friendly, easy to make, and the ideal Thanksgiving Cheesecake and Canned pumpkin pie alternative!
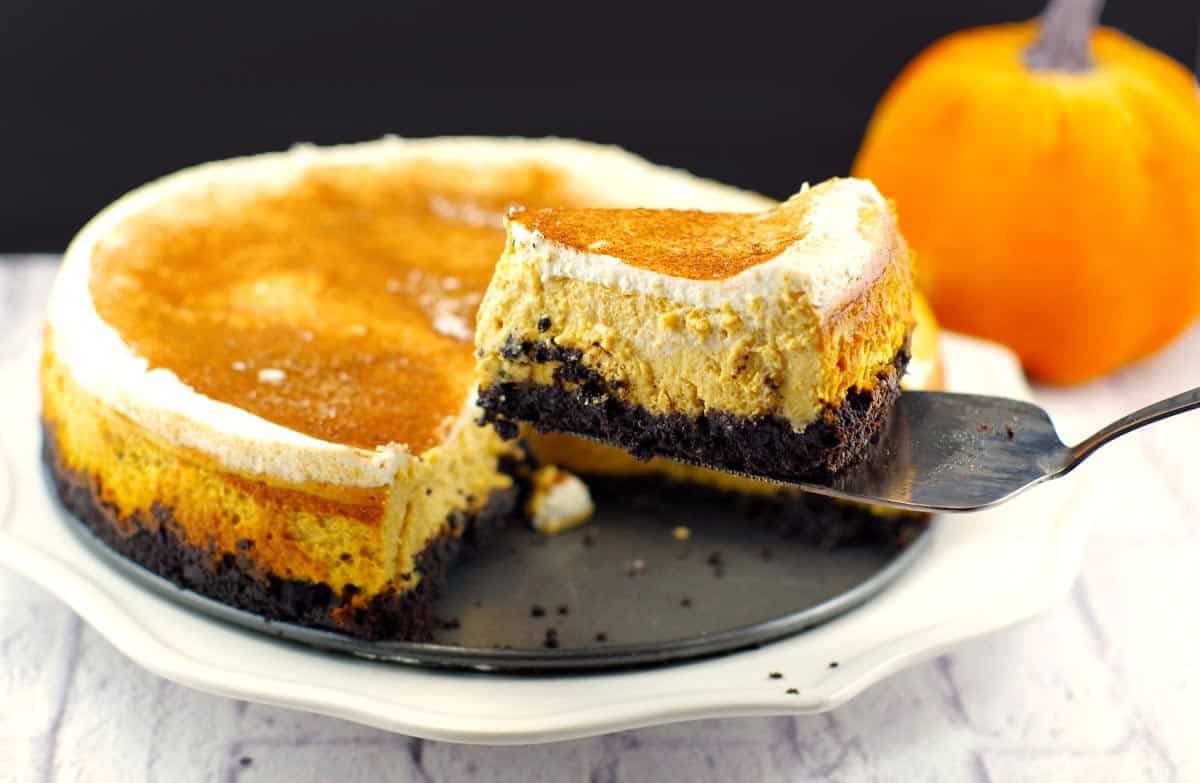
This Weight Watchers Pumpkin Cheesecake is popular during pumpkin season, so if you are looking for Thanksgiving pumpkin desserts (something that's a little different) then give this healthy dessert a try. You will be amazed by how delicious this light pumpkin cheesecake recipe tastes @ only 10 WW points. And no one will ever suspect it's Weight Watchers friendly.
Jump to:
- Tips for Success
- 🥘Ingredients Needed
- 📖 Substitutions & Variations
- Top Tip
- 🔪How to Make Light Pumpkin Cheesecake
- How to tell if cheesecake is done
- 📹Video: Cheesecake Water Bath
- 💧 What to do if you have a Cheesecake Water Bath Leak
- 🥗What to serve with Healthy Pumpkin Cheesecake
- 👪 Serving Size
- 🔢WW Points
- 🌡️Storing
- ❔ Recipe FAQs
- More Pumpkin Recipes
- 📋 Light Pumpkin Cheesecake (with Oreo Crust) recipe
If you're looking for additional light cheesecake recipes, be sure to try my Easy No Bake Baileys Cheesecake and my Birthday Cake Cheesecake !
Tips for Success
- Make sure your cream cheese and eggs are at room temperature- room temperature cream cheese and eggs ensure that your cheesecake batter will be smooth and lump-free!
- Use good quality ingredients (especially cream cheese) - I find that the brand names of light cream cheese are less watery and better quality.
- Use a water bath- a water bath will prevent cracking and help your cheesecake to cook evenly.
- Use a springform pan- springform pans are ideal for cheesecakes because the texture is more custard-like than a cake. Although you can bake a cheesecake in a different pan, you can't display it in the same way and it may not cook as evenly.
- Spray your pan thoroughly - if you don't want your cheesecake to stick to the pan- it will be a mess.
- Don't overmix -overmixed cheesecake can rise, then fall and crack from excess air.
- Don't open the oven while it's baking- any sudden temperature changes could shock the cheesecake and cause it to crack.
- Use an instant-read thermometer- your cheesecake is ready when the internal temperature reaches 150 degrees. At higher temperatures, the texture will suffer. If possible, insert the thermometer into the side of the cheesecake where it rises above the pan (otherwise, insert it into the center of the cake).
- Don't skimp on chilling time- if you try to remove your cheesecake from the springform pan before it's properly chilled, it won't firm up and cut as cleanly as a properly chilled cheesecake.
🥘Ingredients Needed

- Crust. The pumpkin is the star of the show in this Pumpkin Cheesecake with Oreo crust, but the chocolate Oreo cookie crust melds so perfectly with the pumpkin, that it's hard to believe that this cheesecake originally had a gingersnap crust!
- Cream Cheese. I use light cream cheese, but you could use non-fat.
- Flour. I use all-purpose flour.
- Pumpkin Puree. You can use canned pumpkin or make your own pumpkin puree, but DON'T use pumpkin pie filling!
- Cinnamon and Powdered Sugar. I mix powdered sugar (aka icing sugar or confectioners sugar) and cinnamon together (half and half) and sprinkle it on the cheesecake when it's cooled, then again before I serve it.
*See recipe card for full information on ingredients and quantities
📖 Substitutions & Variations
- Chocolate crust- If you can't find Oreo baking crumbs, you can use any chocolate baking crumbs. You can also use crushed Oreo thins. Using crushed Oreo cookies (crushed in a food processor or with a rolling pin) for the crust, as I do with my No Bake Black Forest Cheesecake, is also an option. However, keep in mind that it would be a lot more calories/points! You can also crush up ginger cookies and use them instead of the Oreo cookie crumbs or a regular graham cracker crust (homemade or store-bought). *If you can still find chocolate graham crackers, you can use those (but I think they are discontinued)
- Mini Pumpkin cheesecakes - You can make mini pumpkin cheesecakes using mini aluminum foil pie pans. Bake for 15 minutes, then check the internal temperature. It will read 150 degrees F/65 degrees C.
- Fat-free sour cream - you could use non-fat Greek Yogurt instead (I have tried this and it's a lot tangier - I prefer the sour cream).
- Spices -You can substitute pumpkin pie spice for cinnamon, ginger, and allspice.
Top Tip
Be careful when you are buying light cream cheese for this light pumpkin cheesecake, especially if you are following the Weight Watchers program, as the fat contents vary greatly between brands. I find most of the store/no-name brand fat content is substantially higher (almost the same as regular cream cheese) than the brand names. I generally stick to the brand names for light cream cheese.
🔪How to Make Light Pumpkin Cheesecake
PREP:Preheat oven to 350 degrees F/ 176 degrees C.
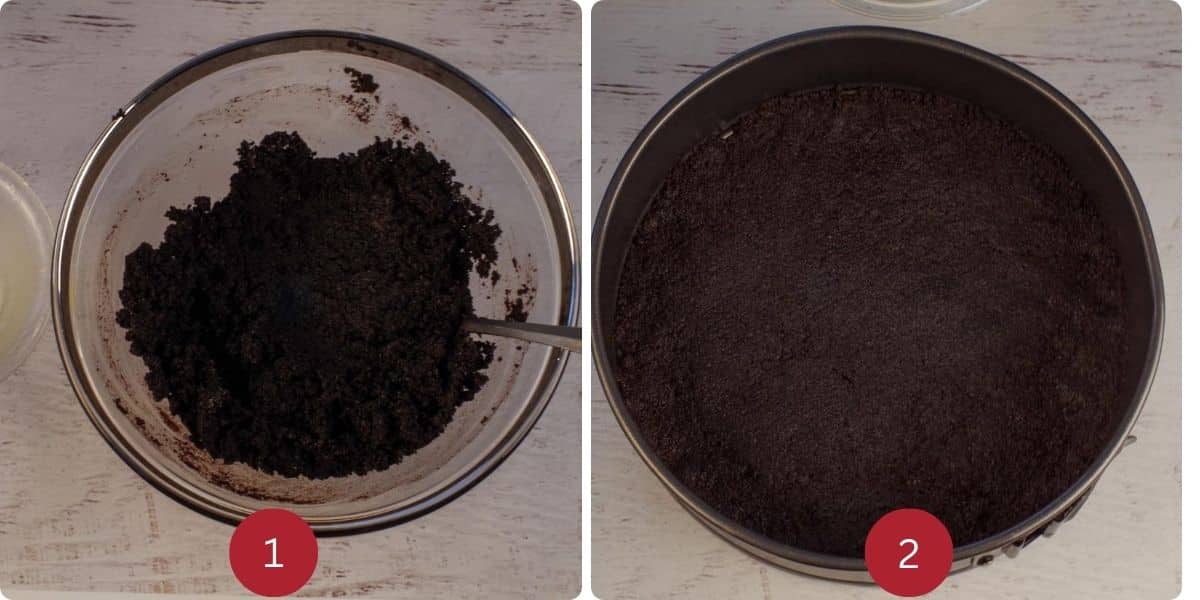
MAKE THE CRUST (STEP 1): Stir together all crust ingredients in a medium mixing bowl (Image 1). Spray a 9" or 10" springform pan with non-stick cooking spray. (Image 2) Press the mixture onto the sides and bottom of the pan. Bake in a preheated oven at 350 degrees F/176 degrees C for 10 minutes.
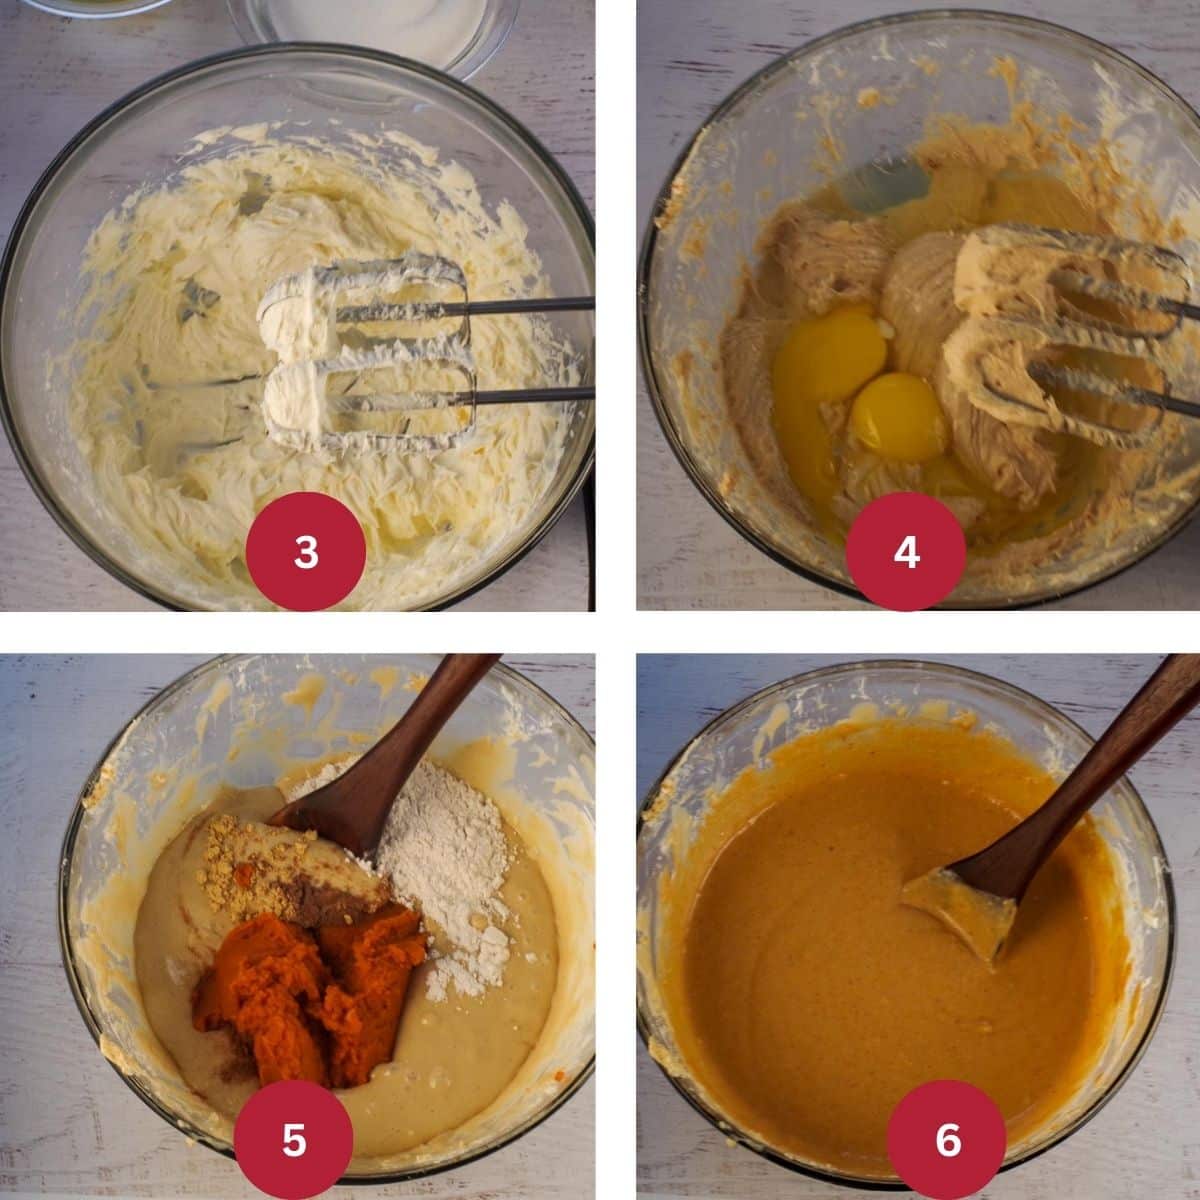
MAKE THE FILLING (STEP 2): Meanwhile, in a large mixing bowl, beat the cream cheese with an electric hand mixer or with the paddle attachment in the bowl of a stand mixer. (Image 3) Beat in the sugars (⅔ cup white sugar and brown sugar). Add the eggs and egg whites and beat at the lowest setting possible until mixture is smooth and fluffy- about 30 seconds (Image 4). Add in the pumpkin, salt, flour, and spices. (Image 5). Mix with a wooden spoon until combined. (Image 6).
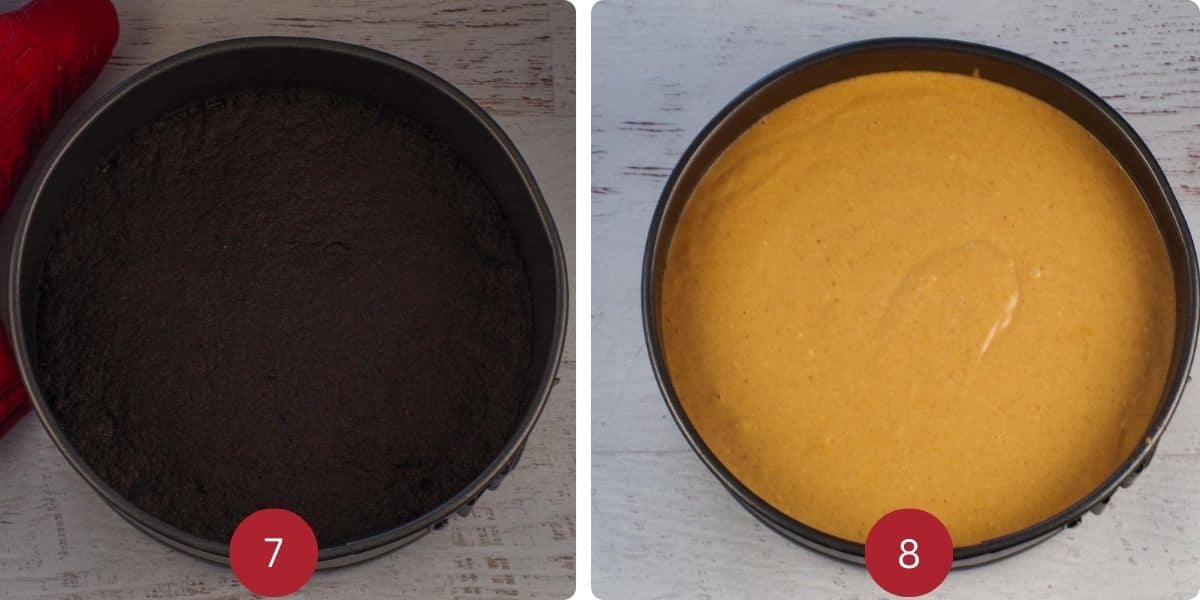
COMBINE THE CRUST AND FILLING (STEP 3): Remove the chocolate crust from the oven and allow to cool (Image 7). Pour filling onto the cooked and cooled crust (Image 8).

MAKE A WATER BATH (STEP 4): Put your cheesecake pan into a pan just a little larger, then put both of those pans into a very large pan (I use a large roasting pan). (Image 9) *See the video below. The water should be about ½ to ⅔ of the way up the pan holding your cheesecake pan. (Image 10). Then return to the oven and bake for 35- 50 minutes at 350 degrees F./176 degrees or until puffed and set/until the instant-read thermometer reads 150 degrees F/65 degrees C. ** I advise you to check it after 35 minutes.*
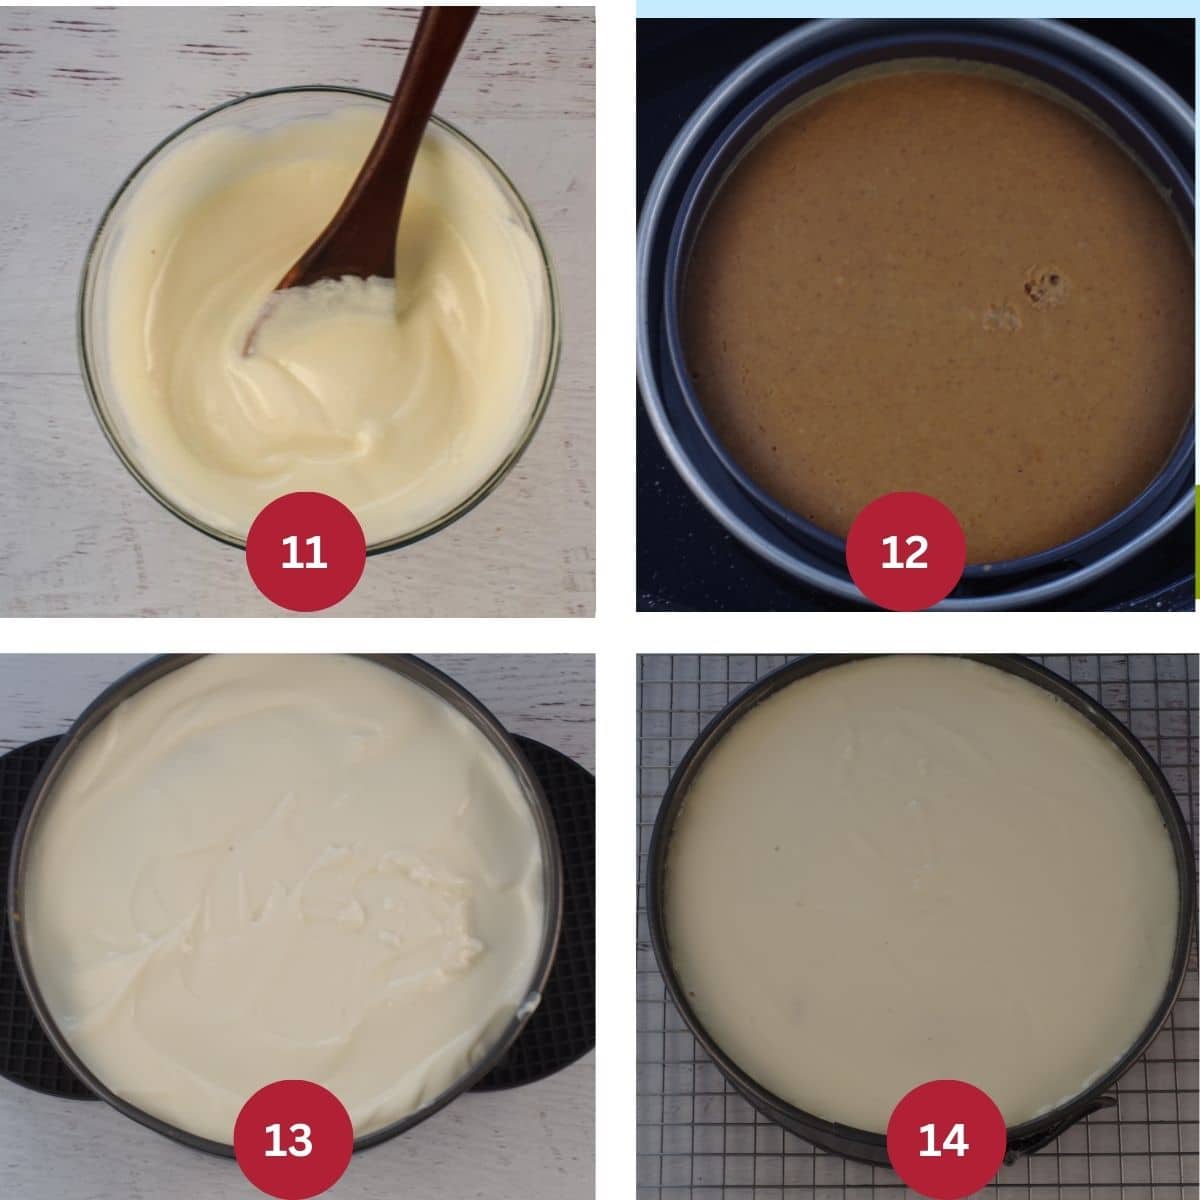
MAKE THE TOPPING (STEP 5): Meanwhile, make the topping by mixing together the vanilla, sour cream, and remaining 6 tbsps of white sugar). (Image 11) Remove the cake from the oven . (Image 12). It will still be a little jiggly when you shake/move it from side to side and the sides will have separated from the edges of the pan. But you will see it is puffed up a little around the center . The best way to ensure cheesecake is done is by internal temperature. When inserted into the center of the cheesecake, it should read 150 degrees F. *Don't worry if you make a mark because it will be covered by the topping. Spread the topping over the cheesecake return to the oven and bake 10 minutes longer. You don't need the water bath for this part. (Image 13) Cool on a wire rack for 30 minutes (Image 14).
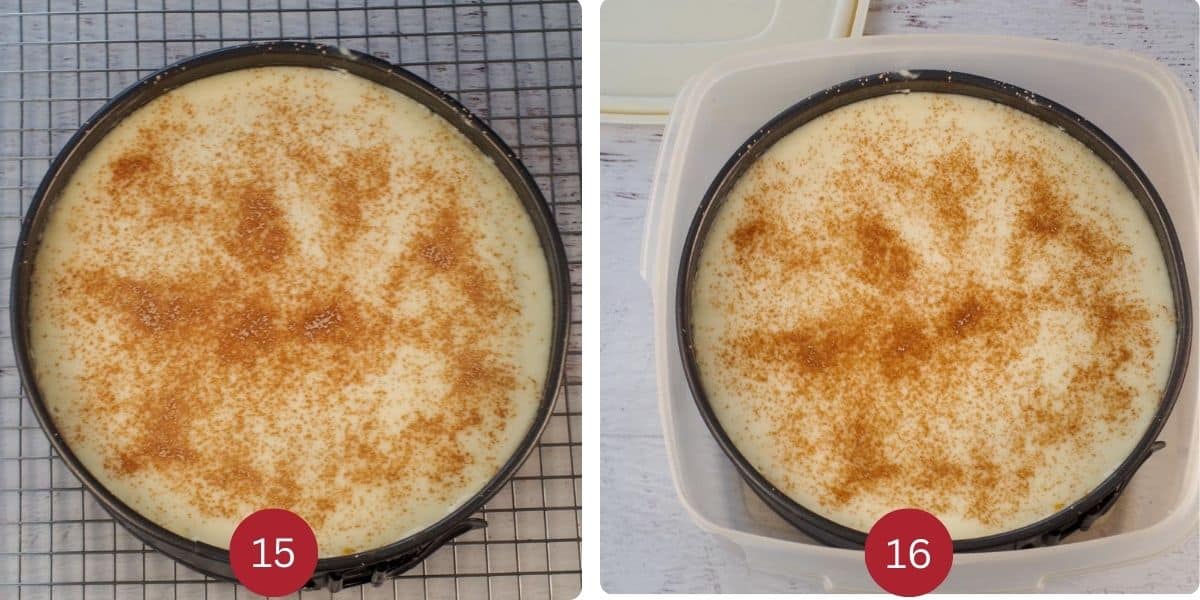
REFRIGERATE THE CHEESECAKE (STEP 6): Sprinkle cinnamon and icing sugar over the top of the cheesecake, to your liking (you can use a little more or less, depending on what you like and I usually add more after the refrigeration) (Image 15). To protect my cheesecake overnight in the fridge, I place it in a container with a lid, but you can simply cover it with plastic wrap. Chill in the fridge for at least 6 hours or overnight. (Image 16)

DECORATE THE CHEESECAKE (STEP 7): When ready to serve, gently unhinge the sides of the pan. (Image 17) Then smooth the sides of the cake with a hot offset spatula or butter knife. (Image 18). If the top is dimpled (like mine was) smooth the top with the hot knife or spatula (Image 19). *You can repair pretty much anything- my light cover fell into this cheesecake while I was photographing it and I fixed it. 🙂 Sprinkle the cinnamon and sugar again. (Image 20).
How to tell if cheesecake is done
It will still be barely jiggly when you shake/move it from side to side and the sides will have separated from the edges of the pan. But you will see it is puffed up a little around the center ** For this recipe, I advise you to check it after 45 minutes.
Since the 'jiggly test" can be hard to judge, the guaranteed way to know cheesecake is ready to come out of the oven is by temperature; when the internal temperature reaches 150 degrees F/65 degrees C. (At higher temperatures, the texture will suffer.)
If possible, insert the thermometer into the side of the cheesecake where it rises above the pan (otherwise, insert it into the center of the cake). I use this instant read thermometer- (affiliate link) it's great for everything food related!)
📹Video: Cheesecake Water Bath
Although cheesecake is not hard to make, if you have one bad experience, it can turn you off ever making it again. And because cheesecake is prone to cracking, I often use a water bath. But you don't have to use a water bath with this recipe. It will crack a little, but the topping covers up any cracks, so it still looks great!
And it won't dry out. However, if you always use a water bath and prefer it to be on the safe side, then go for it! And lastly, if you want to learn how to make a water bath, then watch this video on how to make a water bath for cheesecake!
*I like the process of using a bigger pan in a roasting pan to protect the cheesecake, but you can also tinfoil.
Alternatively, you can put a pan of hot water on the rack underneath your cake as it bakes. The water will heat up, producing steam that will help keep your cheesecake from cracking. *But in my experience, this does not work as well as a water bath.
💧 What to do if you have a Cheesecake Water Bath Leak
If you do find yourself with a water bath leak, don't despair! It does not necessarily mean your cheesecake is a write-off. Get it out of the bath ASAP and immediately switch to the water bath method above!
Drain off any water from the springform pan, give it a shake and a jiggle , and dry off the pan with a tea towel or paper towel. Continue cooking and hope for the best. *Rest assured -this has happened to me several times (before I started using the larger pan method) and my cheesecake was NEVER ruined.
This light pumpkin cheesecake has been my go-to cheesecake recipe for years. I once brought it to work and the recipe was requested by quite a few people afterwards. Then one coworker came back to me and said his wife made the cake, but it didn't taste like mine.
I guess I had changed a few simple things (i.e. sprinkling the icing sugar and cinnamon on top) and hadn't included that in the recipe. Apparently, my changes had made all the difference. Live and learn. Now I always include MY changes in the recipes I share.
🥗What to serve with Healthy Pumpkin Cheesecake
If you are looking for more ww and healthy recipes that pair well with this light pumpkin cheesecake, I would recommend my Slow Cooker Turkey Cranberry Meatballs, my Healthy Glazed Carrots with brown sugar, my Crockpot Turkey Breast (with Cranberry Quinoa Stuffing) (shown) and my Turnip and Apple Casserole.

👪 Serving Size
This Thanksgiving cheesecake is made in a 9-inch or 10-inch springform pan and serves 16. Although 16 pieces may seem like a lot, as you know, cheesecake is quite rich.
🔢WW Points
This Weight Watchers Pumpkin Cheesecake is 10 WW points. You can bring the points down further by using fat-free cream cheese and light margarine. You can also use a sugar substitute such as monk fruit, if you prefer. You will only need half the amount of monk fruit as you would sugar.
🌡️Storing
Make ahead and refrigeration
This healthy pumpkin cheesecake can be made a day or two in advance and you can store it in the fridge in an airtight container for up to 3 days.
Freezing
You can freeze cheesecakes, so if you plan to, you'll want to check out Taste of Home's guide on how to freeze cheesecakes. However, if you do freeze it and plan to serve it, I do not recommend you freeze it for longer than 2 months. It's best if you do NOT put the icing sugar and cinnamon mixture on until it's completely defrosted, prior to serving.
❔ Recipe FAQs
Yes, but it has a much higher risk of burning, racking and cooking unevenly. A water bath uses steam to slowly and evenly cook the cake, which prevents cracking and burning.
Yes, canned pumpkin and pumpkin puree are the same thing. But pumpkin pie filling is different, as it has sweeteners and spices added to it.
Since pumpkin pie filling is already sweetened and spiced, I recommend you omit the spices and use only ⅓ cup of brown sugar in this Light Pumpkin Cheesecake recipe.
There are a few reasons that a cheesecake leaks liquid, which include undermixing, poor quality ingredients (watery cream cheese), and over-baking. Sometimes it just happens. The next time you bake cheesecake, mix in a couple of tablespoons of cornstarch with the sugar before creaming with the cream cheese. If all else fails, stick it in the freezer and enjoy it as a frozen dessert!
So if you're looking for a light pumpkin cheesecake recipe, pumpkin desserts for Thanksgiving, or healthy Thanksgiving dessert ideas, this is the one! It has fewer calories than traditional cheesecake, but is packed with flavor!
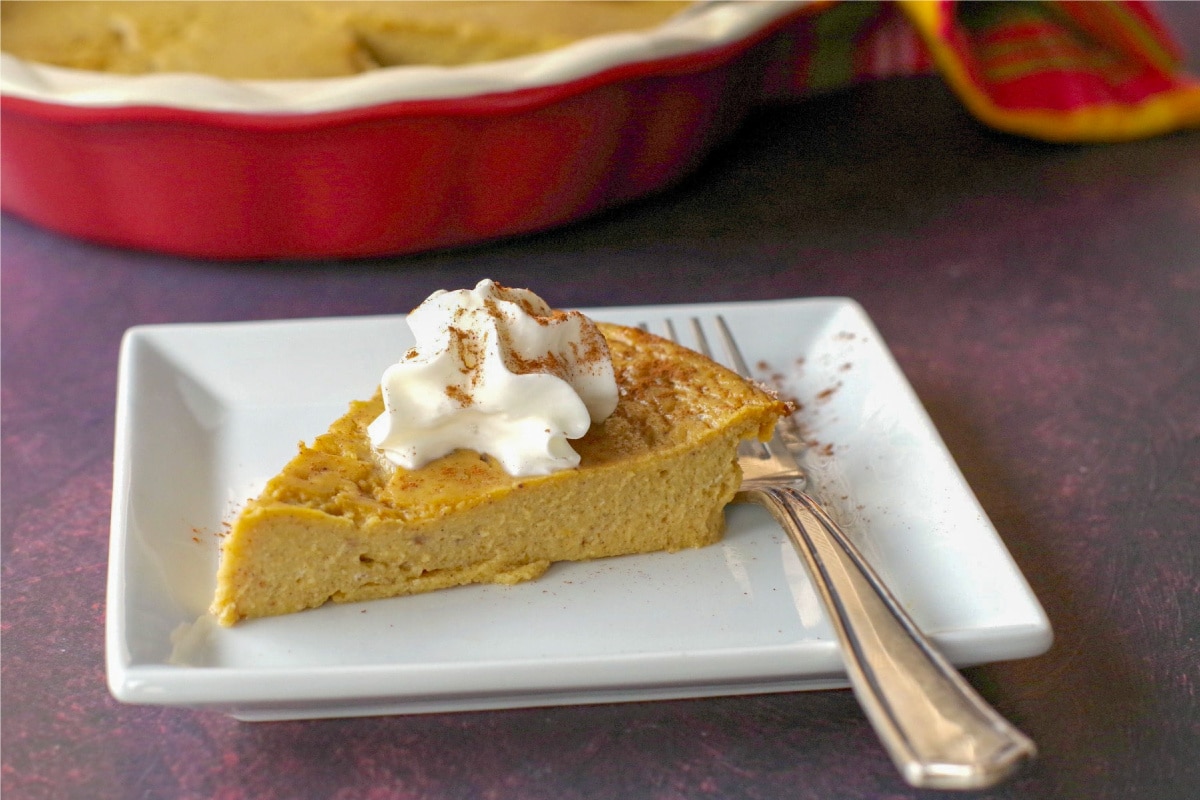
And if you love pumpkin, try my Crustless Pumpkin Pie!
More Pumpkin Recipes
Did your family❤️this recipe? Did you know that commenting and⭐rating recipes is one of the best ways to support your favorite recipe creators? If you LOVED this recipe, please comment and rate it in the recipe card or share photos on social media using the hashtag #foodmeanderings or tagging @foodmeanderings !

📋 Light Pumpkin Cheesecake (with Oreo Crust) recipe
Equipment
Ingredients
CRUST:
- 1 ½ cups Oreo baking crumbs or chocolate baking crumbs
- 2 tablespoon white granulated sugar
- 4 tablespoon light butter melted
FILLING:
- 16 oz reduced-fat cream cheese 2 - 8 oz packages *Name brand, such as Philadelphia brand works better!
- ⅔ cup brown sugar
- ⅔ cup white granulated sugar
- 2 large eggs
- 3 large egg whites
- 1 cup pumpkin puree (canned or fresh) Fresh pumpkin puree: https://foodmeanderings.com/how-to-cook-a-whole-pumpkin-and-make-pumpkin-puree/
- ¼ teaspoon salt
- 2 tablespoon all-purpose flour
- ½ teaspoon ground dry ginger
- ½ teaspoon ground cinnamon
- ¼ teaspoon all spice
TOPPING:
- 2 cups fat- free sour cream
- 6 tablespoon white granulated sugar
- 1 teaspoon vanilla extract
GARNISH:
- about 2 Tblsp each of cinnamon and icing sugar mixed together for sprinkling
Instructions
CRUST:
- PREP: Preheat oven to 350 degrees F/ 176 degrees C.
- Stir together all crust ingredients in a medium mixing bowl. Spray a 9" or 10" springform pan with non-stick cooking spray.1 ½ cups Oreo baking crumbs or chocolate baking crumbs, 2 tablespoon white granulated sugar, 4 tablespoon light butter
- Press the mixture onto the sides and bottom of the pan.
- Bake in a preheated oven at 350 degrees F/176 degrees C for 10 minutes. Cool on a rack.
FILLING:
- In a large mixing bowl, beat the cream cheese with an electric hand mixer or with the paddle attachment in the bowl of a stand mixer.16 oz reduced-fat cream cheese
- Beat in the sugars (⅔ cup white sugar and brown sugar). Add the eggs and egg whites and beat at the lowest setting until mixture is smooth and fluffy- about 30 seconds.⅔ cup brown sugar, ⅔ cup white granulated sugar, 2 large eggs, 3 large egg whites
- Mix in the pumpkin, salt, flour and spices.1 cup pumpkin puree (canned or fresh), ¼ teaspoon salt, 2 tablespoon all-purpose flour, ½ teaspoon ground dry ginger, ½ teaspoon ground cinnamon, ¼ teaspoon all spice
- Pour filling onto cooked and cooled crust.
- Return to a 350 degrees F./176 degrees C oven and bake cheesecake for about 35 - 50 minutes or until puffed and set. It will still be a little jiggly when you shake/move it from side to side and the sides will have separated from the edges of the pan. But you will see it is puffed up a little around the center ** I advise you to check it after 35 minutes.*The best way to ensure cheesecake is done is by internal temperature. When inserted into the centre of the cheesecake, it should read 150 degrees F
TOPPING:
- Mix together the topping ingredients. Set aside.2 cups fat- free sour cream, 6 tablespoon white granulated sugar, 1 teaspoon vanilla extract
- Remove cake from oven and spread the topping over the cheesecake. Return to oven and bake 10 minutes longer.
- Cool on a rack for 30 minutes.
- Sprinkle cinnamon and icing sugar over the top of the cheesecake, to your liking (you can use a little more or less, depending on what you like and I usually add more after the refrigeration). To protect my cheesecake overnight in the fridge, I place it in a container with a lid, but you can simply cover it with plastic wrap.about 2 Tblsp each of cinnamon and icing sugar mixed together for sprinkling
- Chill in fridge for 6 hours or overnight.
- When ready to serve, gently unhinge the sides of the pan. Then smooth the sides of the cake with a hot offset spatula or butter knife. If the top is dimpled (like mine was) smooth the top with the hot knife or spatula. *You can repair pretty much anything- my light cover fell into this cheesecake while I was photographing it and I fixed it. Sprinkle the cinnamon and sugar again.
Notes
- Make sure your cream cheese and eggs are at room temperature- room temperature cream cheese and eggs ensure that your cheesecake batter will be smooth and lump-free!
- Use a water bath- a water bath will prevent cracking and help your cheesecake to cook evenly.
- Use a springform pan- springform pans are ideal for cheesecakes because the texture is more custard-like than a cake. Although you can bake a cheesecake in a different pan, you can't display it in the same way and it may not cook as evenly.
- Spray your pan thoroughly - if you don't want your cheesecake to stick to the pan, make sure it's sprayed well. Otherwise, it will be a mess.
- Don't overmix -overmixed cheesecake can rise, then fall and crack from excess air.
- Don't open the oven while it's baking- any sudden temperature changes could shock the cheesecake and cause it to crack.
- Use an instant-read thermometer- your cheesecake is ready when the internal temperature reaches 150 degrees. At higher temperatures, the texture will suffer. If possible, insert the thermometer into the side of the cheesecake where it rises above the pan (otherwise, insert it into the center of the cake).
- Don't skimp on chilling time- if you try to remove your cheesecake from the springform pan before it's properly chilled, it won't firm up and cut as cleanly as a properly chilled cheesecake.








Susanne Sulkers
This recipe is easy to make and makes a wonderful treat for any special occasion. I baked it in a 9 x 9 pan, cut them into squares to serve in paper cupcake holders at a bridal shower.
Terri Gilson
I'm so glad you liked it, Susanne! Great idea to bake it in 9X9 square and serve as mini cheesecake squares :)!
Travelista Journal
Hi Terri! Your recipe looks so yummy. I will try this one. Thank you for sharing. 🙂
Food Meanderings
Great - hope you enjoy it! Tastes even better with real pumpkin, as opposed to canned. Do you have access to pumpkins right now?
Travelista Journal
We don't have pumpkins here but I saw a can of pumpkins in the grocery store or other option would be the butter squash. You think that would taste good as well?
Food Meanderings
Hi, from what I've read that substitution should be fine! Just make sure it's pureed really well. I have made the mistake of not pureeing it enough and it comes out stringy. Happy baking!
Travelista Journal
Thank you.