


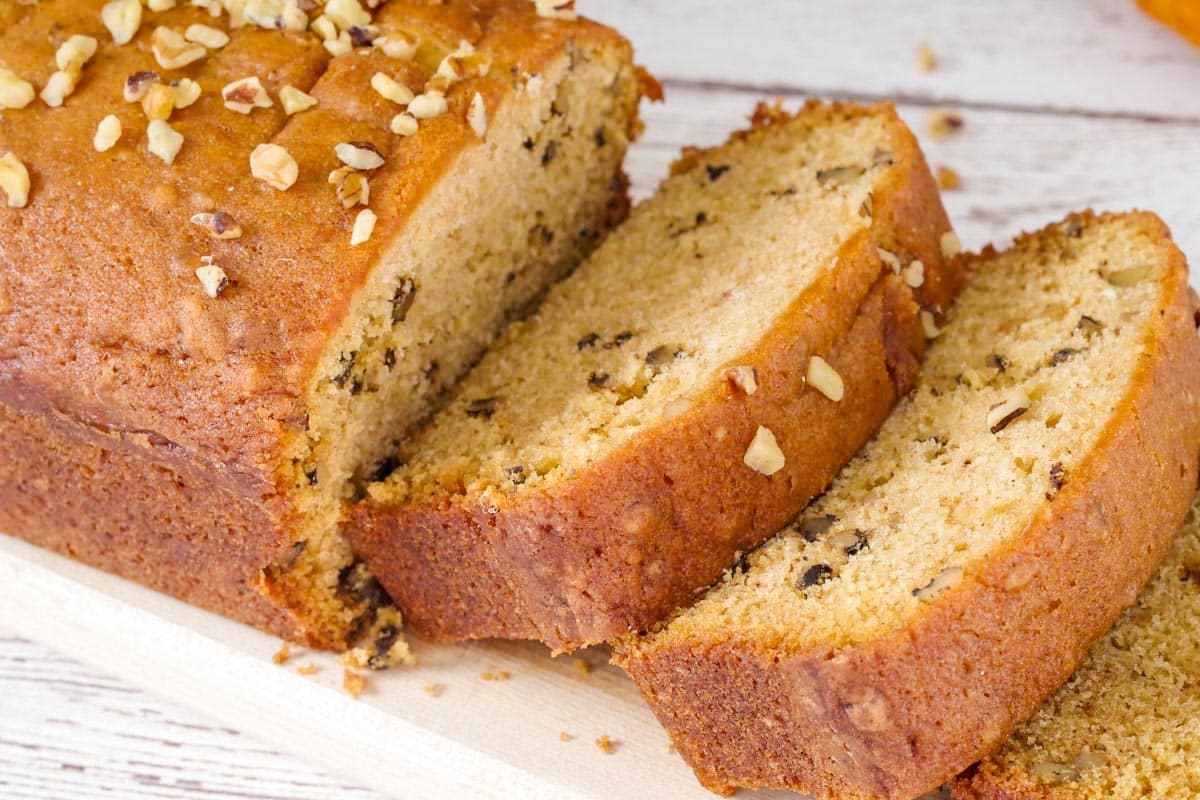
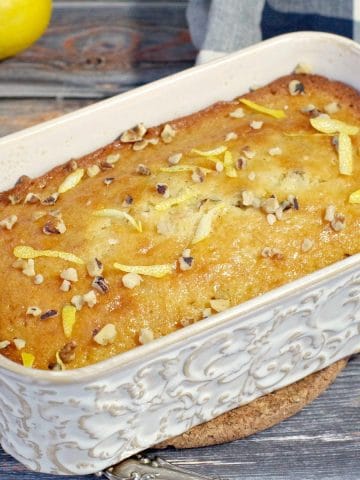
This original recipe for this Dairy Free Pumpkin Bread is another that I found in my mother-in-law's collection after she passed away. It's an easy quick bread recipe made with simple ingredients, made with walnuts, and canned pumpkin puree, and uses vegetable shortening instead of butter. The walnuts balance the texture perfectly, making it a scrumptious dairy-free breakfast, snack, or dessert, and are perfect for packing in the lunch bag!

It's fall and if that signals one thing, it's that it's pumpkin season and time to eat and drink pumpkin everything! And you'll want to put this Dairy free Pumpkin Bread at the top of your baking list!
Jump to:
So, you're probably wondering why the internet needs yet another pumpkin loaf recipe. Well, the reason is... I had tried several other pumpkin breads before this, but they never quite made the cut.
This one is super satisfying, easy, moist, not too spicy, and delicious, and the walnuts give it the perfect texture. And now that my daughter is lactose intolerant, I try to make as many lactose free/dairy free treats as possible for her!
🥘 Ingredient Notes
For this pumpkin walnut bread, you'll need:

- Vegetable shortening. I use Crisco.
- Pumpkin puree. You can use canned if you don't have fresh pumpkin, but do NOT use pumpkin pie filling! (shown below).
*Please see recipe card for full list of ingredients and quantities
📖Variations & Substitutions
- Nuts - you can substitute pecans for the walnuts
- Add-ins - add in chocolate chips, if you desire. There are dairy-free brands available at the grocery store
- Spices - you can use pumpkin spice or pumpkin pie spice mix instead of cloves and cinnamon
- Pumpkin muffins- you can use this recipe to make pumpkin muffins - just bake for ½ the time (25 minutes) or until a cake tester comes out clean.
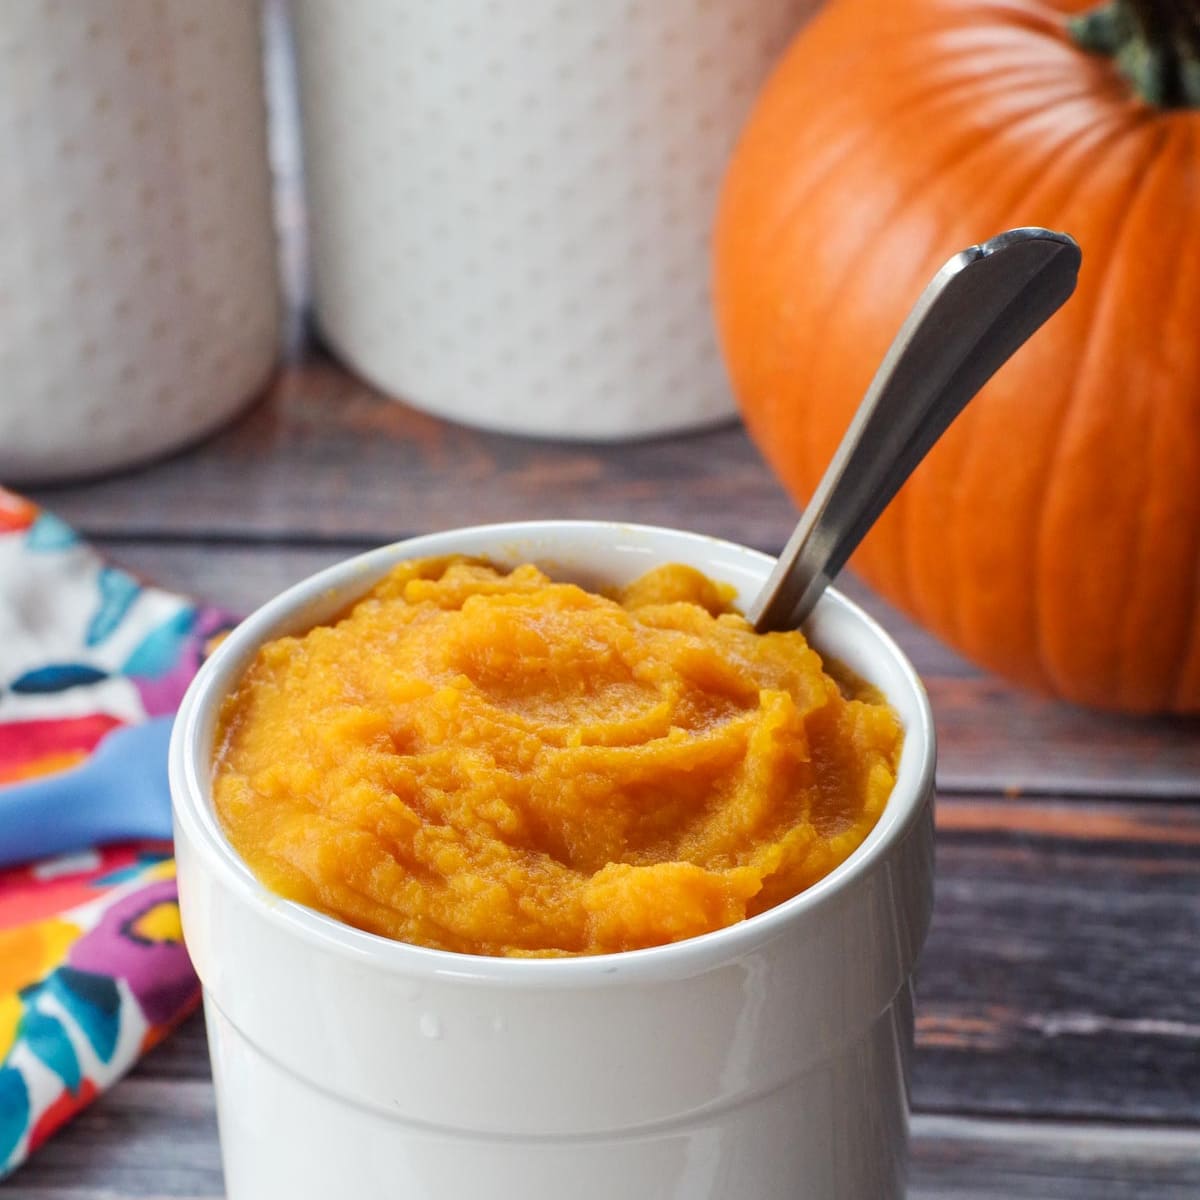
*NOTE: If you use canned pumpkin the color of the bread will be a little more orange.
🔪 Step-by-Step: How to Make Dairy-free Pumpkin Bread
PREP: Preheat oven to 350 degrees F/175 degrees C then spray a 9X5 loaf pan with non-stick cooking spray.
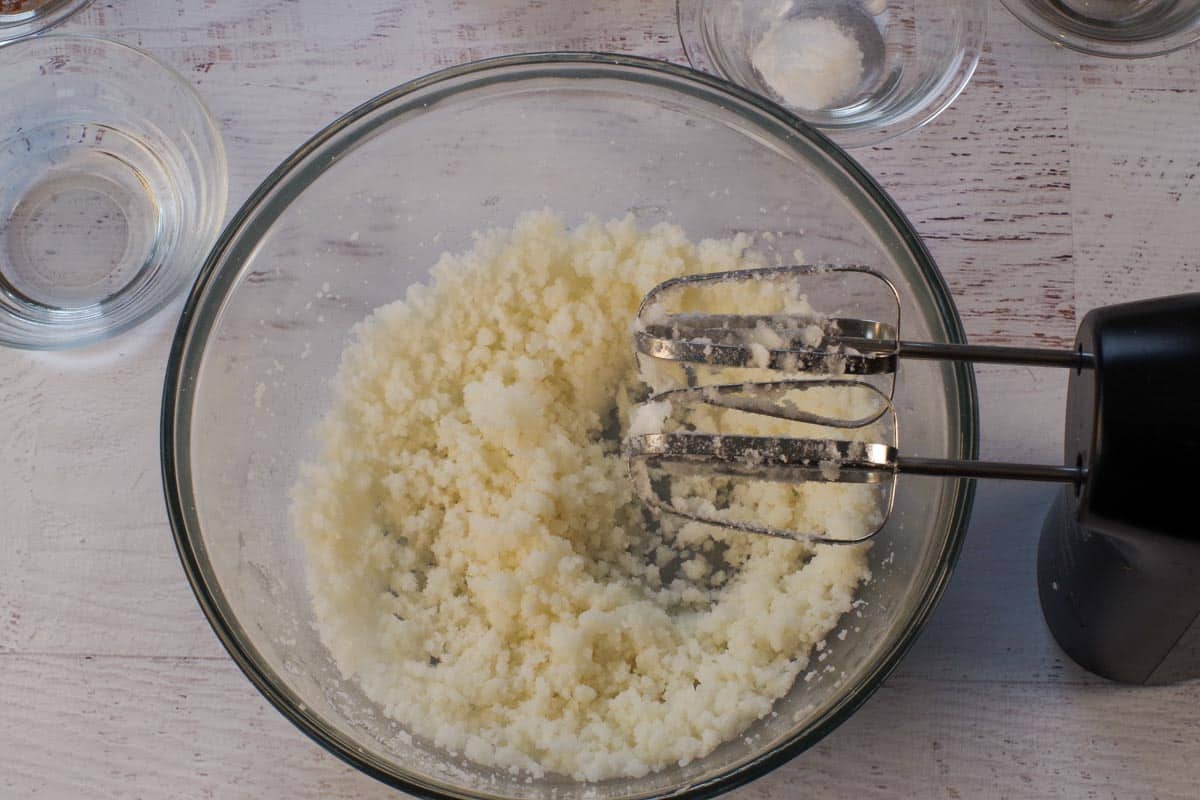
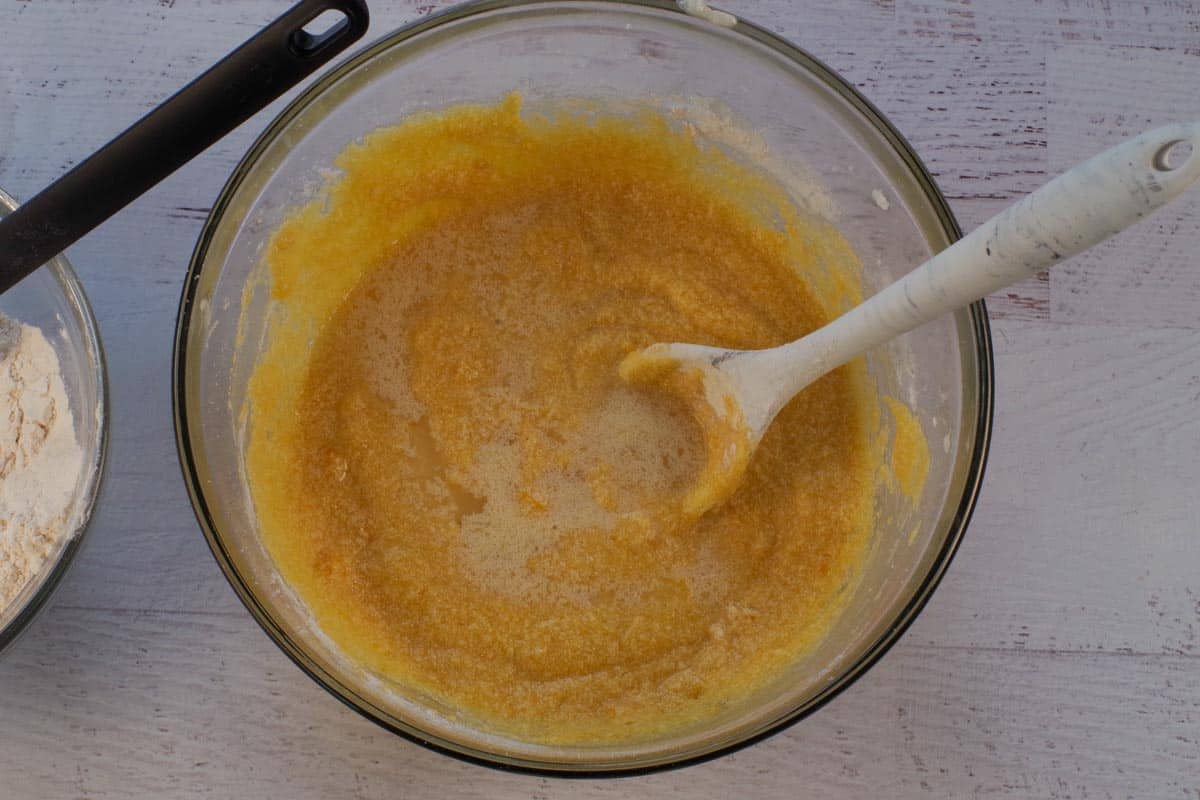
- Step 1: Beat sugar and shortening until fluffy.
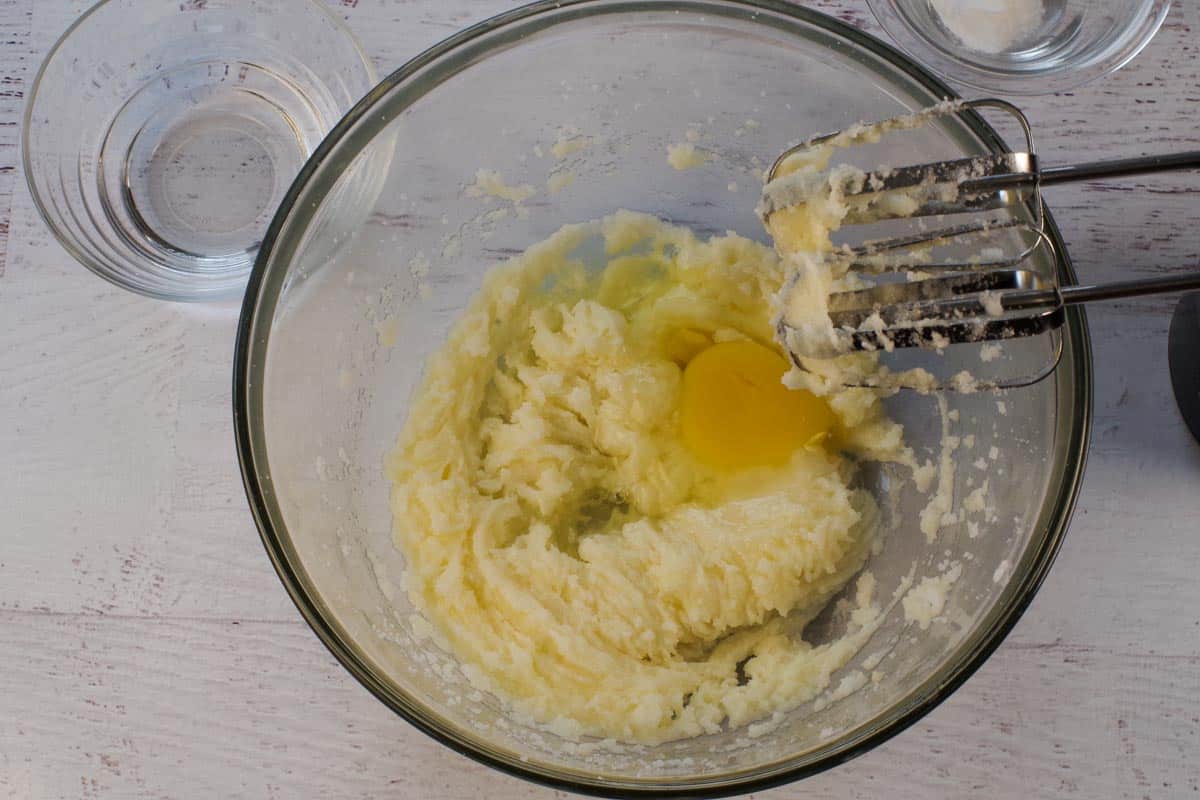
- Step 2: Beat in eggs, one at a time.
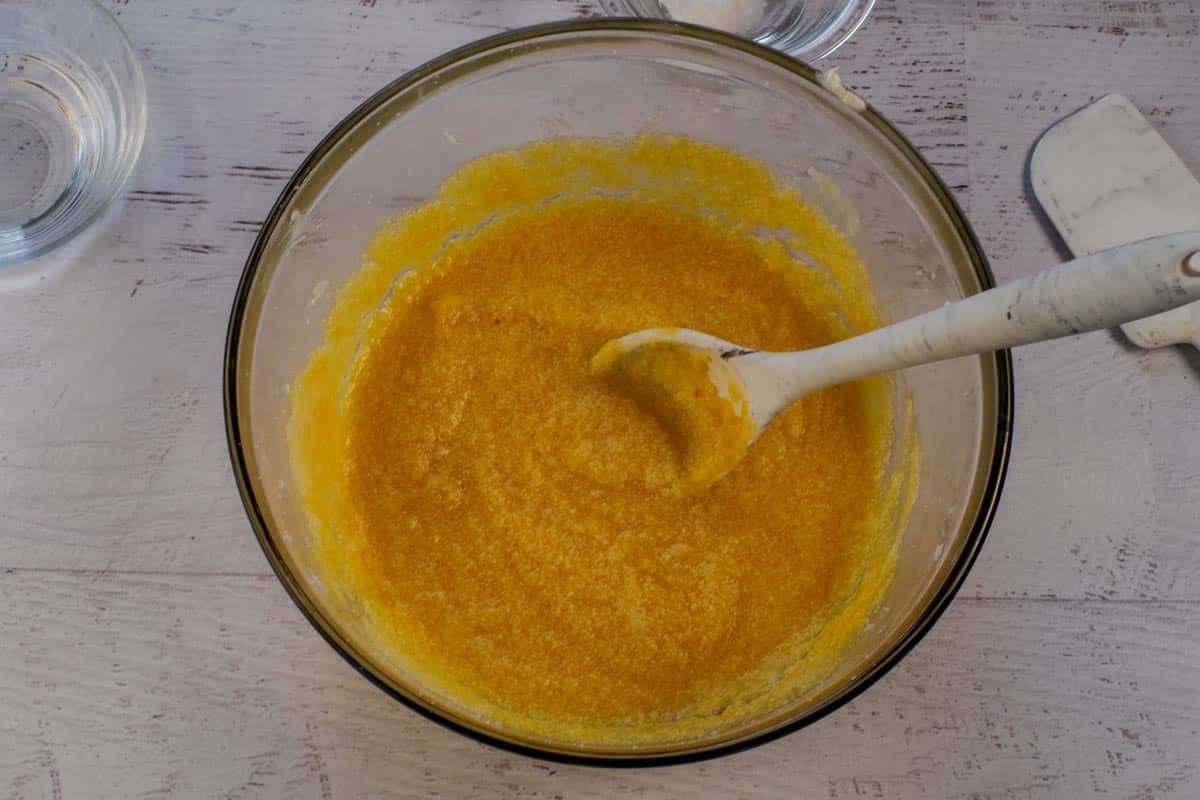
- Step 3: Stir in pumpkin.

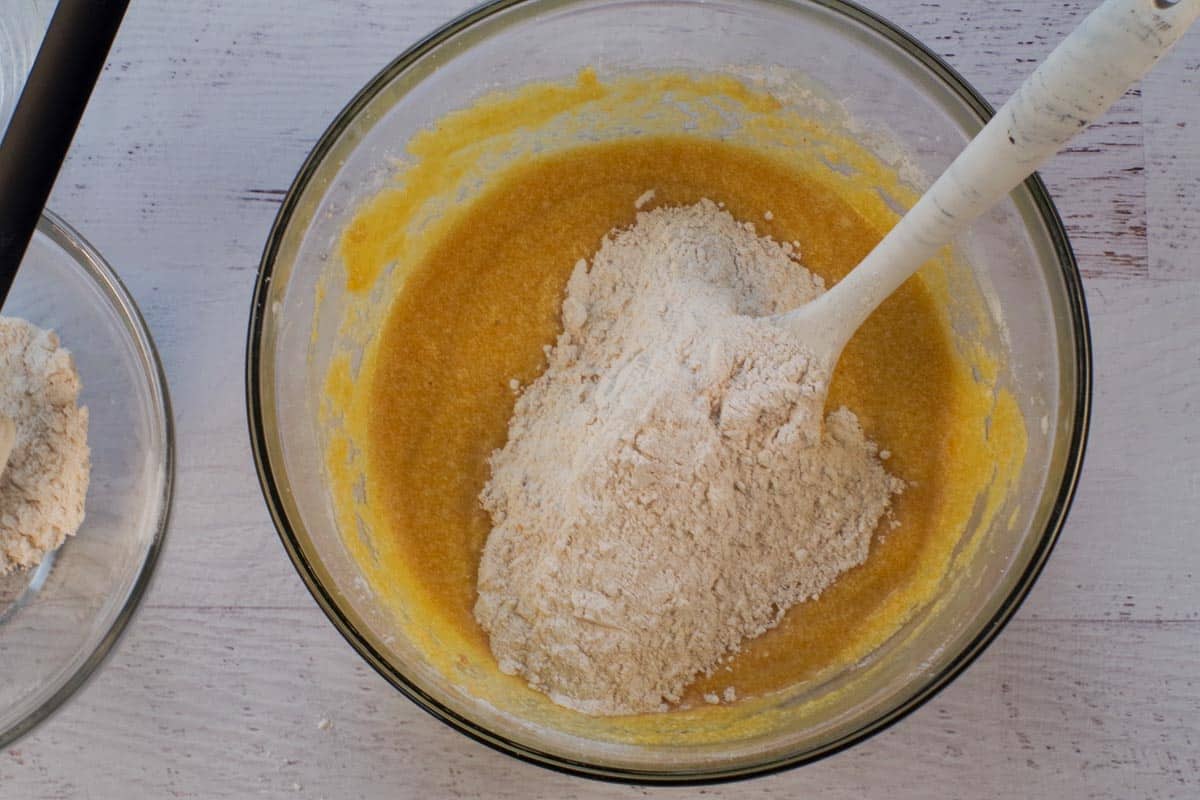
- Step 4: In a separate bowl, sift together flour, baking powder, cloves, baking soda, cinnamon, and salt.
- Step 5: Add water and dry ingredients alternately, starting with the water.
- Step 6:
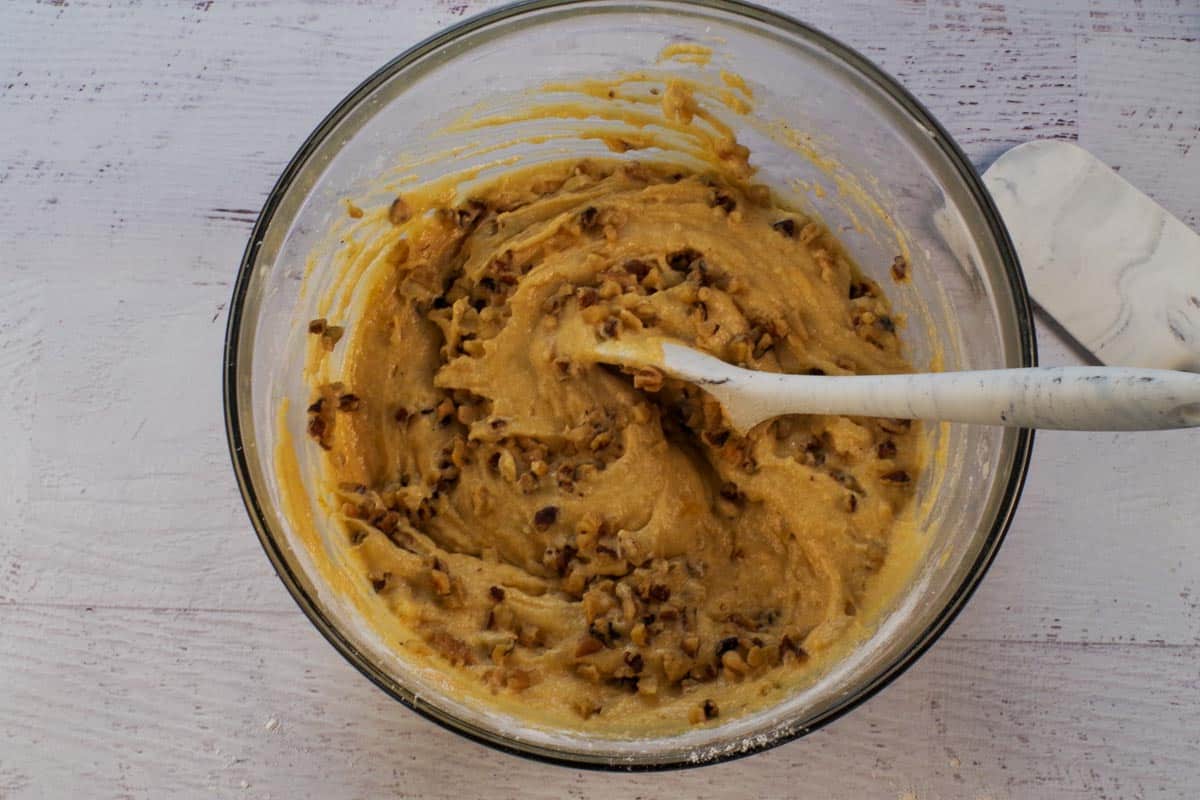
- Step 7: Stir in nuts.
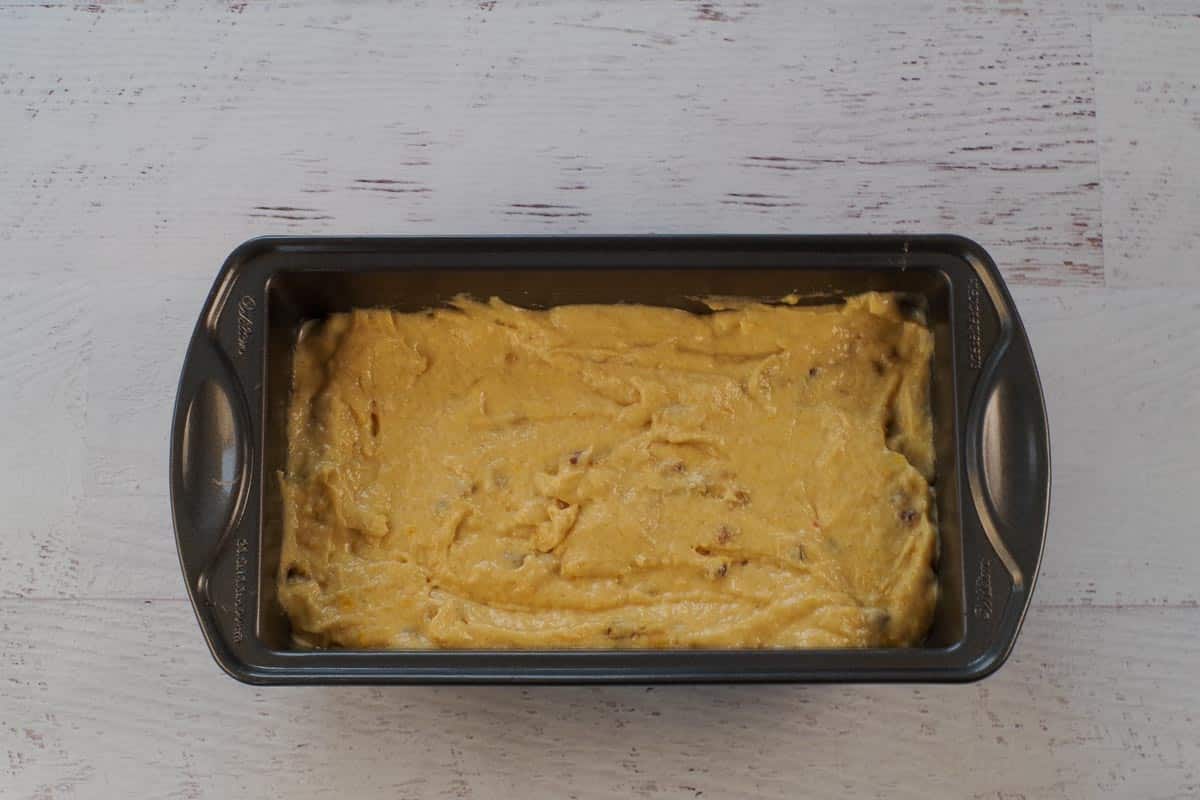
- Step 8: Pour batter into prepared loaf pan.
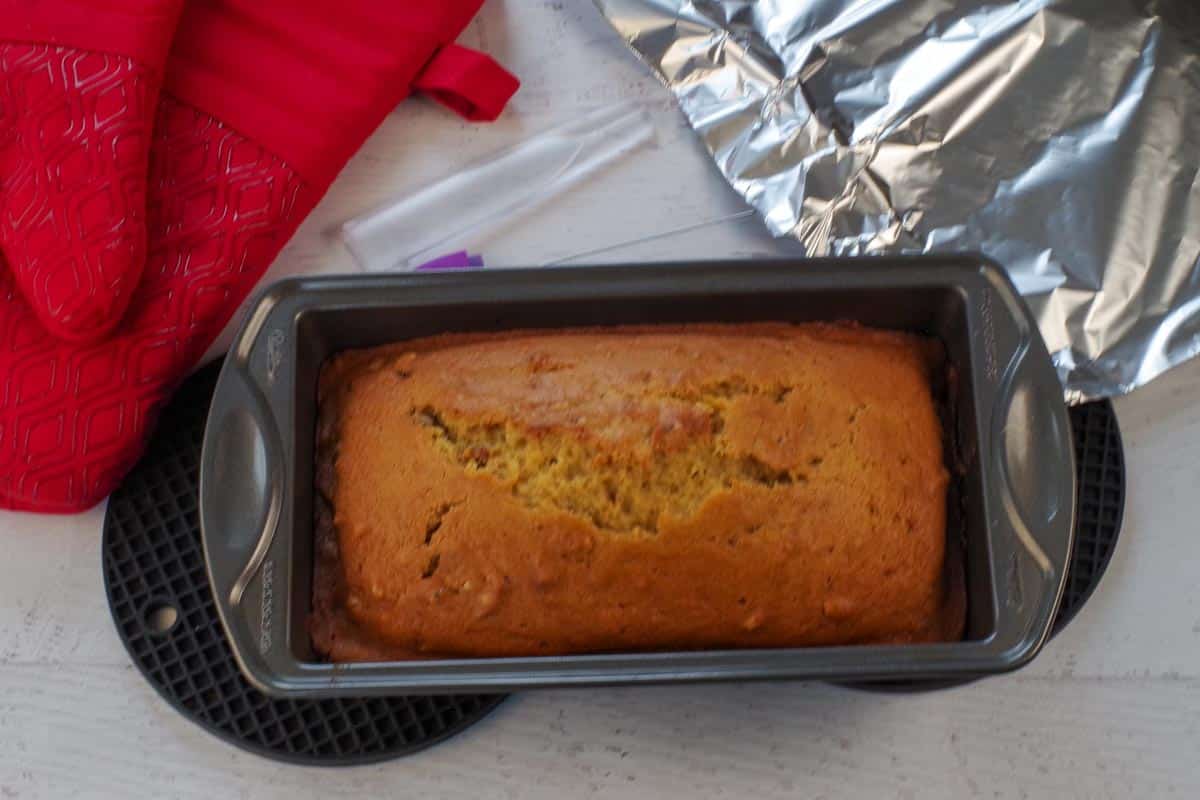
- Step 9: Bake for 50-60 minutes or until cake tester or toothpick comes out clean.

- Step 10: Cool loaf for 5 minutes, then remove from pan and cool on cooling rack. Sprinkle on nuts as a garnish on the top of the bread, if desired.
Expert Recipe Tips
- Don't slice the loaf until you are ready the eat the pieces. Cut the pumpkin loaf as you need it, as slicing it dries it out more quickly. Be sure to cover the sliced end with plastic wrap when you are storing it in the fridge in a sealed container or large Ziploc bag.
- Cream the shortening and sugar thoroughly. Beat them together until the mixture looks pale and airy before adding the eggs-this step helps create a light, fluffy texture.
- Use room-temperature eggs. Cold eggs can cause the batter to curdle slightly and affect the texture of the loaf, so let them sit at room temperature for about 30 minutes before mixing.
- Use pure pumpkin puree-not pumpkin pie filling. Pumpkin pie filling already contains sugar and spices, which will alter the flavor and sweetness of your loaf. Always check the label to ensure it's 100% pumpkin.
- Toast the walnuts for extra flavor. Lightly toasting the chopped walnuts in a dry skillet or the oven for a few minutes brings out their nutty flavor and adds a delicious crunch to the bread.
- Alternate adding dry ingredients and water. Mixing the dry ingredients and water in alternating additions prevents overmixing and helps achieve a tender, evenly textured crumb.
- Don't overmix the batter. Once the dry ingredients are incorporated, stop mixing. Overmixing develops gluten, which can make your quick bread dense or tough.
- Know your oven. Oven temperatures can vary, so start checking for doneness around the 50-minute mark. If the center is still wet, tent the loaf lightly with foil to prevent overbrowning while it finishes baking.
- Cool completely before slicing. Allowing the loaf to cool helps it set and keeps it from crumbling when sliced. If you cut it too soon, it can become gummy inside.
- Freeze in slices for convenience. If you plan to freeze the bread, slice it first. Wrap individual pieces in plastic wrap and store in a freezer-safe bag so you can thaw and enjoy a single serving anytime.
- Bring to room temperature before serving. For the best texture and flavor, let refrigerated or frozen slices come to room temperature-or warm them briefly in the microwave or toaster oven before eating.
I don't have a ton of dairy-free recipes on the blog, but that will likely change now that my daughter has developed a lactose intolerance.
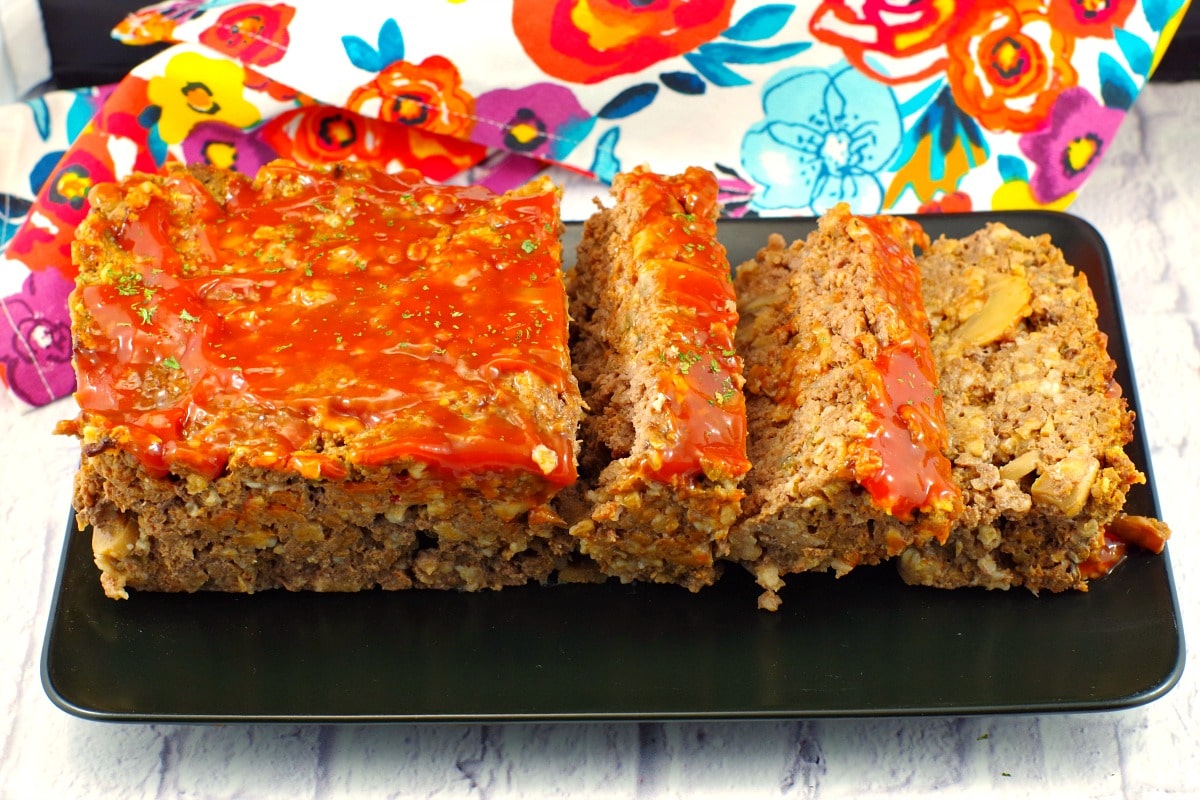
I also have a Dairy-free and Gluten-free Meatloaf (shown below), Dairy-Free Orange Creamsicle Pie, Corn Chowder Soup (Weight Watchers friendly), Saskatoon Berry Muffins (Dairy-free), Egg Roll in a Bowl, and of course my Vegan recipes.
But she is an older teen now so she is able to make a lot of her own substitutions and she also just takes the hit sometimes (if she feels it's worth it) and uses her Lactaid.
Apparently, you can develop a lactose intolerance at any age, as it's not a true allergy. You can read more about developing a lactose intolerance HERE.
Equipment
For this pumpkin bread (dairy-free) recipe, you'll need mixing bowls, spoons, an electric mixer, a wire rack for cooling and a 9x5 loaf pan (affiliate links). I like the ones that come with lids because you can simply put the lid on and pop them right into the fridge or freezer, once they are completely cooled! However, you can use a glass, ceramic, or metal loaf pan.
🌡️Storage
- Fridge: The dairy free pumpkin loaf can be stored in an airtight container or freezer Ziplock bag for up to 3 days in the fridge.
- Freezer: This recipe freezes well for up to 3 months. You can leave it in the loaf pan to freeze, if you prefer (I do this sometimes). Simply cover the loaf with Glad Press n' Seal (affiliate link) and slide the entire loaf into an extra-large Ziplock freezer bag. Or you can use a loaf pan that comes with a lid (see equipment above). I would still put that into a Ziplock bag, just to ensure it stays as fresh as possible.
👪 Serving Size
This dairy free pumpkin loaf recipe makes 10 individual slices. However, you can double or triple this recipe by adjusting the serving size on the recipe card. Just click on the serving size and select the number of servings you'd like. You'll need extra loaf pans. *You can freeze the extra loaves (see storage, above).
🎃Leftover Pumpkin
Whenever I make my Pumpkin Pie for Thanksgiving, I always have exactly a cup of leftover pumpkin puree from the 796 ml/28 oz can, which is perfect for making this pumpkin bread recipe!
If you want to make this pumpkin pie dairy-free or lactose-free, just replace the milk with non-dairy milk. Coconut whipped cream (spray bottle) is a delicious alternative to regular whipped cream!
❔ Recipe FAQs
Absolutely! Replace the eggs with two flax eggs (2 tablespoons ground flaxseed mixed with 6 tablespoons water, rested for 5 minutes) and ensure the shortening or oil you use is plant-based. The texture will be slightly softer but still delicious.
Yes! This recipe works beautifully for mini loaves or muffins. For mini loaves, bake for about 25-30 minutes; for muffins, bake for 20-25 minutes, or until a toothpick inserted in the center comes out clean.
This can happen if the bread is underbaked, if too much liquid was added, or if the oven door was opened too early during baking. Make sure to bake it until a tester comes out clean and avoid opening the oven before the 45-minute mark
Didn't find the answer you're looking for?
Ask AI to answer based on this specific recipe
I am also a little crazy about quick bread in general. They are fast, delicious and don't take a lot of effort. And you can make them in so many flavors. Check out my other quick bread recipes below the recipe card! But first, you're going to want to make this delicious Dairy-free Pumpkin Bread, whether or not you care that it's dairy-free!
So if you are a pumpkin lover or have one among you and are looking for easy recipes for pumpkin bread, you'll love this one! It's perfect as a snack, dessert, or with your morning cup of coffee!
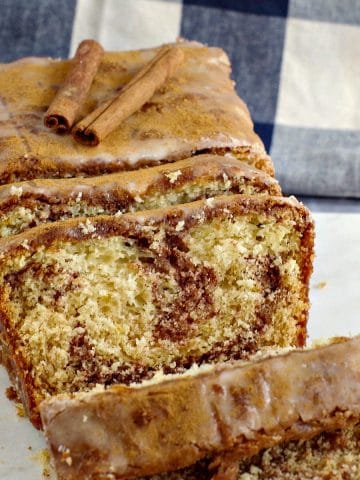
🍞More Quick Bread Recipes!
Did your family❤️this recipe? Did you know that commenting and⭐rating recipes is one of the best ways to support your favorite recipe creators? If you LOVED this recipe, please comment and rate it in the recipe card or share photos on social media using the hashtag #foodmeanderings or tagging @foodmeanderings !


📋 Dairy free Pumpkin Bread Recipe
Equipment
Ingredients
- 1 cup white granulated sugar
- ⅓ cup vegetable shortening * I use Crisco
- 2 eggs
- 1 cup pumpkin purée (fresh or canned) *Do NOT use pumpkin pie filling
- 1 ⅔ cup all-purpose flour
- ¼ teaspoon baking powder
- ⅛ teaspoon ground cloves
- 1 teaspoon baking soda
- ½ teaspoon cinnamon
- ⅛ teaspoon salt
- ⅓ cup water
- ½ cup chopped walnuts
Instructions
- Preheat oven to 350 degrees F/175 degrees C then spray a 9X5 loaf pan with non-stick cooking spray. Beat sugar and shortening until fluffy.1 cup white granulated sugar, ⅓ cup vegetable shortening
- Beat in eggs, one at a time.2 eggs
- Stir in pumpkin.1 cup pumpkin purée (fresh or canned)
- In a separate bowl, sift together flour, baking powder, cloves, baking soda, cinnamon and salt.1 ⅔ cup all-purpose flour, ¼ tsp baking powder, ⅛ tsp ground cloves, 1 tsp baking soda, ½ tsp cinnamon, ⅛ tsp salt
- Add dry ingredients alternately with the water to the batter.⅓ cup water
- Stir in walnuts.½ cup chopped walnuts
- Pour batter into greased loaf pan and bake for 50-60 minutes or until cake tester or toothpick comes out clean.
- Cool loaf for 5 minutes, then remove from pan and cool on cooling rack. Sprinkle on nuts as garnish, if desired.
Notes
- Don't slice the loaf until you are ready the eat the pieces. Cut the pumpkin loaf as you need it, as slicing it dries it out more quickly. Be sure to cover the sliced end with plastic wrap when you are storing it in the fridge in a sealed container or large Ziploc bag.
- Cream the shortening and sugar thoroughly. Beat them together until the mixture looks pale and airy before adding the eggs-this step helps create a light, fluffy texture.
- Use room-temperature eggs. Cold eggs can cause the batter to curdle slightly and affect the texture of the loaf, so let them sit at room temperature for about 30 minutes before mixing.
- Use pure pumpkin puree-not pumpkin pie filling. Pumpkin pie filling already contains sugar and spices, which will alter the flavor and sweetness of your loaf. Always check the label to ensure it's 100% pumpkin.
- Toast the walnuts for extra flavor. Lightly toasting the chopped walnuts in a dry skillet or the oven for a few minutes brings out their nutty flavor and adds a delicious crunch to the bread.
- Alternate adding dry ingredients and water. Mixing the dry ingredients and water in alternating additions prevents overmixing and helps achieve a tender, evenly textured crumb.
- Don't overmix the batter. Once the dry ingredients are incorporated, stop mixing. Overmixing develops gluten, which can make your quick bread dense or tough.
- Know your oven. Oven temperatures can vary, so start checking for doneness around the 50-minute mark. If the center is still wet, tent the loaf lightly with foil to prevent overbrowning while it finishes baking.
- Cool completely before slicing. Allowing the loaf to cool helps it set and keeps it from crumbling when sliced. If you cut it too soon, it can become gummy inside.
- Freeze in slices for convenience. If you plan to freeze the bread, slice it first. Wrap individual pieces in plastic wrap and store in a freezer-safe bag so you can thaw and enjoy a single serving anytime.
- Bring to room temperature before serving. For the best texture and flavor, let refrigerated or frozen slices come to room temperature-or warm them briefly in the microwave or toaster oven before eating.
- Fridge: The dairy free pumpkin loaf can be stored in an airtight container or freezer Ziplock bag for up to 3 days in the fridge.
- Freezer: This recipe freezes well for up to 3 months. You can leave it in the loaf pan to freeze, if you prefer (I do this sometimes). Simply cover the loaf with Glad Press n' Seal (affiliate link) and slide the entire loaf into an extra-large Ziplock freezer bag. Or you can use a loaf pan that comes with a lid (see equipment above). I would still put that into a Ziplock bag, just to ensure it stays as fresh as possible.


Sadia Malik says
These are just perfect for us very delicious
Terri Gilson says
Glad you liked it, Sadia!
Vanessa says
Thanks for the great recipe! A good way to put my frozen pumpkin puree to use!
Terri Gilson says
You're welcome, Vanessa!
Shelby says
Pumpkin loaf is the best dessert for the season! I love pumpkin spice and pumpkin but not pumpkin pie lol this is the perfect "in-between".
Terri Gilson says
I agree, Shelby - the perfect 'in between' 🙂
nancy says
thanks for sharing this nice and easy recipe! Now i know what to do with my pumpkins!
Terri Gilson says
Enjoy!
Colleen says
This pumpkin bread is so simple to make but so yummy. It didn't last long! Thanks for sharing you mother-in-law's recipe.
Sabrina says
I love this recipe. Nice and simple and moist. Thanks, I’ll make it again!
Terri Gilson says
Glad you liked it, Colleen!
Laura says
Can’t go wrong with pumpkin bread! I’m lactose intolerant so this is right up my alley. Looks so moist and fluffy!
Terri Gilson says
I agree, Laura - can't go wrong with it!
Bernice says
Such a nice, easy bread to make. Which is good because I already spent a lot of time roasting and mashing my pumpkin! On the flipside, having pumpkin puree in the freezer is super handy for this recipe.
Terri Gilson says
So true, Bernice! I do that every year too and it's A LOT of work! This recipe is so easy it's a welcome break after all that pumpkin mashing! Enjoy 🙂