


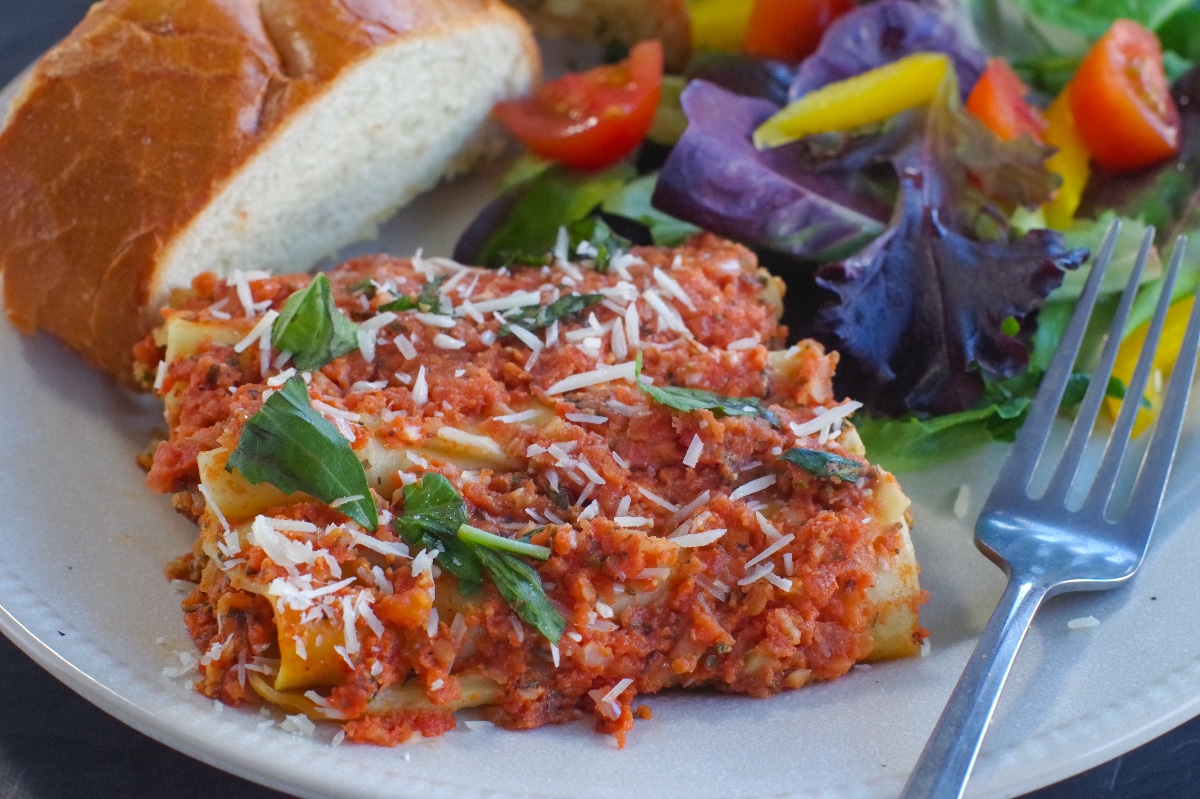
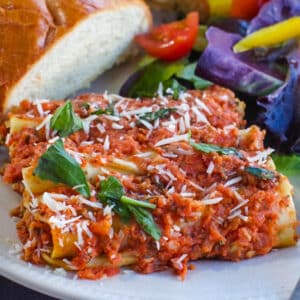
Have you ever totally messed up a recipe, only to have it turn out completely amazing? That is exactly how this Baked Beef Cannelloni was born. I spent years trying to "mess it up" again just like I did that first time, and after nearly a decade of trial and error, I finally nailed it! This isn't your average pasta dish-it's a rich, savory Italian comfort food that is distinctively different from lasagna. With a unique filling of extra lean ground beef, spinach, and carrots (and absolutely no ricotta!), this recipe is the perfect blend of a "happy accident" and a refined Sunday dinner.
This Italian comfort food recipe is most popular during the winter, but is great any time of the year. And this cannelloni recipe makes a wonderful special occasion meal, but is also one the whole family will love! It pairs perfectly with my garlic bread.
Jump to:
I like to make extra special meals for special occasions like birthdays, anniversaries, and Valentine's Day, or simply because I'm having people over for dinner. But like most people, I've got a busy life and don't always have the time to leisurely cook right before company comes; nor do I like that 'pressure'. Therefore, I need an arsenal of make-ahead and reheat recipes to pick from. This cannelloni recipe is now a member of that elite group! And it only took about 8 years....
If you also love make-ahead meals, be sure to try my Baked Chicken Cacciatore or my Baked Cornish Hens in Wine Sauce.
🥘Ingredient Notes
I love this recipe because it's a unique cannelloni filling; it does NOT have ricotta, nor do I use a béchamel sauce, alfredo sauce, or white sauce, as many recipes do.
I find that if I use ricotta in cannelloni, it really just ends up having the same taste and texture as lasagna, not that lasagna is a bad thing... It's just that I want my cannelloni to have a distinct taste and texture. But trust me, you'll also want to try my Make-Ahead Lasagna !
You will need the following ingredients:
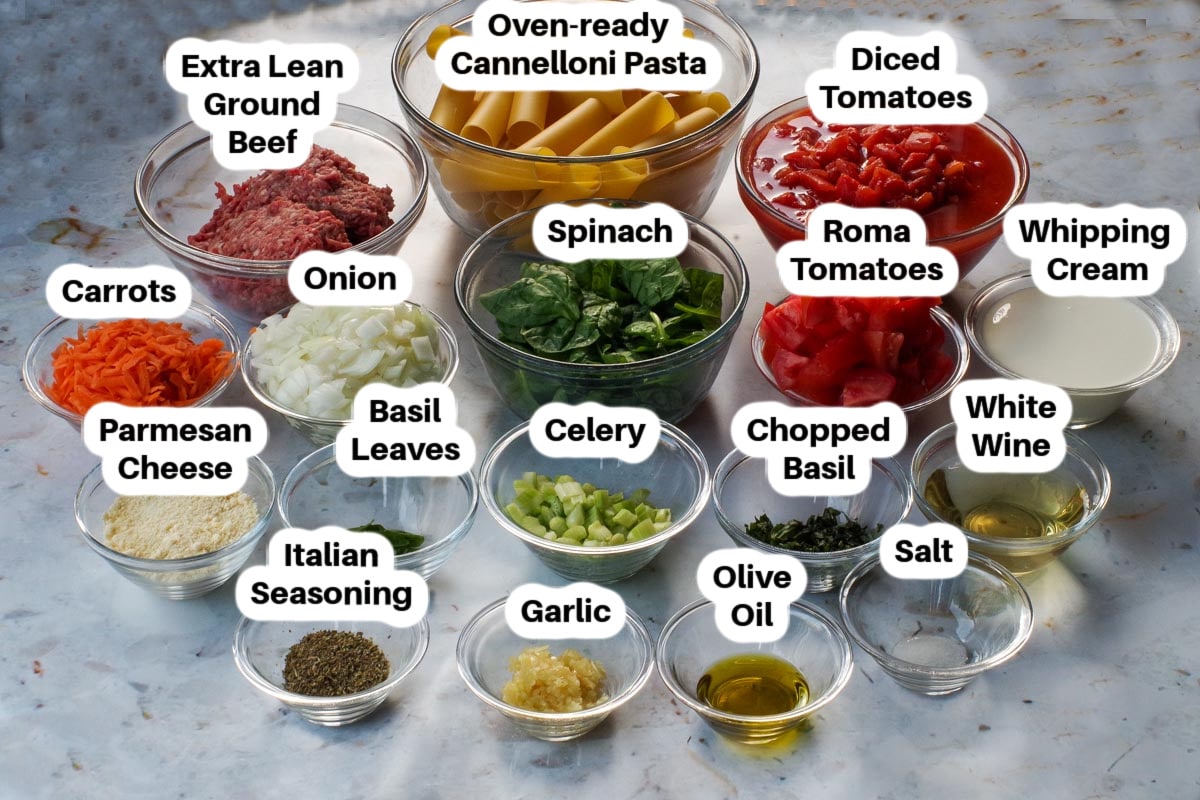
- Oven-ready Cannelloni: Using "oven-ready" or "no-boil" shells is a massive time-saver! These dry pasta tubes are designed to soften and cook by absorbing the moisture from the sauce while baking. Note: Because they rely on the sauce to cook, it is very important to seal the baking dish tightly with foil. *You may have leftover shells, but that's okay because sometimes they come broken or break while they are being filled.
- White wine: Dry white wine adds a beautiful acidity and depth to the sauce and filling. Pinot Grigio, Vinho Verde, or Sauvignon Blanc work best! If you prefer to cook without alcohol, you can substitute this with chicken or beef broth with a tiny squeeze of lemon juice or de-alcoholized wine.
- Extra Lean Ground Beef: I recommend using extra lean to ensure the filling stays hearty and flavorful without becoming greasy. Since today's ground beef can sometimes release more liquid than in the past, make sure to drain any excess fat or water after browning and before mixing with the vegetables.
- Spinach: Baby spinach is ideal because it wilts down quickly and has a much more delicate texture and flavor than mature spinach. It's an easy way to sneak extra nutrients and a pop of color into the filling.
- Whipping cream (Heavy cream): This is the "secret" to the rich, luxurious texture of this dish. It replaces the traditional ricotta cheese, creating a silky-smooth filling and a velvety, creamy tomato sauce that feels truly indulgent. Make sure you use 33%- 36% fat
*Please see recipe card for full list of ingredients and quantities
📖 Variations & Substitutions
- Meat: While extra lean ground beef is traditional for this recipe, for an extra punch of flavor, try a 50/50 blend of ground beef and mild Italian sausage (removed from the casings).
- Spinach: If you don't have fresh spinach on hand, you can use frozen chopped spinach. Just be sure to thaw it completely and squeeze out every drop of excess moisture before adding it to the veggie mixture; otherwise, the filling will become too watery.
- Cheese: I love the salty bite of Parmesan, but Pecorino Romano is a great alternative. If you want a more "melty" cheese experience on top, feel free to sprinkle a layer of shredded mozzarella over the tomato sauce before baking for that classic golden cheese pull.
- Gluten-Free Option: To make this recipe gluten-free, use Gluten-Free Cannelloni shells (typically made from corn or rice flour). Ensure your Italian seasoning and beef are also certified gluten-free, as some pre-packaged blends contain anti-caking agents with gluten.
- Spicy Kick: If your family loves heat, add ½ teaspoon of red pepper flakes to the vegetable sauté and a dash to the tomato sauce.
🔪How to Make Beef Cannelloni
PREP: Preheat oven to 350 degrees F. Spray two 9 X 13-inch baking dishes (lasagna dishes) with non-stick cooking spray.
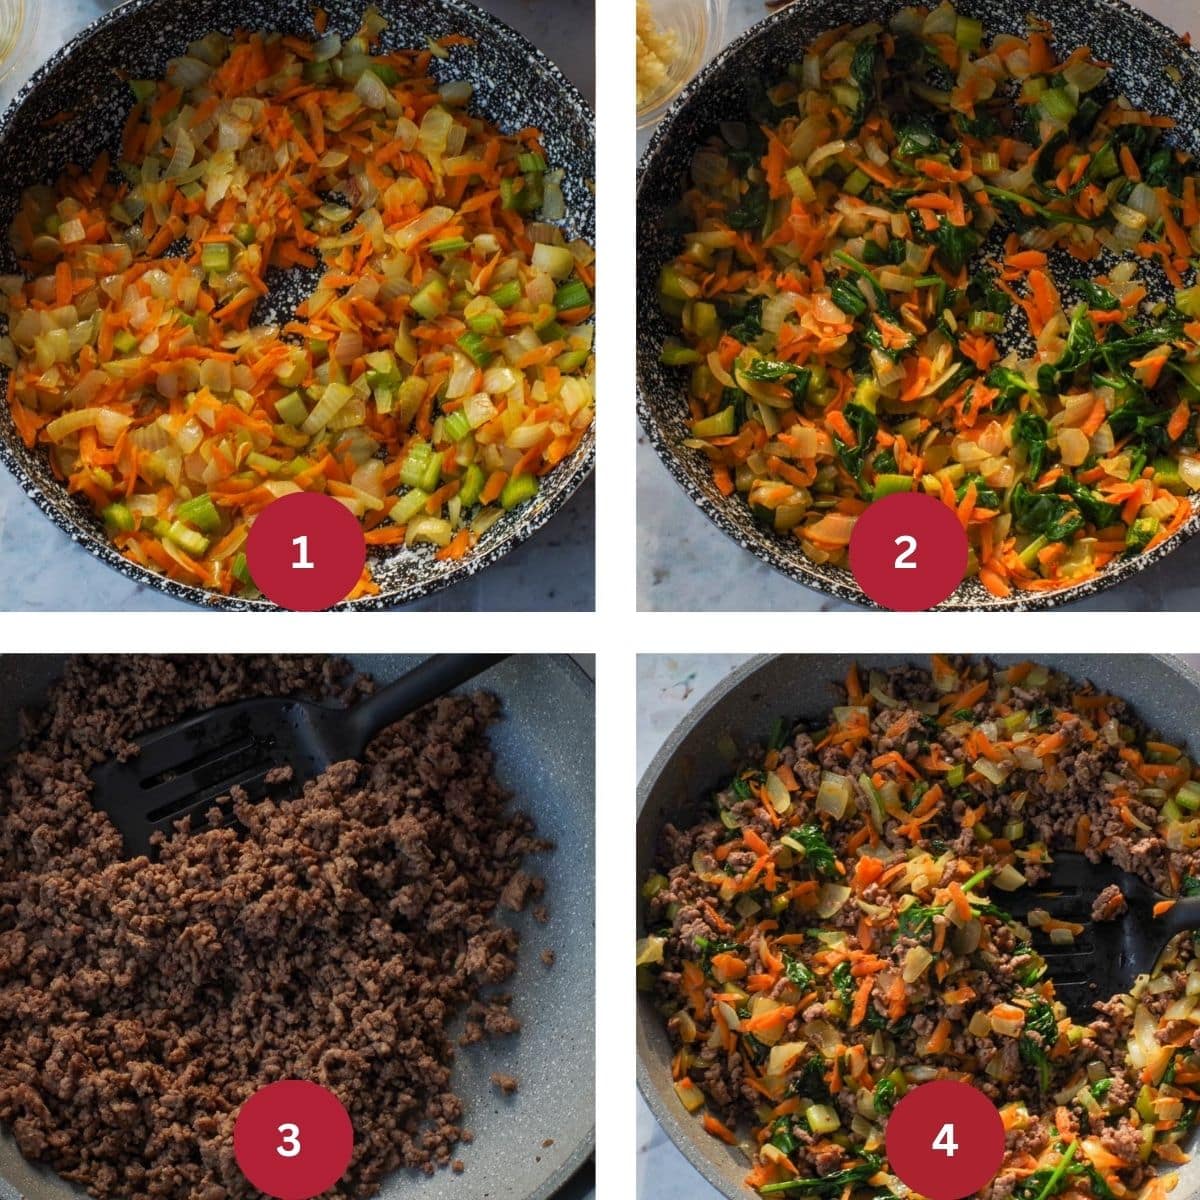
MAKE THE FILLING (STEP 1): In a large frying pan, over medium-high heat, sautee onions, celery, and grated carrots with olive oil until soft (IMAGE 1). Add spinach and cook for 3 more minutes (IMAGE 2). Meanwhile, cook ground beef over medium heat in a separate frying pan until browned (IMAGE 3). Then mix with veggie mixture (IMAGE 4).
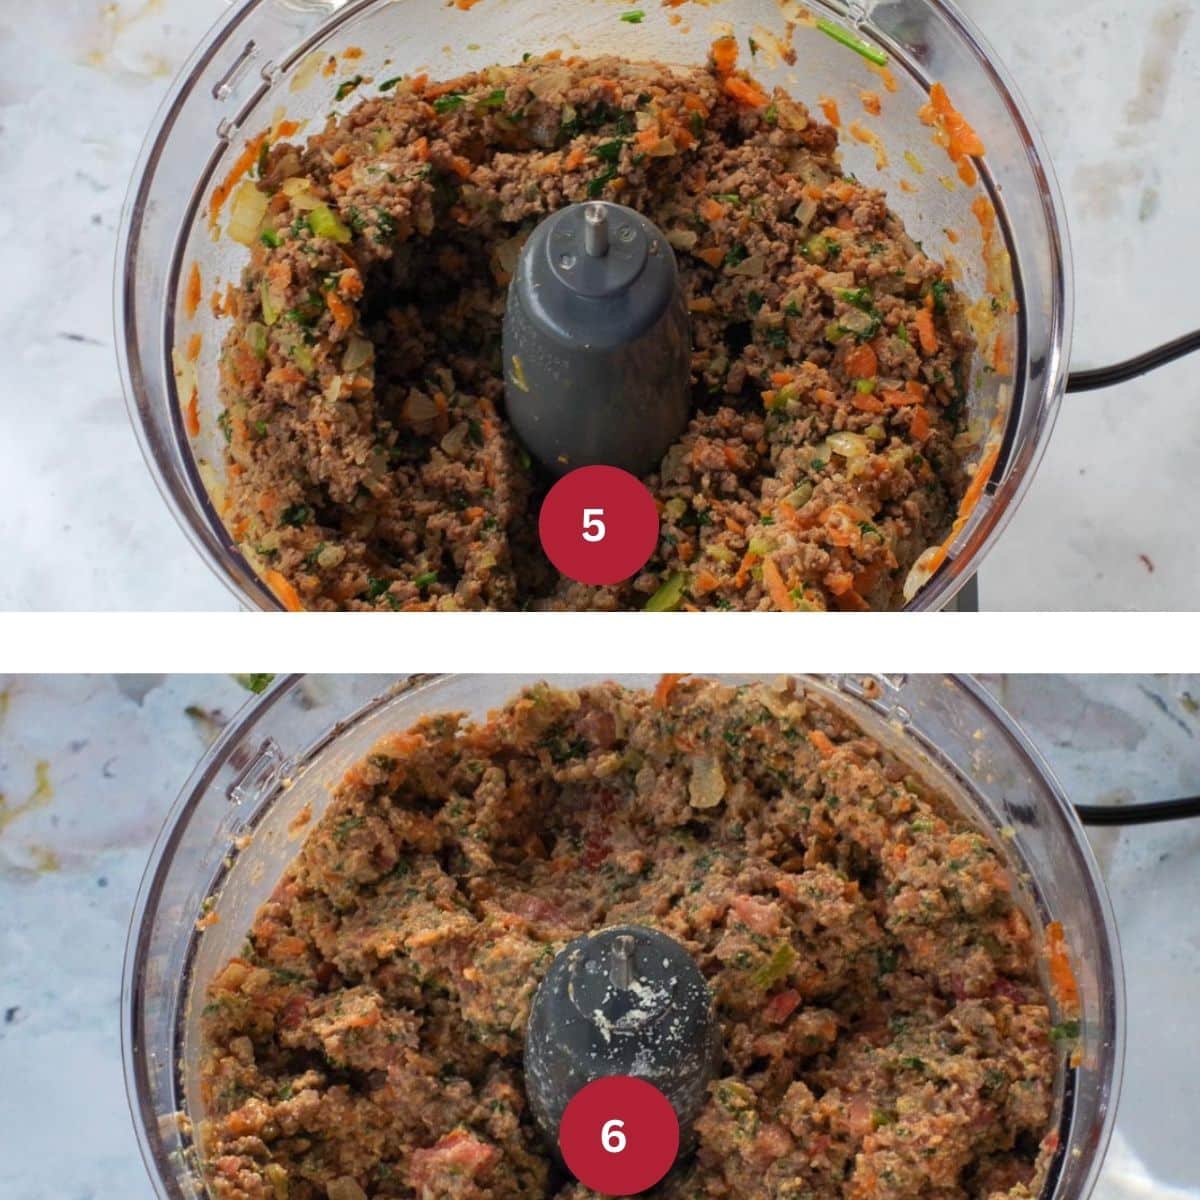
PUREE THE FILLING (STEP 2): Place the vegetable and beef mixture in a food processor and process until finely chopped/blended (IMAGE 5). Add whipping cream, white wine, Roma tomatoes, parmesan cheese, Italian seasoning, garlic, and basil, and pulse (in food processor) just until combined.(IMAGE 6)* If you have a smaller food processor, do a ½ a batch at a time. It will look mushy when mixed. Note: it can be a little bit chunkier, but do not puree it anymore, as it needs to go through a pastry bag, but stay intact and not be too runny.
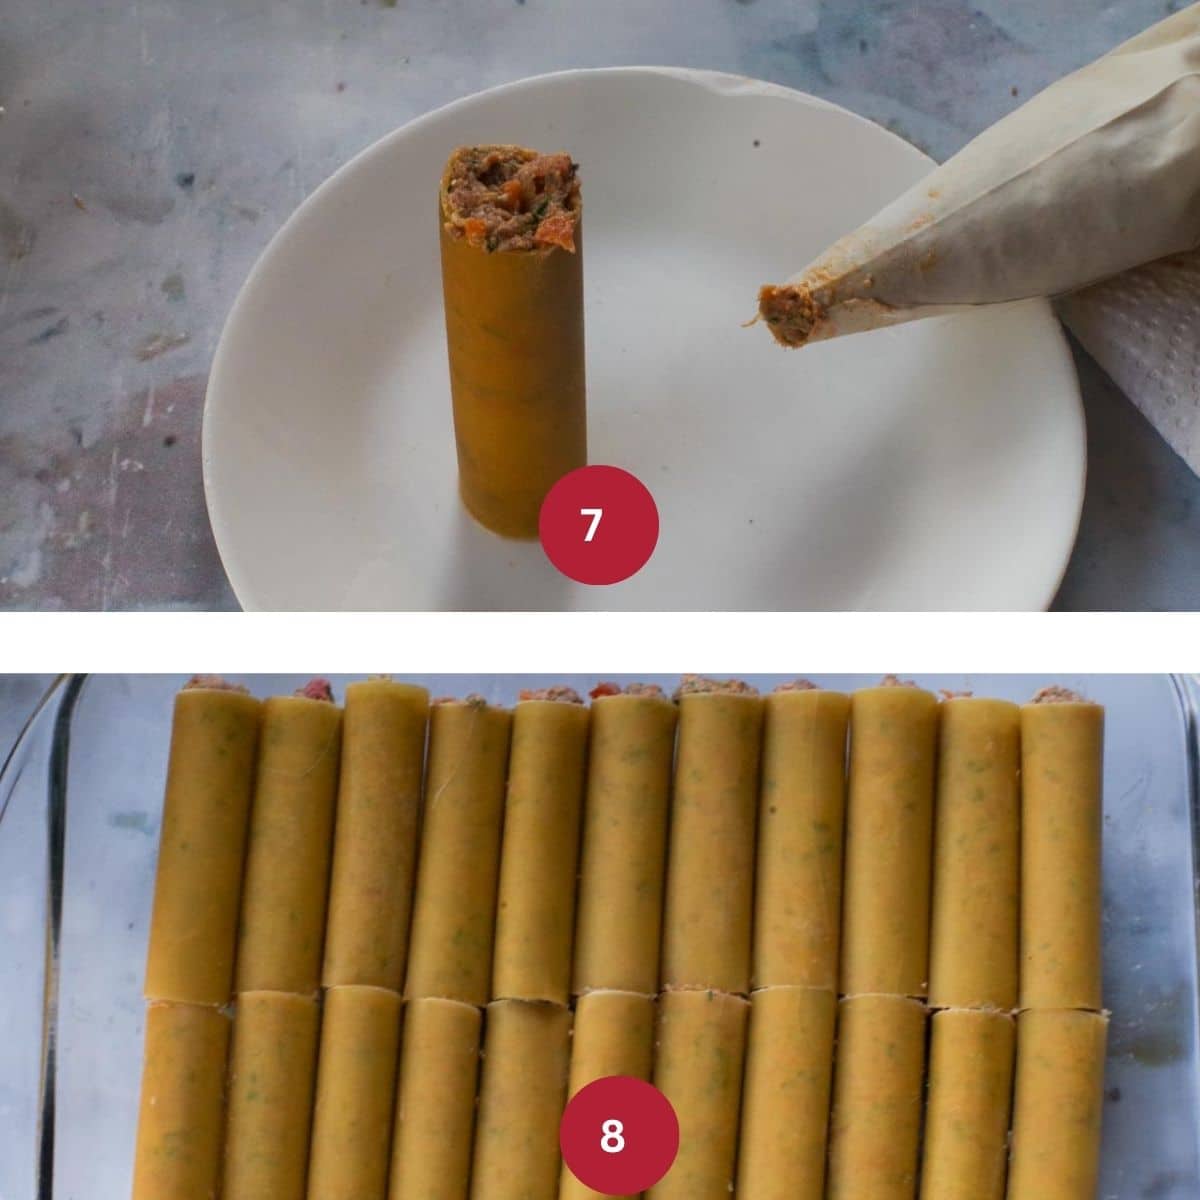
STUFF THE SHELLS (STEP 3): Stuff the cannelloni shells with the mixture until full, but not overflowing (IMAGE 7). The best way to do this is to hold the tubes upright (where the bottom is flush against the bottom of a small plate). Then you can flip it over to ensure it's completely filled from the other side. See VIDEO. A trick when you are stuffing cannelloni is to pipe in the filling with a pastry bag WITHOUT a tip! And if you don't have a pastry bag, use a ziplock freezer bag and cut off the end. And I guarantee that it's totally worth the effort in the end!! Then gently lay the cannelloni pasta tubes in the prepared 9 x 13-inch baking dish in a single layer(IMAGE 8).Repeat for second pan until filling is gone.
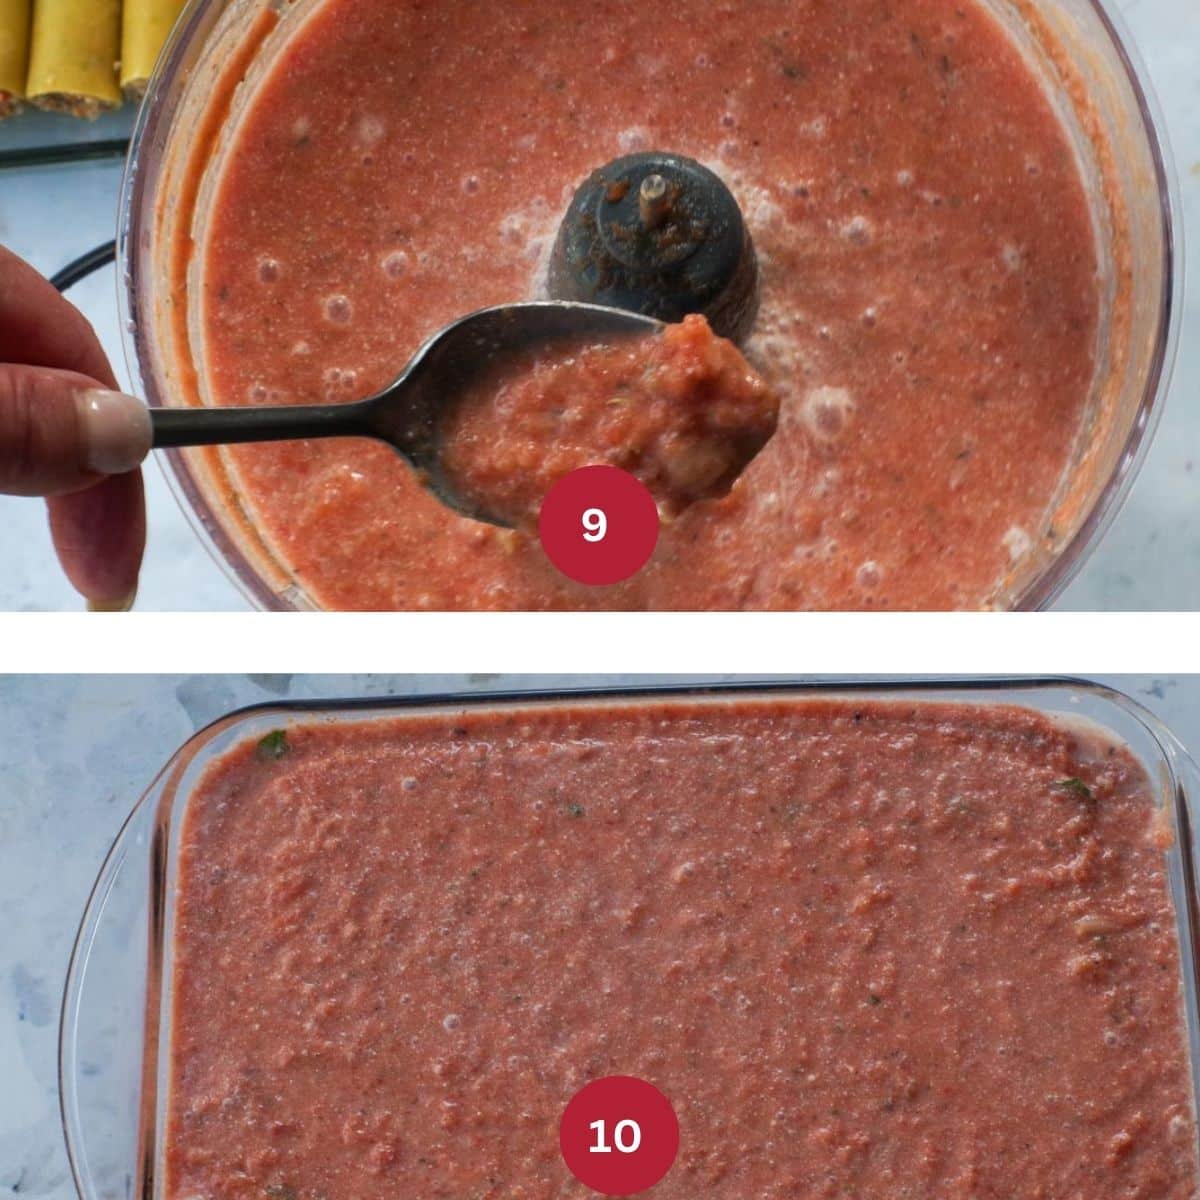
MAKE THE CREAMY TOMATO SAUCE (STEP 4): Place diced canned tomatoes with liquids in a food processor and add garlic cloves and onion, basil leaves, parmesan cheese, white wine, Italian seasoning, salt, and whipping cream (IMAGE 9). * I also do this in 2 batches. Pour creamy tomato sauce mixture over stuffed, uncooked oven-ready cannelloni tubes, dividing by both pans. (IMAGE 10).

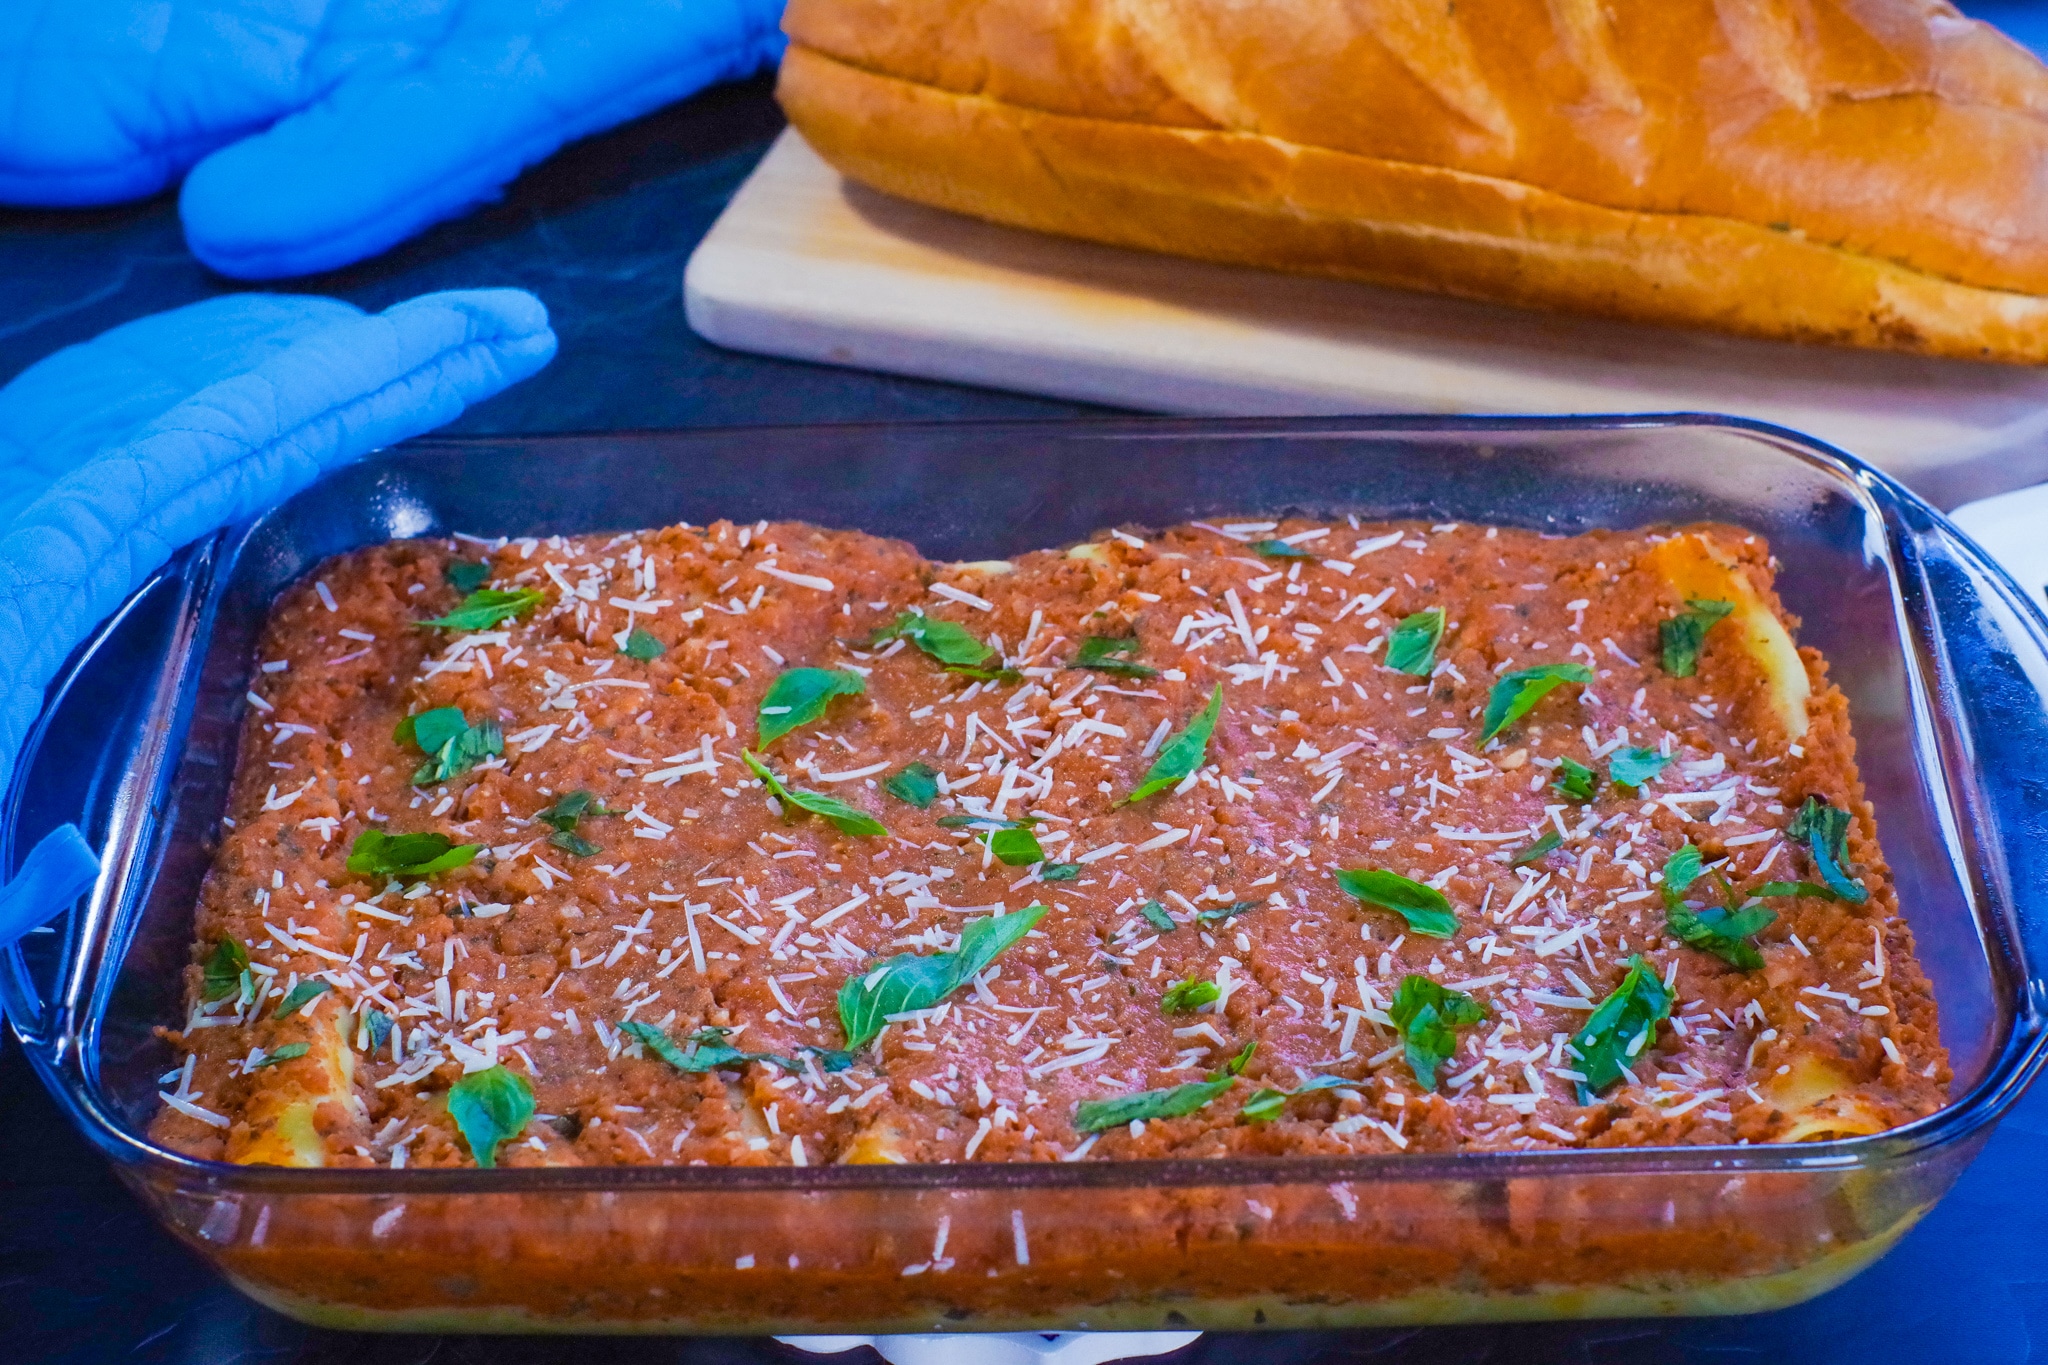
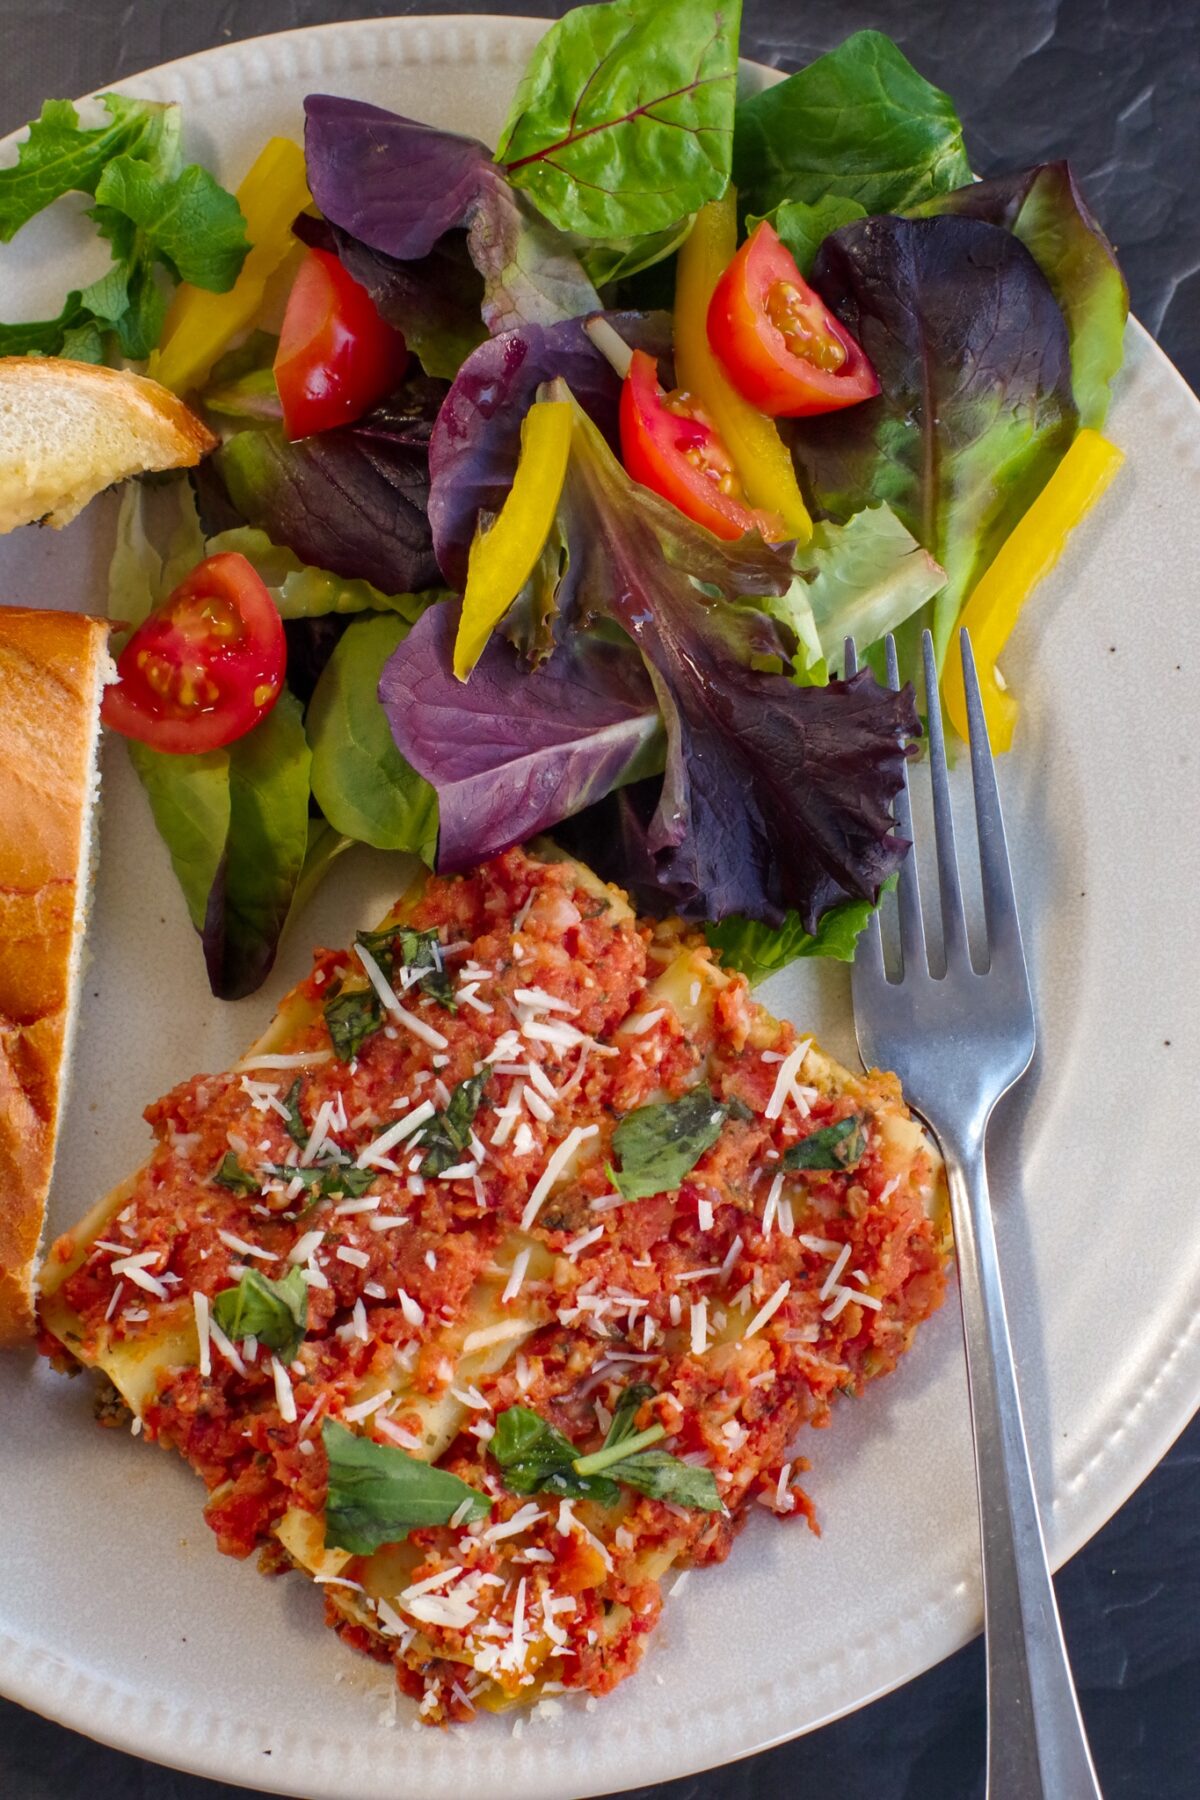
BAKE THE CANNELLONI (STEP 5): Cover the pan with aluminum foil and seal around edges (*this is very important) (IMAGE 11) and bake for 50 minutes in a preheated oven (IMAGE 12). Serve warm. Garnish with additional parmesan cheese and/or fresh basil leaves.
Expert Recipe Tips
- Avoid Stuffing Ahead of Time: Do not stuff the cannelloni tubes more than 15-20 minutes before they go into the oven. If they sit too long, the dry shells will absorb moisture from the filling and become soft, causing them to crack or fall apart before they even begin to bake.
- The Best Make-Ahead Strategy: If you want to prep this for a busy day, your best bet is to bake the entire dish in advance, let it cool, and refrigerate it. Then, simply reheat the whole dish (covered with foil) until bubbly. This actually allows the flavors to meld even more!
- Partial Prep for Faster Assembly: If you don't want to cook it entirely in advance, you can make the beef filling and the creamy tomato sauce up to two days ahead. Store them in separate airtight containers in the fridge, then just stuff the shells and bake whenever you're ready.
- Use the "Pastry Bag" Method: Forget trying to stuff these with a spoon! Use a 12-inch piping bag (or a large Ziploc bag with the corner snipped off) without a tip. This method is incredibly efficient and allows you to fill all the tubes in about 10 minutes with zero mess.
- Ensure Full Sauce Coverage: When using oven-ready pasta, every single part of the tube must be touching sauce. If any part of the dry pasta is left exposed to the air, it will remain hard and crunchy after baking.
- Master the Foil Seal: The foil is what creates the "steam chamber" that cooks the dry pasta. Make sure to crimp the aluminum foil tightly around the edges of your baking dish to prevent any steam from escaping during the 50-minute bake time.
- Manage the "Skimpflation" Water Content: Because modern ground beef and canned tomatoes can be "waterier" than they used to be, be diligent about draining the excess fat and liquid from your browned beef and discarding the extra half-cup of tomato liquid. This ensures your final sauce is creamy and rich rather than thin.
- Don't Over-Process the Filling: When using the food processor, pulse the beef and veggie mixture until it is finely chopped and "mushy" enough to pipe, but stop before it becomes a complete puree. You still want a little bit of that hearty texture in every bite!
- Let the Dish Rest: Once you take the cannelloni out of the oven, let it sit for 5 to 10 minutes before serving. This allows the sauce to thicken slightly and makes the individual tubes much easier to lift out of the pan without breaking.
🍽Equipment
You will need a large baking dish (I use 9X13 inch), a 12-inch piping bag, a food processor, and a large skillet (affiliate links) to make this beef cannelloni dish.
🔢WW Points
This cannelloni recipe is 5 ww points per serving. If you use fat-free parmesan cheese you can further reduce the points.
👪 Serving Size
This delicious beef cannelloni recipe makes A LOT- 21 servings (for 2 pieces/cannelloni tubes). However, you can half, double, or triple the recipe by clicking on the serving number and selecting the number of servings you'd like. The ingredient quantities will automatically adjust. You just need additional baking dishes.
🥗 What to Serve with Cannelloni
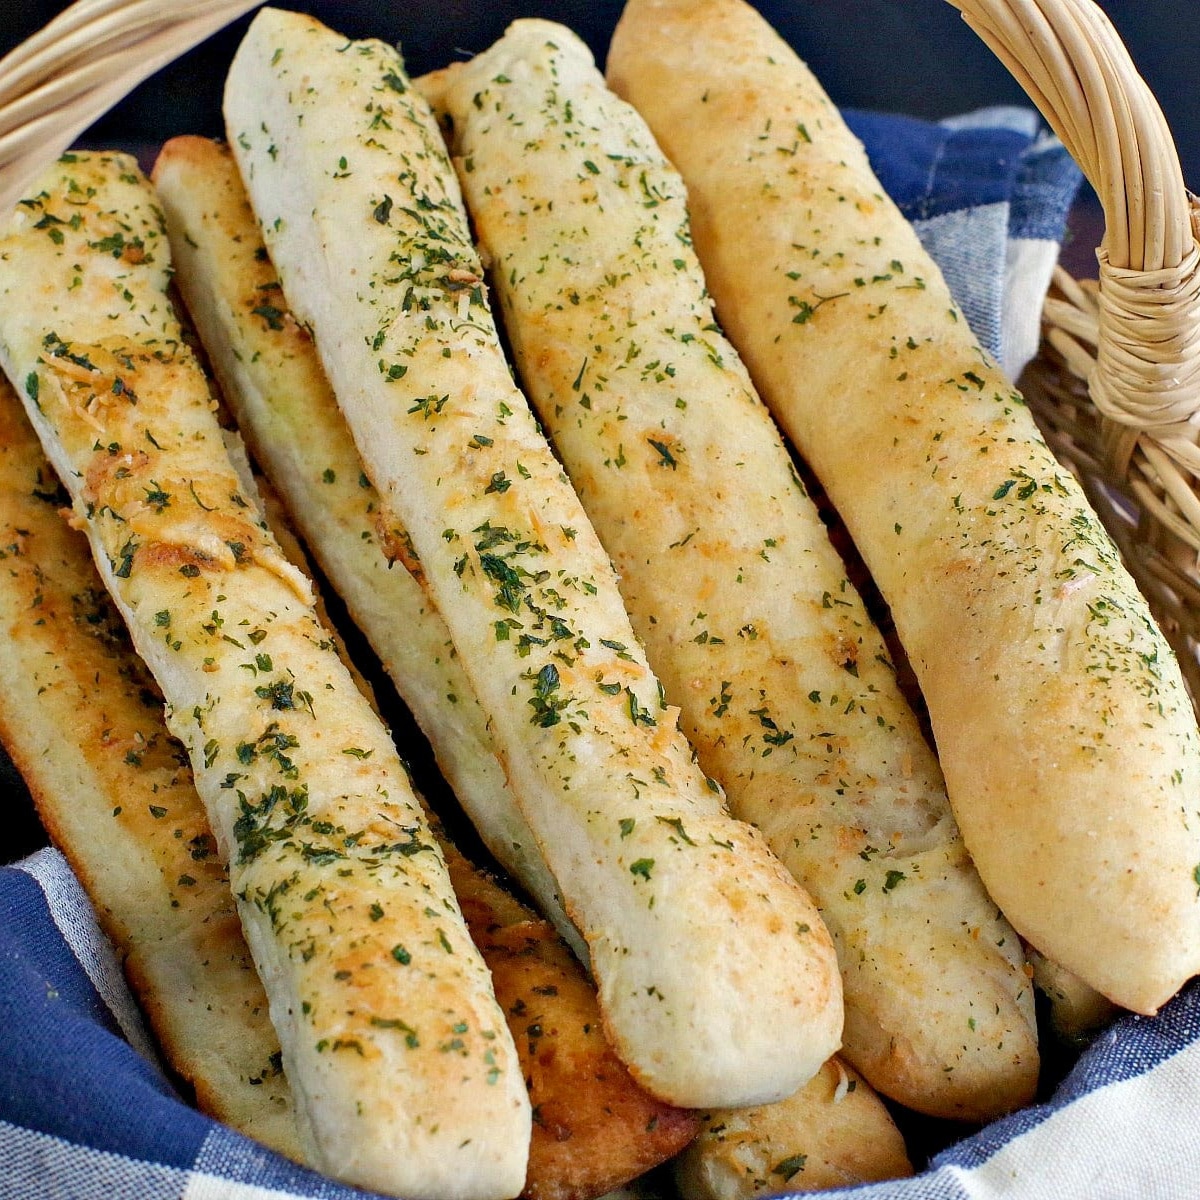
I love to serve pasta like this Baked Beef Cannelloni Recipe with Garlic Bread (from Baguette) or Italian Breadsticks (shown), and salad.
My favorite salads are the Strawberry Spinach Pecan Salad, the Kale Salad with Cranberries and Feta, and this Tangy Mandarin Orange Salad. But if I'm in a hurry, I'll grab some spring mix, cherry tomatoes, a yellow pepper, and red onions for a quick salad!
As far as desserts go, depending on the occasion, I like to serve my Chocolate Italian Sponge Cake (shown below) Red Wine Strawberry Chocolate Fudge Cake, or my No Bake Black Forest Tiramisu for dessert.
🌡️Storage
Store leftover beef cannelloni in an airtight container in the fridge for up to 4 days. You can simply cover it with plastic wrap if you're only storing it overnight.
You can also freeze it in an airtight container for up to 3 months. For the best results, bake the dish completely, let it cool, and then freeze it.
To reheat, thaw it in the fridge overnight and bake at 350°F (175°C) covered with foil until bubbly and heated through. I don't recommend freezing them stuffed but unbaked, as the pasta shells can become brittle and crack.
❔Recipe FAQ's
Yes, but you will need to change the process. If you are using regular shells, par-boil them in salted water for about 2-3 minutes (until just pliable), then drain and cool before stuffing. You will also need to reduce the liquid in the recipe by at least ½ a cup. If you use regular shells without boiling them first, they will remain hard after baking.
Modern canned tomatoes and ground beef often have a higher water content than they used to (thanks to "skimpflation"). To prevent a watery sauce, make sure to drain the excess liquid from your browned beef and tightly seal the pan with aluminum foil while baking.
While you can use a small spoon, a piping bag (or even a large Ziploc bag with the corner snipped off) is significantly faster and much less messy. It allows you to get the filling deep into the center of the tube without air pockets or cracking the pasta.
This usually happens for two reasons: either the pan wasn't sealed tightly enough with foil, allowing the steam to escape, or there wasn't enough sauce covering the tubes. Ensure the shells are completely submerged in the sauce, and the foil is crimped tightly around the edges of the dish.
Didn't find the answer you're looking for?
Ask AI to answer based on this specific recipe
But whatever you serve this Baked Beef Cannelloni with, it's sure to be loved!
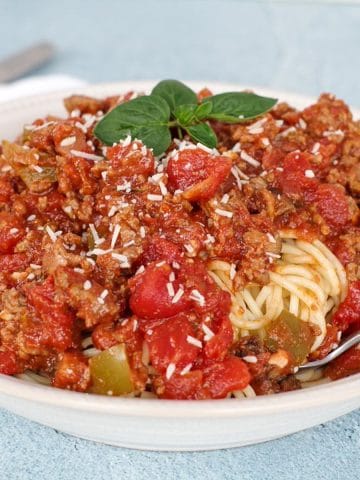
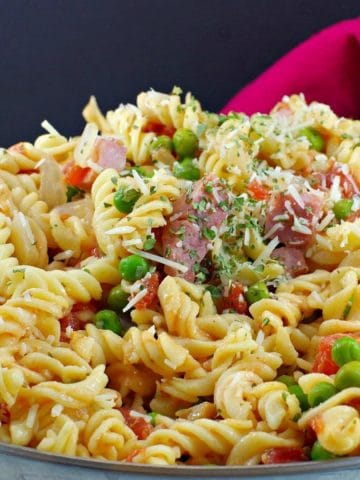
🥘More Pasta Recipes!


Did your family❤️this recipe? Did you know that commenting and⭐rating recipes is one of the best ways to support your favorite recipe creators? If you LOVED this recipe, please comment and rate it in the recipe card or share photos on social media using the hashtag #foodmeanderings or tagging @foodmeanderings !

📋 Baked Beef Cannelloni Recipe
Ingredients
- 2 -200g -boxes of oven ready cannelloni pasta (dry pasta) * I use Catelli Express- it's important to use oven ready
Filling
- 2 tablespoon olive oil
- 1 lb extra lean ground beef 2 cups
- 4 whole carrots, grated (2 cups grated)
- 2 stalk chopped celery chopped
- 1 medium onion chopped
- 3 cups fresh spinach washed and chopped
- ½ cup dry white wine
- ¾ cup heavy whipping cream
- 5 roma tomatoes chopped
- ½ cup grated Parmesan cheese
- 2 teaspoon Italian seasoning
- 2 tablespoon chopped fresh basil
- 2 cloves garlic
Creamy Tomato Sauce
- 2 -28 oz - cans diced tomatoes
- 6 cloves garlic
- 1 medium onion chopped
- 8 leaves fresh basil
- ½ cup whipping cream
- ½ teaspoon salt
- 2 teaspoon Italian seasoning
- ¼ cup dry white wine
- ¼ cup grated Parmesan cheese
Instructions
- Preheat oven to 350 degrees F. Spray two 9 X 13 inch baking dishes (lasagna dishes) with non-stick cooking spray.
Filling:
- In a large frying pan, over medium-high heat, sautee onions, celery and grated carrots with olive oil until soft.2 tablespoon olive oil, 4 whole carrots, grated, 2 stalk chopped celery, 1 medium onion
- Add spinach and cook for 3 more minutes.3 cups fresh spinach
- Meanwhile, cook ground beef over medium heat, in separate frying pan until browned. Then mix with veggie mixture.1 lb extra lean ground beef
- Place the vegetable and beef mixture in food processor and process until finely chopped/blended. Add whipping cream, white wine, garlic, Roma tomatoes, parmesan cheese, Italian seasoning and basil and pulse (in food processor) just until combined. * I do ½ a batch at a time.½ cup dry white wine, ¾ cup heavy whipping cream, 5 roma tomatoes, ½ cup grated Parmesan cheese, 2 teaspoon Italian seasoning, 2 tablespoon chopped fresh basil, 2 cloves garlic
- It will look mushy when mixed. Note: it can be a little bit chunkier, but do not puree it any more , as it needs to go through a pastry bag, but not be too runny.
- Stuff the cannelloni shells with mixture until full, but not overflowing. The best way to do this is to hold the tubes upright (where the bottom is flush against the bottom of a small plate.) Then you can flip it over to ensure it's completely filled from the other side. See VIDEO 🎥2 -200g -boxes of oven ready cannelloni pasta (dry pasta)
- Then gently lay the cannelloni pasta tubes in the prepared 9 x 13 inch baking dish in a single layer (for both pans.)
Creamy Tomato Sauce
- Place diced canned tomatoes with liquids in food processor and add garlic cloves and onion, basil leaves, parmesan cheese, Italian seasoning, white wine, and whipping cream. * You can also do this in 2 batches2 -28 oz - cans diced tomatoes, 6 cloves garlic, 1 medium onion, 8 leaves fresh basil, ½ cup whipping cream, ½ teaspoon salt, ¼ cup dry white wine, ¼ cup grated Parmesan cheese, 2 teaspoon Italian seasoning
- Pour creamy tomato sauce mixture over stuffed, uncooked oven ready cannelloni tubes, dividing sauce by both pans.
- Cover pans with aluminum foil and seal around edges (*this is very important) and bake for 50 minutes in preheated oven. Serve warm.
Garnish
- Garnish with additional parmesan cheese and/or fresh basil if desired.
Notes
- Avoid Stuffing Ahead of Time: Do not stuff the cannelloni tubes more than 15-20 minutes before they go into the oven. If they sit too long, the dry shells will absorb moisture from the filling and become soft, causing them to crack or fall apart before they even begin to bake.
- The Best Make-Ahead Strategy: If you want to prep this for a busy day, your best bet is to bake the entire dish in advance, let it cool, and refrigerate it. Then, simply reheat the whole dish (covered with foil) until bubbly. This actually allows the flavors to meld even more!
- Partial Prep for Faster Assembly: If you don't want to cook it entirely in advance, you can make the beef filling and the creamy tomato sauce up to two days ahead. Store them in separate airtight containers in the fridge, then just stuff the shells and bake whenever you're ready.
- Use the "Pastry Bag" Method: Forget trying to stuff these with a spoon! Use a 12-inch piping bag (or a large Ziploc bag with the corner snipped off) without a tip. This method is incredibly efficient and allows you to fill all the tubes in about 10 minutes with zero mess.
- Ensure Full Sauce Coverage: When using oven-ready pasta, every single part of the tube must be touching sauce. If any part of the dry pasta is left exposed to the air, it will remain hard and crunchy after baking.
- Master the Foil Seal: The foil is what creates the "steam chamber" that cooks the dry pasta. Make sure to crimp the aluminum foil tightly around the edges of your baking dish to prevent any steam from escaping during the 50-minute bake time.
- Manage the "Skimpflation" Water Content: Because modern ground beef and canned tomatoes can be "waterier" than they used to be, be diligent about draining the excess fat and liquid from your browned beef and discarding the extra half-cup of tomato liquid. This ensures your final sauce is creamy and rich rather than thin.
- Don't Over-Process the Filling: When using the food processor, pulse the beef and veggie mixture until it is finely chopped and "mushy" enough to pipe, but stop before it becomes a complete puree. You still want a little bit of that hearty texture in every bite!
- Let the Dish Rest: Once you take the cannelloni out of the oven, let it sit for 5 to 10 minutes before serving. This allows the sauce to thicken slightly and makes the individual tubes much easier to lift out of the pan without breaking. Storage Store leftover beef cannelloni in an airtight container in the fridge for up to 4 days. You can simply cover it with plastic wrap if you're only storing it overnight. You can also freeze it in an airtight container for up to 3 months. For the best results, bake the dish completely, let it cool, and then freeze it. To reheat, thaw it in the fridge overnight and bake at 350°F (175°C) covered with foil until bubbly and heated through. I don't recommend freezing them stuffed but unbaked, as the pasta shells can become brittle and crack.


Susanne Sulkers says
I made half the recipe and used the regular cannelloni noodles but added 1/2 cup broth to the creamy tomato topping and cooked for 15 minutes longer. Turned out great!!
Terri Gilson says
Glad you loved it, Sue! I'm going to try your method when I need a smaller batch! 🙂